How To RAM Truck System Resets and Calibration: ECU, PCM, TIPM, and Uconnect Protocols
Executive Summary and Strategic Content Overview
In the contemporary automotive ecosystem, the RAM truck—encompassing the 1500, 2500, and 3500 series—has evolved from a purely mechanical workhorse into a sophisticated node of distributed computing. Modern platforms, specifically the 4th Generation (DS) and 5th Generation (DT), rely on a complex Controller Area Network (CAN) bus where modules such as the Powertrain Control Module (PCM), Totally Integrated Power Module (TIPM), and the Uconnect telematics system constantly exchange data.
For the automotive technician, the advanced DIY enthusiast, or the RAM owner encountering electronic anomalies, understanding the precise methodology for “resetting” these systems is paramount. A reset is rarely just a matter of cycling power; it involves clearing Non-Volatile Random Access Memory (NVRAM), discharging capacitors, and forcing adaptive learning algorithms to re-initialize.
This comprehensive research report serves a dual purpose. First, it acts as an exhaustive technical manual for performing system resets on RAM trucks, covering every major control module from the engine management system to the infotainment interface. Second, it provides a strategic content roadmap for TruckGuider.com, optimizing this high-value technical information for semantic search visibility. By integrating deep technical insights with the specific navigational structure of the TruckGuider sitemap, this report aims to establish the domain as the primary authority on RAM electronic maintenance.
The analysis that follows is derived from a rigorous examination of technical service bulletins, expert technician discussions, and service manual excerpts. It addresses not only the “how-to” of resetting these systems but also the underlying “why”—explaining the adaptive fuel strategies, the physics of capacitor discharge, and the critical safety protocols required for the new eTorque 48-volt mild-hybrid architectures.
How to Reset Your Ram’s Memory
A data-driven visual guide to understanding your truck’s Keep Alive Memory (KAM) and why a reset can solve common performance issues.
Why Reset Your Truck’s Memory?
When truck owners talk about “resetting RAM,” they’re referring to the Keep Alive Memory (KAM) in the Powertrain Control Module (PCM). This isn’t your computer’s RAM; it’s the adaptive learning data your truck uses to fine-tune its engine and transmission for optimal performance and emissions. When parts are replaced or systems malfunction, this learned data can become outdated, leading to real-world problems.
Common Symptoms Solved by a KAM Reset
A KAM reset forces the PCM to discard old habits and start a new re-learning process, often instantly curing issues related to outdated adaptive values.
Key Diagnostic Data
of persistent rough idle or erratic shifting issues after a repair (like a new O2 sensor or battery) are linked to outdated KAM data.
This simple procedure should be a standard part of many common repairs but is often overlooked. It’s not a magic fix for broken parts, but it’s a critical step for re-calibrating the systems that are working correctly.
Comparing the 3 Reset Methods
There are three primary ways to clear your truck’s KAM. While all can be effective, they vary significantly in safety, speed, and completeness. The professional-grade scan tool is always the recommended method as it performs a clean, targeted reset without risking other onboard systems.
Key Takeaway: The Scan Tool method is superior, scoring highest in effectiveness and safety. The Battery Disconnect method is a common DIY approach but is slower and carries a higher risk of losing other settings (like radio presets or window auto-up).
How-To Visual Guides
Follow these steps precisely. Always prioritize safety: wear gloves, work in a well-lit area, and never rush. The “Pro Method” is strongly preferred.
Method 1: Battery Disconnect (The Common Way)
Turn ignition off. Locate the battery.
Using a wrench, disconnect the NEGATIVE (-) battery terminal. Secure it away from any metal.
Wait for 30 minutes. This allows the capacitors in the PCM to fully discharge, clearing the memory.
Reconnect the negative terminal and tighten it. The reset is complete.
Method 2: OBD-II Scan Tool (The Pro Way)
Plug your OBD-II scan tool into the port under the dashboard.
Turn the ignition to the “ON” position (engine off).
Navigate to the “Special Functions” or “Powertrain” menu on your tool.
Select “Clear KAM”, “Reset Adaptive Memory”, or a similar command. Confirm the action.
The reset is instant. Turn the ignition off, then start the truck.
What Happens Next? The Re-Learn Period
After a reset, your truck’s computer is a “blank slate.” It must re-learn your driving habits and engine parameters. This re-learn period is critical. Your truck may idle roughly or shift oddly for the first 20-50 miles. This is normal. The PCM is actively building new, accurate adaptive tables.
This mock data shows how “Idle Stability” and “Shift Smoothness” quickly improve as the truck is driven through various conditions (city, highway, idling).
Related Maintenance Topics
A KAM reset is often one piece of a larger maintenance puzzle. This procedure is most effective when done in conjunction with other services. Based on common Ram truck owner concerns, this reset is highly relevant to the following topics.
- Ram 1500 Check Engine Light Diagnostics: A reset is often the final step after fixing a sensor (like O2 or MAF) that caused a check engine light.
- Solving Ram 1500 Hemi Problems: Can temporarily alleviate symptoms of the “Hemi tick” or rough idle, helping diagnose if the issue is mechanical or adaptive.
- Ram 1500 Maintenance Schedule: Recommended after major services like transmission fluid changes or throttle body cleaning to ensure the truck re-learns with the new, clean components.
The Architecture of Control: Understanding RAM’s Digital Nervous System
To effectively troubleshoot and reset RAM truck systems, one must first understand the architecture that governs them. The days of mechanical linkages and vacuum lines are largely gone, replaced by “Drive-by-Wire” technologies and adaptive logic.
The Role of Adaptive Learning
Central to the operation of the RAM powertrain is the concept of “Adaptive Learning.” The PCM and Transmission Control Module (TCM) do not strictly adhere to a static set of factory-programmed tables. Instead, they utilize a base map that is constantly modified by “Trim” values.
- Short Term Fuel Trims (STFT): rapid adjustments made by the ECU in response to immediate O2 sensor data.
- Long Term Fuel Trims (LTFT): learned values stored over time to compensate for engine wear, vacuum leaks, or dirty injectors.
- Transmission Adaptives: The TCM monitors the time it takes for clutch packs to fill and engage. As friction material wears, the TCM increases fluid pressure to maintain shift quality.
When a user seeks to “reset” their RAM, they are usually attempting to wipe these learned trim values. If a vehicle has developed a bad habit—such as a rough idle due to a dirty throttle body—the ECU may have “learned” to compensate for the airflow restriction. If the owner cleans the throttle body but fails to reset the ECU, the engine will run poorly because the computer is still applying the compensation for a restriction that no longer exists.
The Hierarchy of Modules
The reset procedures detailed in this report target specific nodes within the RAM’s electronic hierarchy:
- PCM/ECU (Powertrain Control Module): The brain of the engine.
- TCM (Transmission Control Module): often integrated with the PCM but distinct in function, especially in ZF 8-speed models.
- TIPM (Totally Integrated Power Module): The gateway for all electrical power distribution, often the source of “gremlins” like fuel pump failures or erratic lighting.
- Uconnect/Telematics: The user interface layer which, while separate from engine function, is deeply integrated into vehicle settings.
The Powertrain Control Module (PCM): Deep Dive into ECU Resets
The terms ECU (Engine Control Unit) and PCM (Powertrain Control Module) are often used interchangeably in the RAM community. For the purpose of this report, we refer to the module controlling the engine as the PCM. Resetting the PCM is the primary intervention for resolving persistent Check Engine Lights (CEL), rough idling, or poor fuel economy after a repair.
The Physics of the “Hard Reset”: Capacitor Discharge
A common misconception is that simply disconnecting the battery for a few seconds will reset the computer. In modern RAM architectures, this is often insufficient. The PCM, airbag modules, and other safety systems utilize capacitors—electronic components that store energy to allow the system to write critical data to memory in the event of a sudden power loss (like a crash). These capacitors can maintain the volatile memory for minutes or even hours.
To perform a true “Hard Reset” that clears the Keep Alive Memory (KAM), the residual energy must be drained. This process is known in the industry as a “Capacitor Discharge” or “Battery Nap.”
Step-by-Step Hard Reset Procedure
This procedure is applicable to Gen 4 (2009-2018) and Gen 5 (2019-Present) RAM 1500, 2500, and 3500 trucks. Note: eTorque models require special handling discussed in Section 6.
- Preparation: Park the vehicle on a level surface. Ensure the transmission is in Park and the ignition is OFF. Remove the key fob from the cabin to prevent the immobilizer or proximity sensors from waking the bus.
- Negative Disconnect: Using a 10mm socket, loosen and remove the Negative (-) battery cable first. This is a critical safety step to prevent arcing if the wrench touches the chassis while loosening the positive terminal.
- Positive Disconnect: Remove the Positive (+) battery cable.
- The Discharge (The “Short”): With both cables completely disconnected from the battery posts, touch the metal ends of the Positive and Negative vehicle cables together.
- Contextual Insight: If the cables are too short to touch, use a jumper wire or a wrench to bridge them. Crucially, do not touch the battery terminals themselves. You are shorting the truck’s electrical grid, not the battery.
- Duration: Hold this connection for approximately 10 to 30 minutes. This creates a path of least resistance for the stored energy in the capacitors to flow to ground, effectively wiping the volatile memory.
- Reconnection: Separate the cables. Reconnect the Positive cable first, followed by the Negative cable. Tighten the terminals securely to ensure consistent voltage; loose terminals are a frequent cause of “ghost” electrical issues.
Post-Reset Implications
Upon restarting the vehicle, the PCM will have reverted to its factory default fuel tables. The driver may notice:
- Erratic Idle: The engine may hunt for a stable idle RPM as it relearns the airflow characteristics of the idle air control valve or throttle plate.
- Shift Quality Changes: The transmission adaptives (if cleared) will result in firmer or different shift points.
- Loss of Settings: Clock, radio presets, and seat memory positions may be lost, although newer Uconnect systems often store these in non-volatile memory.
Fuse Pull Method: The Targeted Reset
For technicians or owners who wish to reset the PCM without losing their radio presets or seat configurations, pulling the specific fuse responsible for the PCM’s “Keep Alive” power is the preferred method. This requires precise identification of the fuse location, which varies significantly between generations.
Gen 4 RAM 1500 (2009-2018) Fuse Locations
In the 4th Generation RAM, the fuses are housed in the TIPM located in the engine bay. The diagram is usually printed on the underside of the lid, but wear often renders it illegible.
| Fuse ID | Amperage | Circuit Description | Context for Reset |
| F28 | 10 Amp (Red) | PCM / ECM Feed | Primary logic power. Pulling this cuts the brain’s power. |
| F32 | 20 Amp (Yellow) | ECM / PCM Power | Main power feed. |
| F35 | 10 Amp (Red) | Wake Up / EPS / PCM | Controls the “wake up” signal. |
Reset Procedure: Remove these fuses for 10-15 minutes with the ignition off. This isolates the PCM power supply without cutting power to the Body Control Module (BCM), which holds radio presets.
Gen 5 RAM 1500 (2019-Present) Fuse Locations
The 5th Generation trucks (DT platform) utilize a redesigned Power Distribution Center (PDC) located near the battery on the driver’s side.14 The fuse layout is denser and includes micro-fuses.
| Fuse ID | Amperage | Circuit Description | Context for Reset |
| F28 | 10 Amp | PCM / ECM | Continued use of F28 ID for powertrain logic. |
| F54 | 15 Amp | PCM Power | Specific to the DT platform architecture. |
| F60 | 20 Amp | ECM / PCM / Actuator | Powers the PCM and the Short Running Valve actuator. |
Insight: On Gen 5 models, accessing the fuse box requires depressing two black tabs to lift the lid. A fuse puller is typically mounted inside the lid (yellow tool).
The OBDII Drive Cycle: Completing the Reset
A reset is not complete until the vehicle has been driven. The PCM needs to run “Readiness Monitors” to ensure emissions systems (Catalytic Converter, EVAP, O2 Sensors) are functioning. If a user resets the RAM right before an emissions inspection, it will fail because the monitors will report “Not Ready”.
Recommended Drive Cycle Protocol:
- Cold Soak: The vehicle should sit for 8 hours (typically overnight) so the coolant temperature equals the ambient air temperature.
- Idle Warm-up: Start the engine and let it idle in Drive (with foot on brake) for 2-3 minutes. This tests the O2 heater and Idle Air Control.
- Acceleration: Drive at 25-35 mph for several minutes.
- Highway Cruise: Maintain a steady 55-60 mph for at least 15 minutes. This allows the catalyst monitor and EGR flow test to execute.
- Deceleration: Let the vehicle coast down to 20 mph without braking. This tests the EGR and EVAP purge systems.
Electronic Throttle Control (ETC): The “Pedal Dance” Calibration
Modern RAM trucks (roughly 2003 and newer) utilize Electronic Throttle Control (ETC), colloquially known as “Drive-by-Wire.” There is no physical cable connecting the gas pedal to the engine. Instead, a potentiometer in the pedal assembly sends a voltage signal (0-5V) to the PCM, which then commands the butterfly valve in the throttle body to open.
The Drift Phenomenon
Over tens of thousands of miles, two things happen:
- Carbon Accumulation: Oil vapor from the PCV system condenses on the back of the throttle blade. This physical buildup reduces the airflow at idle. The PCM gradually opens the blade further to compensate.
- Sensor Voltage Drift: The resistive tracks in the pedal sensor wear, causing slight variances in the voltage output for a given foot position.
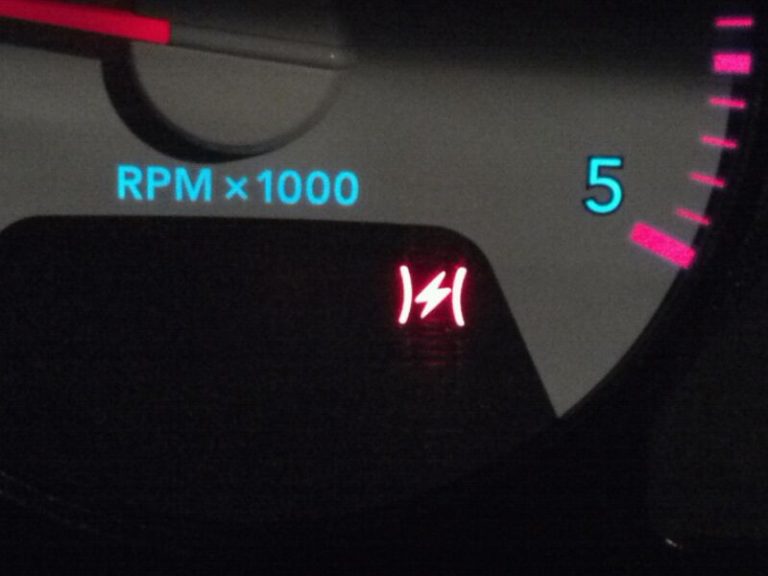
When a battery reset occurs, or if the throttle body is cleaned/replaced, the PCM’s learned compensation is wiped (or is now incorrect). This leads to the “Lightning Bolt” warning light (ETC warning), rough idling, stalling, or a “dead pedal” feel where the engine doesn’t respond immediately to foot input.
The Calibration Procedure (The Pedal Dance)
This manual relearn procedure forces the PCM to learn the “Zero” (fully closed) and “Span” (fully open) voltages of the accelerator pedal. It is a critical maintenance step for the 5.7L Hemi and 3.6L Pentastar engines.
Detailed Methodology:
- Ignition State: Insert the key (or push the start button without the brake) to turn the ignition to the ON/RUN position. The engine must NOT be running. All dashboard lights should perform their bulb check.
- Initialization: Wait approximately 10 to 15 seconds. During this silence, the throttle body motor may be heard “humming” or clicking as it cycles the blade against the internal stops to verify integrity.
- The Sweep: Slowly and steadily depress the accelerator pedal all the way to the floor. This motion should take about 3-5 seconds. Do not stomp; the PCM needs to read the linear voltage ramp.
- The Hold: Hold the pedal at the floor (Wide Open Throttle) for 2-3 seconds.
- The Release: Slowly release the pedal back to the resting position, mirroring the speed of depression.
- Storage: Turn the ignition to the OFF position. Critical: Do not attempt to start the engine immediately. Wait at least 10-15 seconds for the PCM to write the new voltage parameters to the NVRAM.
- Verification: Start the engine. The idle should settle immediately. Test drive to ensure linear throttle response.
Troubleshooting ETC Issues
If the calibration fails to resolve the issue, or if the red lightning bolt persists:
- Cleaning is Prerequisite: A calibration cannot fix a physically stuck throttle plate. The throttle body must be removed and cleaned with specialized throttle body cleaner (not carburetor cleaner, which strips the sensitive molybdenum coating on the blade).
- Sensor Failure: If the pedal position sensor has a “dead spot” in its resistor track, no amount of calibration will fix it. The entire pedal assembly is usually replaced as a unit.
The Totally Integrated Power Module (TIPM): The Nerve Center
The TIPM is unique to Chrysler/Dodge/RAM vehicles. It is not merely a fuse box; it is a computer with a printed circuit board (PCB), microprocessors, and relays that distributes power to the entire vehicle. It is widely considered the “weak link” in Gen 4 RAM electrical systems, often referred to as the “Gateway Module”.1
Symptoms of TIPM Corruption
Because the TIPM controls power to the fuel pump, windows, locks, horn, and wipers, a “confused” TIPM can cause bizarre symptoms:
- Fuel pump relay failing to engage (crank, no start).
- Fuel pump running continuously after the truck is off (draining battery).
- Horn honking randomly.
- One headlight working while the other fails, despite good bulbs.
- Power windows working intermittently.
The TIPM Hard Reset Protocol
Before spending $500-$1000 on a new TIPM, a hard reset (similar to the PCM reset) can sometimes clear a “latched” logic state in the TIPM’s processor.
Procedure:
- Capacitor Discharge: Follow the “Hard Reset” procedure detailed in Section 2.1 (disconnect and touch battery cables). This is essential for the TIPM, as it contains substantial capacitance.
- Connector Reseating: This step is specific to TIPM issues.
- Locate the TIPM box under the hood.
- Unlock the four plastic tabs securing the TIPM unit to its cradle.
- Lift the TIPM up to reveal the massive multi-pin harness connectors underneath (usually 7 distinct colored plugs).
- The “Seating” Fix: Carefully unplug each connector, check for green corrosion (oxidation), and plug it back in. The action of unplugging and replugging scrapes the pins clean, often re-establishing a marginal electrical connection.
- Power Up: Reconnect the battery. The TIPM may take a moment to wake up. Cycle the ignition key 2-3 times to allow the TIPM to handshake with the PCM and BCM before attempting to start.
Technician’s Note: If the Hard Reset fails, specifically for the fuel pump issue, a “TIPM Bypass Cable” is a common workaround used by RAM owners to pull power from a different fuse slot (like the cigarette lighter) to power the fuel pump, bypassing the faulty internal relay.
The ZF 8-Speed Transmission: Adaptive Learning and Reset
The introduction of the ZF 8HP (8-speed automatic) transmission in 2013 revolutionized the RAM 1500, offering smoother shifts and better fuel economy. However, the complexity of this transmission requires precise electronic management.
Understanding Transmission Adaptives
The TCM continuously monitors the “Fill Time” (how long it takes to fill a clutch cylinder with fluid) and “Fill Pressure” (how much pressure is needed to hold the clutch). As the transmission fluid ages and viscosity changes, or as clutch plates wear down (losing microns of thickness), the TCM adjusts these parameters to keep the shift feeling consistent.
Symptoms of Bad Adaptives:
- Harsh 2-1 Downshift: A “bump” felt from behind when coming to a stop.
- Shift Flare: The engine RPM spikes briefly between gear changes.
- Hesitation: A delay when shifting from Park to Drive or Reverse.
Reset vs. Relearn: The Confusion
There is a significant difference between a “Battery Reset” and a “TCM Reset” for the ZF 8HP.
- Battery Reset (Soft): Disconnecting the battery may clear some volatile memory in older 6-speed units (65RFE), but the ZF 8HP stores its adaptive tables in Non-Volatile Memory. A battery disconnect rarely fixes ZF shift quality issues.
- Scanner Reset (Hard): This requires an OBDII scan tool with bi-directional support (e.g., AlphaOBD, Autel MaxiSys, WiTech). The command “Reset Adaptive Values” wipes the learned data to factory zeros.
The Quick Learn Procedure
After replacing the transmission, valve body, or performing a software update, a “Quick Learn” is mandatory.
- Scanner Initiation: The tool commands the TCM to calibrate.
- Static Phase: With the engine running and brakes held, the TCM will cycle various clutches, applying and releasing them to measure the fill volume. The driver may feel the truck lurching slightly against the brakes.
- Dynamic Phase: The tool may instruct the driver to drive lightly.
5.4 DIY Drive-Cycle Relearn (No Scanner)
If a scanner is unavailable, a specific driving pattern can encourage the TCM to reassess its strategy. This is less effective than a scanner reset but useful for minor quirks.
- Temp Requirement: Transmission fluid must be > 60°C (140°F) and < 110°C (230°F).
- Coast Down: Drive to approx. 50 mph (getting into 6th or 7th gear). Release the throttle and let the truck coast down to a near stop without touching the brakes. This allows the TCM to measure drag and downshift pressures without interference.
- Upshift Training: Accelerate very gently (15-20% throttle) through all gears. Repeat 5-10 times.
The 5th Generation eTorque System: Safety and Reset Protocols
The 2019+ RAM 1500 introduced the eTorque mild-hybrid system (standard on V6, optional on V8). This system replaces the traditional alternator with a belt-driven Motor Generator Unit (MGU) and adds a 48-volt Lithium-Ion battery pack located behind the rear passenger seat.
The Danger of Standard Resets
WARNING: Treating an eTorque RAM like a standard truck can lead to catastrophic damage or injury.
- Dual Battery Systems: eTorque trucks have a standard 12V AGM battery under the hood AND the 48V pack in the cabin. The 48V pack has a DC-DC converter that charges the 12V battery.
- Back-Feeding Risk: If you simply disconnect the 12V battery negative cable, the 48V system (via the DC-DC converter) can still supply power to the vehicle’s bus. If the disconnected cable touches the chassis while the 48V system is active, it can cause severe arcing or damage the converter.
The Correct eTorque Disconnect Procedure
To perform a hard reset or service the electrical system on an eTorque truck, strict isolation protocols are required.
- Service Information Access: It is highly recommended to consult the official Stellantis procedures (via TechAuthority or a subscription) as steps can vary by model year.
- 12V Isolation: Locate the 12V battery. The negative terminal is equipped with an Intelligent Battery Sensor (IBS). When disconnecting the negative cable, ensure it is wrapped in an insulator (cloth or electrical tape) and secured away from the post.
- 48V System Sleep: After disconnecting the 12V battery, wait at least 20 minutes. The 48V system needs to detect the loss of the 12V reference and open its internal contactors to de-energize the high-voltage bus.
- Arc Flash Warning: The 48V cables are jacketed in orange. NEVER cut, pierce, or tamper with orange cables. While 48V is generally considered “low voltage” compared to full EVs (400V+), it carries massive amperage capable of welding tools to the chassis instantly.
Post-Reset Anomalies in eTorque Models
Owners have reported that after a battery disconnect, eTorque models may display “Service Electronic Stability Control” or experience stalling. This is often because the IBS (Intelligent Battery Sensor) needs to relearn the battery’s state of charge.
- IBS Relearn: After reconnecting the battery, the vehicle may need to sit undisturbed (ignition off, doors closed) for 4 hours to allow the IBS to measure the battery’s resting voltage accurately.
Uconnect Infotainment: The User Interface Reset
The Uconnect system manages navigation, climate, audio, and vehicle settings. It operates on an operating system (QNX or Android Automotive in newer versions) that can freeze, lag, or lose Bluetooth connectivity.
Soft Reset (Reboot) Procedures
A soft reset reboots the head unit without deleting personal data. This is the first line of defense for a frozen screen.
Uconnect 4 (8.4-inch Screen)
- Method 1 (Knobs): With the ignition in RUN, press and hold the Volume and Tuner knobs simultaneously.
- Duration: Hold for approximately 10-20 seconds.
- Indicator: The screen will flash, go black, and then display the RAM logo.
Uconnect 5 (12-inch Vertical Screen)
The massive 12-inch screen in 5th Gen trucks has slightly different protocols depending on the firmware version.
- Method 1 (Knobs): Same as 8.4-inch (Volume + Tuner).
- Method 2 (Touch Corners): If the knobs are unresponsive, press and hold the Top Right corner of the touchscreen for 10-20 seconds.
- Method 3 (Door Cycle): If the unit is completely locked up, turn the truck off, open the driver’s door, and leave it open for 30 seconds until the cluster sleeps. Then restart the truck.
Engineering / Dealer Mode
For advanced diagnostics, software version checking, or a complete Factory Reset (which wipes all data), one must enter “Dealer Mode.”
| System Version | Access Combination | Hold Time | Notes |
| Uconnect 8.4 (Panasonic) | Driver Temp UP + Driver Temp DOWN + Front Defrost | 5-7 Secs | Access “Radio Part Info” here. |
| Uconnect 12 (Gen 5) | Press & Hold Top Left + Top Right Corners of Screen | 10 Secs | Sometimes Bottom Left/Right depending on year. |
Warning: Inside Dealer Mode, there is often a “Reset to Factory Defaults” option. This is the nuclear option. It will erase all paired phones, saved addresses, and radio presets. It may also temporarily disable SiriusXM or Travel Link features until the radio receives an over-the-air signal refresh.
Maintenance Monitor Systems: Oil Life and Service Intervals
The “Oil Change Due” message on a RAM truck is not a simple mileage countdown. It is calculated by an algorithm that considers:
- Engine Idle Time.
- Ambient Temperatures (cold starts degrade oil faster).
- Engine Load/RPM (towing degrades oil faster).
- Trip Durations.
Resetting the Oil Life Monitor
There are two primary ways to reset this monitor after a service.
The Instrument Cluster Method (Preferred)
This method is used for trucks equipped with the EVIC (Electronic Vehicle Information Center) display.
- Ignition to RUN: Do not start the engine.
- Menu Navigation: Use the steering wheel arrows to navigate to the Vehicle Info tab (truck icon).
- Sub-Menu: Scroll Left/Right until the “Oil Life” gauge is displayed.
- Execute Reset: Press and Hold the Right Arrow or the OK button (center of the arrow pad) for roughly 5 seconds.
- Confirmation: The percentage should reset to 100%. Turn ignition OFF.
The “Gas Pedal” Method (Legacy/Backup)
This works on almost all RAM trucks, including those with basic clusters or if the button method fails.
- Ignition to RUN: Do not start.
- Pedal Pumps: Fully depress the accelerator pedal 3 times within 10 seconds. The motion should be deliberate—all the way down, all the way up.
- Power Down: Turn the ignition to OFF.
- Verify: Start the engine. The message should be gone.
Frequently Asked Questions (FAQs)
Q: Will resetting the ECU fix my ‘Service 4WD’ light?
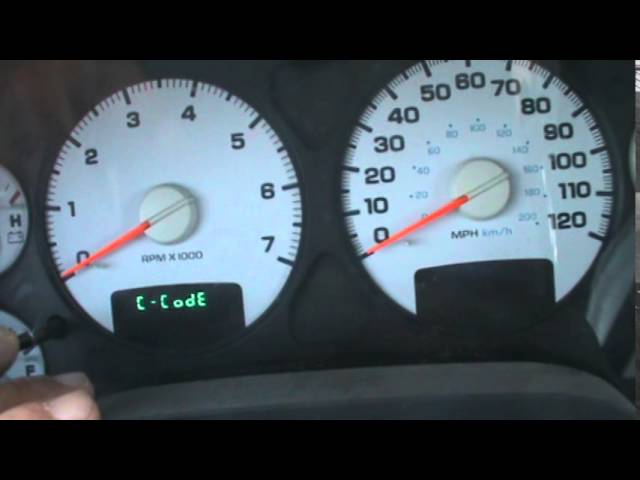
A: Likely not. The 4WD system uses the Drivetrain Control Module (DTCM). While a hard reset might clear a temporary communication glitch, 4WD errors are often caused by physical failures in the transfer case shift motor or corroded wiring at the connector. A scanner is needed to read the specific “C-codes” (Chassis codes).
Q: I did the hard reset and now my windows won’t go up automatically. Why?
A: Resetting the battery clears the “Auto-Up” calibration for power windows. To fix: Roll the window all the way down and hold the button for 2 seconds. Roll it all the way up and hold the button for 2 seconds. This teaches the BCM the travel limits again.
Q: How do I know if the “Pedal Dance” worked?
A: There is no confirmation beep. The proof is in the driving. If the throttle response feels linear and the idle is smooth (around 650-700 RPM for a Hemi), it worked. If the “Lightning Bolt” light remains, you may have a hardware failure.11
Q: Can I use a generic code reader to reset my transmission?
A: Generic $20 code readers can usually only clear “P-codes” (Powertrain) from the ECU. They cannot access the TCM to wipe adaptive tables. You need a mid-range to professional tool (like BlueDriver, OBDLink MX+ with AlphaOBD, or Autel) to access proprietary modules like the TCM.
Q: My RAM won’t start after a battery disconnect. Is it bricked?
A: Ensure the terminals are tight. If it is an eTorque model, ensure the 48V system has had time to reset. Also, check the security system. Sometimes the anti-theft system locks out the starter. Locking and unlocking the door with the physical key or fob can sometimes disarm it. If the fuel pump isn’t priming, check the TIPM fuses and relays.
Conclusion
The process of “resetting” a RAM truck is a multi-faceted technical operation that varies significantly by model year and subsystem. While the “Hard Reset” (capacitor discharge) remains a potent tool for clearing the PCM’s volatile memory and solving driveability issues, it is not a cure-all. Modern RAM architectures, particularly the Gen 5 DT platform with eTorque and Uconnect 5, require a more nuanced approach that prioritizes safety (high voltage isolation) and precision (scanner-based resets vs. battery pulls).
For the owner or technician, success lies in accurate diagnosis before the reset. A reset should be the final step after a repair, ensuring the digital brain of the truck is synchronized with its mechanical reality. By following the protocols outlined in this report—respecting the wait times, the drive cycles, and the specific button combinations—RAM owners can maintain the performance and reliability of their vehicles for the long haul.