1999 Ford F150 Fuse Box Diagram Under Dash: Mapped Out by Circuit Ratings

Electrical issues in your 1999 Ford F-150, such as a dead radio or malfunctioning interior lights, usually stem from a blown fuse located in the cabin. The 1999 Ford F-150 fuse box diagram under dash provides the roadmap you need to identify and replace faulty circuits. This guide helps you navigate your vehicle’s electrical system to restore functionality quickly and safely.


1999 Ford F150 Fuse Box Diagram Under Dash: Essential Reference Table
Recommended Best Deal Products


How to Read This Chart
The table above lists the most critical circuits found in the under-dash fuse panel. The “Fuse #” column corresponds to the physical slots found on the panel, while the “Amp Rating” represents the maximum current capacity in Amperes for that specific circuit. Always verify the physical label on your vehicle’s fuse box cover, as specific trim levels (XL, XLT, Lariat) may feature optional equipment that modifies the layout.
Locating and Identifying the 1999 Ford F150 Fuse Box Diagram Under Dash
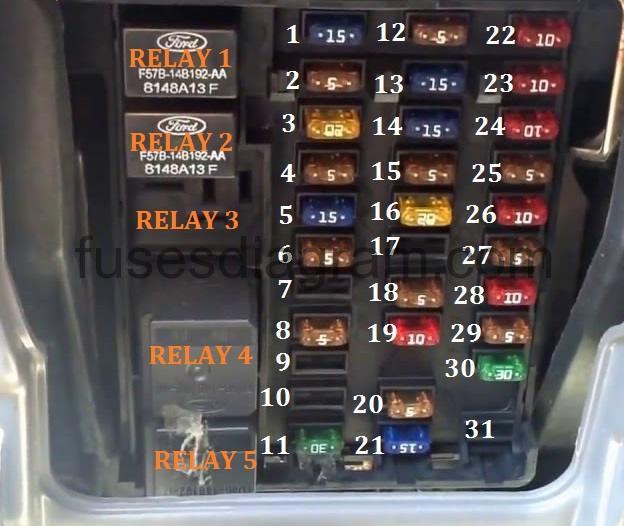
The fuse box, or Central Junction Box (CJB), is conveniently placed to be accessible to the driver. To locate it, look under the dashboard on the driver’s side near the steering column. You will find a plastic panel cover that protects the fuses from debris and accidental contact.
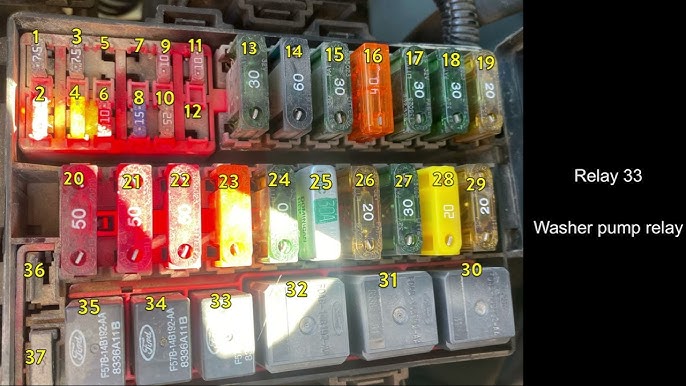
The inside of this cover typically features a diagram sticker. If this sticker is missing or illegible due to age, the reference chart provided in this article serves as the standard replacement. Always ensure the ignition is in the “Off” position before attempting to inspect or replace any electrical components to prevent short circuits.
📋
Step-by-Step Guide: Replacing a Blown Fuse
Recommended Best Deal Products


Turn off the vehicle and remove the key. Locate the plastic panel under the dashboard on the driver’s side and gently unclip the cover to expose the fuses.
Use the chart above or the diagram on the back of the cover to identify the fuse associated with the non-working component. Look for a broken metal wire inside the transparent plastic housing.
Use a fuse puller tool to remove the blown fuse. Replace it with a new one of the exact same amperage. Test the component to ensure functionality returns.
✨ Features and Advantages of Regular Fuse Maintenance
Cost Effectiveness
Diagnosing your own electrical issues using a diagram saves significant labor costs at a dealership. Replacing a $2 fuse is often the simple solution to a complex-seeming problem.
System Protection
Fuses are designed to be the “winner” in an electrical overload situation, sacrificing themselves to prevent permanent damage to expensive components like the radio or climate control module.
Common Disadvantages of Improper Fuse Handling
Recommended Best Deal Products


While the pros of DIY troubleshooting are clear, there are specific disadvantages to improper handling. Never use a fuse with a higher amperage rating than specified in the diagram. This is a critical safety violation that can lead to melted wiring, electrical fires, or severe damage to your truck’s electrical architecture.

Audible — Listen Free for 30 Days
One free credit a month and thousands of titles included.
Listen Free for 30 DaysAdditionally, force-inserting a fuse into the incorrect slot can damage the metal terminals inside the block. Always ensure the fuse is seated firmly and matches the specifications provided by the manufacturer. If you are ever unsure about the required rating, refer back to the owner’s manual or check the diagram sticker on the panel cover.
Never replace a fuse with a piece of metal, wire, or a fuse of a higher amperage. This bypasses the safety feature intended to prevent electrical fires and can result in total vehicle electrical system failure or a catastrophic fire hazard.
What If the Issue Persists After Replacing the Fuse?
If you replace a fuse and it blows again immediately, you likely have a “short to ground” somewhere in that specific circuit. Following these steps can help you diagnose further:
- Inspect the wiring harness associated with the failing component for signs of fraying or heat damage.
- Ensure the accessory itself isn’t internally shorted (e.g., a bad radio unit or a jammed window motor).
- Check for loose ground connections in the dashboard area.
- Consult a professional technician if the circuit continues to blow fuses, as this indicates a deeper electrical fault that may require specialized diagnostic tools like a multimeter or circuit tester.
Professional diagnosis typically ranges from $100 to $250 depending on the complexity of the electrical short.
Conclusion
Understanding the 1999 Ford F-150 fuse box diagram under dash empowers you to manage your vehicle’s health with confidence. By using the provided charts and following the diagnostic steps, you can resolve common interior electrical failures efficiently. Always prioritize safety, use the correct amperage ratings, and consult professional help for recurring issues. Taking these precautions ensures your Ford F-150 remains a reliable workhorse for years to come.
Key Takeaways
-
✓
Identify the specific fuse responsible for interior accessories like radio, wipers, and dome lights. -
✓
Understand the critical distinction between the interior CJB and the under-hood BJB power centers. -
✓
Learn how to interpret color-coded fuses to match the correct amperage for your electrical circuit. -
✓
Master the safe removal and installation process using standard automotive fuse pullers. -
✓
Compare the advantages of OEM fuses versus aftermarket replacements for long-term reliability.
❓ Frequently Asked Questions
1
What is the 1999 Ford F150 under-dash fuse box?
The under-dash fuse box, or Central Junction Block (CJB), is the primary control point for interior electrical features. It contains the fuses and relays that manage the instrument cluster, interior lighting, radio, and power windows. Its primary advantage is accessibility from the driver’s seat for quick troubleshooting.
2
How does the interior fuse panel compare to the under-hood box?
The interior panel (CJB) manages low-current cabin accessories, while the under-hood Battery Junction Box (BJB) handles high-current components like the starter, PCM, and headlights. A key disadvantage of the BJB is its exposure to elements, whereas the interior box benefits from a protected, climate-controlled environment.
3
Why is checking the fuse amperage important?
Using the correct amperage is critical for safety. The features of a 15-amp fuse are designed to protect specific wires; installing a higher rating can cause the wiring to melt or ignite before the fuse blows, presenting a major disadvantage. Always match the manufacturer’s specified rating exactly.
Audible Premium Plus — Annual Membership
12 audiobook credits up front, plus the full Audible catalogue.
See Annual Plans
4
What are the benefits of using a diagram for fuse replacement?
A diagram provides the specific map of your vehicle’s electrical layout. The main advantage is preventing the accidental pulling of the wrong fuse, which could reset your PCM or security system. It allows for a systematic head-to-head comparison between your current setup and factory specifications.
5
How can I get started with electrical diagnostics?
Start by identifying the failed component, then locate its corresponding fuse using our diagram. Check the metallic strip inside the fuse; if it is broken, pull it and replace it with an identical amperage. This simple process is the expert-recommended first step before visiting a professional mechanic.
6
Where is the fuse box located on a 1999 Ford F-150?
The passenger compartment fuse panel (Central Junction Box) is located inside the vehicle, on the driver’s side, under the dashboard, to the left of the steering column. It is typically behind a removable trim panel.