6.7 Cummins Heater Hose Connector Leak: Complete Diagnosis & Repair Guide
If you’ve ever walked up to your Ram truck and spotted that telltale puddle of coolant under the engine bay, you might be dealing with the notorious 6.7 Cummins heater hose connector leak. As someone who’s owned three different generations of Ram diesels and fixed this exact issue more times than I’d like to admit, I can tell you that this seemingly minor problem can quickly escalate into a major headache if ignored. The good news? With the right knowledge and approach, you can tackle this common issue without breaking the bank or getting stranded on the side of the road.
Understanding the 6.7 Cummins Heater System
Before diving into the specifics of the leak, let’s get familiar with how the heating system works in your Cummins-powered rig.
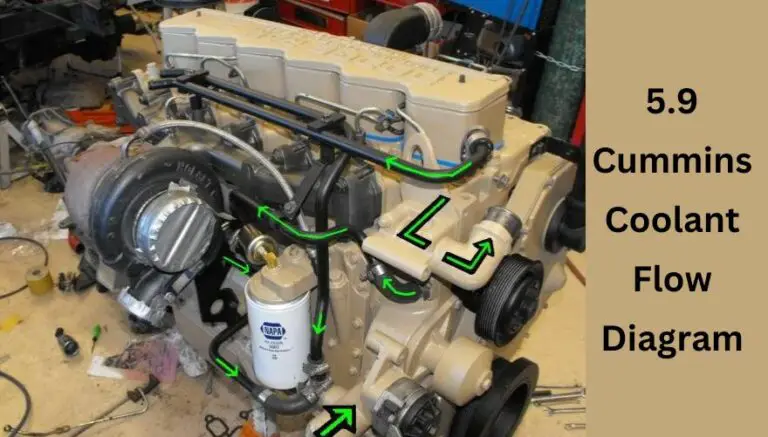
The 6.7L Cummins uses a fairly standard liquid-cooling system where hot coolant from the engine is circulated through the heater core (essentially a small radiator) inside your dash. This hot coolant transfers heat to the air that’s blown into your cabin, providing that toasty warmth during winter months.
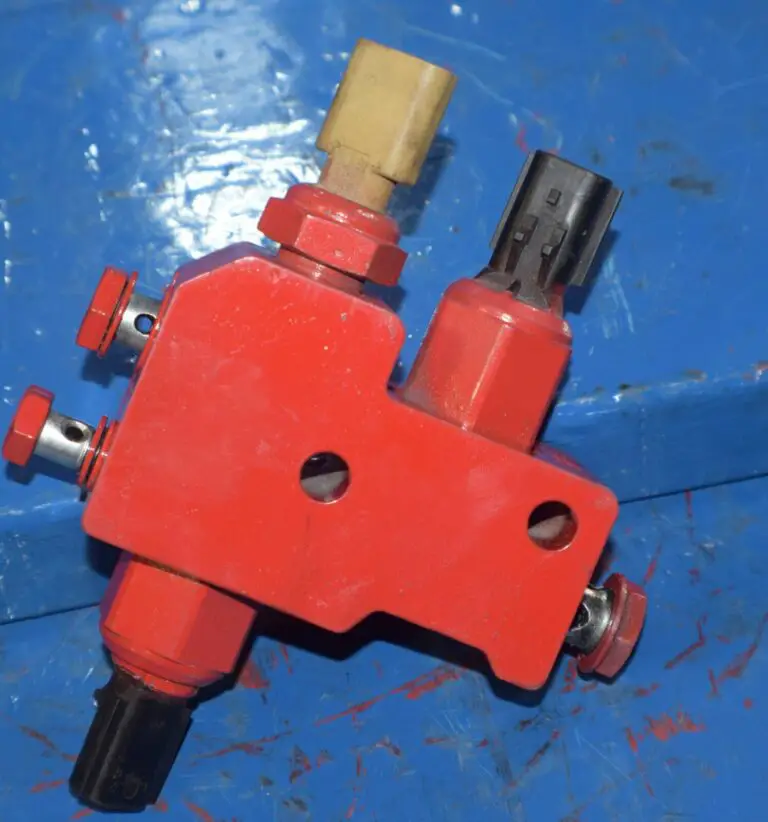
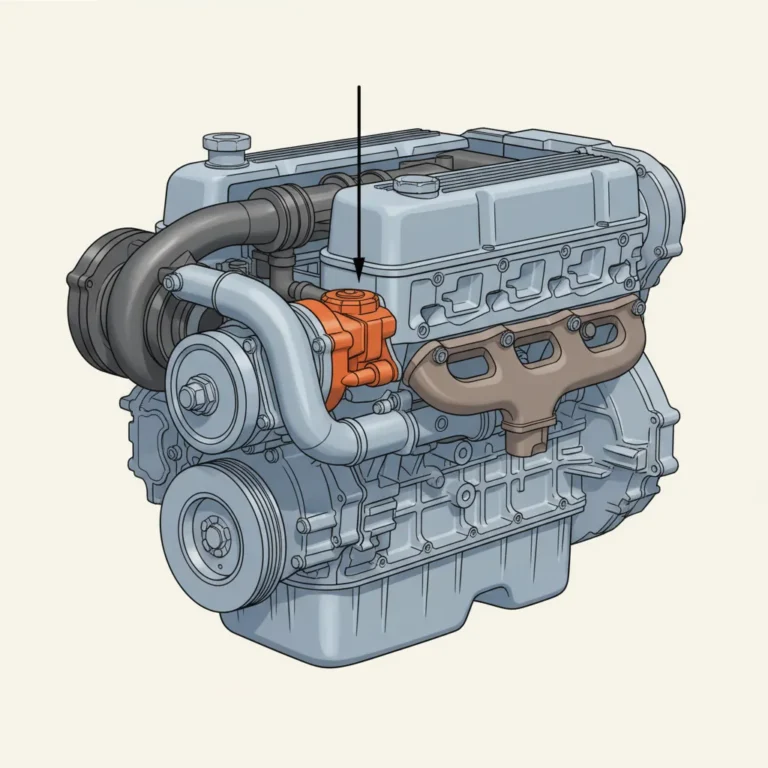
The heater hose connectors are the critical junctions where rubber heater hoses attach to hard plastic or metal fittings on the engine. These connections typically include:
- Engine block heater hose connections
- Heater core supply and return connections
- Quick-connect fittings at various junction points
- T-connectors that split flow to different parts of the system
Why these connectors matter: These connection points experience significant heat cycling, vibration, and pressure changes, making them natural failure points in an otherwise robust system. When they fail, you’re not just looking at an inconvenient puddle – you’re potentially facing overheating issues and costly damage if ignored.
Identifying a 6.7 Cummins Heater Hose Connector Leak
Spotting this problem early can save you significant hassle down the road. Here are the telltale signs that you’re dealing with a heater hose connector leak:
Common Symptoms
- Sweet-smelling puddle under the truck – Coolant has a distinctive sweet smell that’s hard to miss
- Low coolant warnings or coolant reservoir constantly needing refills
- Foggy windows that won’t clear properly in cold weather
- Inconsistent cabin heat – Sometimes hot, sometimes lukewarm
- Steam from the engine bay, particularly after shutdown
- White residue or crusty deposits around connector areas
Where to Look First
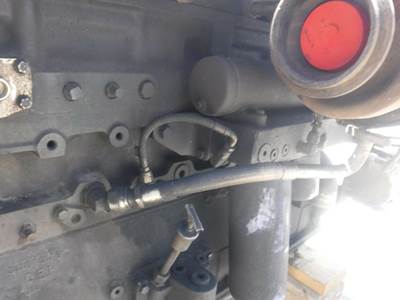
The most common locations for the 6.7 Cummins heater hose connector leaks include:
- Rear of the engine block near the firewall (most common)
- Near the water pump on the passenger side
- T-connectors along the heater hose routing
- Quick-connect fittings where rubber meets plastic/metal
- Heater core inlet/outlet connections under the dash
Pro inspection tip: The leak is often most visible after the engine has been running for a while and then shut off. This is because the cooling system pressurizes during operation and then contracts as it cools, often forcing coolant through even tiny cracks.
Diagnostic Approach
Here’s my tried-and-true method for confirming a heater hose connector leak:
- Clean the suspect area thoroughly when the engine is cool
- Add UV dye to the cooling system (available at any auto parts store)
- Run the engine until operating temperature
- Use a UV flashlight to inspect connections – leaks will glow brightly
- Mark any leaking areas for future reference
This approach helps identify even slow leaks that might not be immediately obvious with a visual inspection alone.
Common Causes of Heater Hose Connector Leaks
Understanding why these leaks happen can help you make better repair decisions. In my experience working on numerous 6.7 Cummins engines, these are the most common culprits:
Material Degradation
The connectors on the 6.7 Cummins were originally made from plastic that doesn’t age gracefully. Over time, these materials:
- Become brittle from heat cycling
- Develop microscopic cracks from vibration
- Expand and contract at different rates than the metal components they connect to
- React with certain coolant additives, accelerating degradation
Design Flaws
Certain model years have inherent design issues:
- 2007-2012 models: Used particularly failure-prone plastic connectors
- Quick-connect fittings: Can lose tension over time, allowing leaks
- Inadequate support: Some connections lack proper bracing against engine vibration
Environmental Factors
Living in extreme climates can accelerate connector failure:
- Cold weather regions: Freeze-thaw cycles stress connections
- Hot climates: Accelerated heat aging of plastic components
- High humidity areas: Can promote corrosion at metal-plastic interfaces
Real-world observation: In my experience, trucks that regularly tow heavy loads tend to develop these leaks earlier due to the additional heat stress on the cooling system. If you’re a heavy tower, it’s worth inspecting these connections more frequently.
Year-by-Year Breakdown: Model Specific Issues
Different model years of the 6.7 Cummins have their own quirks when it comes to heater hose connectors. Here’s what I’ve observed across different generations:
2007-2010 (First Generation 6.7L)
These early 6.7 Cummins engines are the most prone to heater hose connector failures, particularly:
- The rear block heater hose connection (extremely common failure point)
- T-connectors along the firewall routing
- Water pump connection points
Common issue: The quick-connect fittings used in this generation are notorious for failing around 80,000-100,000 miles.
2010-2013 (Second Generation)
Ram made some improvements, but still struggled with:
- Rear block connections (improved but still problematic)
- Heater core inlet/outlet connections
- Integration points with the EGR cooling system
Worth noting: This generation started using slightly better materials, but the fundamental design issues remained.
2013-2018 (Third Generation)
Further improvements were made, including:
- More durable connector materials
- Better routing to reduce vibration stress
- Improved clamp designs at critical junctions
Real-world feedback: These models still develop leaks, but typically at higher mileages (150,000+ miles) compared to the earlier generations.
2019+ (Current Generation)
The latest Ram trucks with the 6.7 Cummins have addressed many previous issues:
- Redesigned connection points
- Higher-quality materials throughout
- Better integration with other cooling systems
From the trenches: While significantly improved, these newer models aren’t immune to connector issues, particularly if the truck sees heavy use or extreme conditions.
DIY Repair Options for Heater Hose Connector Leaks
If you’re reasonably handy and don’t mind getting your hands dirty, most 6.7 Cummins heater hose connector leaks can be fixed at home. Here’s how I approach these repairs:
Tools and Materials Needed:
- Basic hand tools (sockets, screwdrivers, pliers)
- Replacement connector (OEM or quality aftermarket)
- New hose clamps (never reuse old ones)
- Coolant (meeting Mopar MS-12106 specifications)
- Catch pan for old coolant
- Shop rags for cleanup
- Penetrating lubricant for stubborn connections
- Replacement O-rings if applicable
Step-by-Step Repair Process:
- Preparation
- Ensure engine is completely cool
- Disconnect the negative battery terminal
- Place a drain pan under the work area
- Have plenty of rags handy for coolant spills
- Coolant Drainage
- You don’t need to drain the entire system
- Just enough to lower the level below the connector you’re working on
- Close the drain once enough coolant is removed
- Accessing the Connection
- Remove any shields, covers or components blocking access
- Take photos before disassembly to remember routing
- Label connectors if removing multiple
- Removing the Failed Connector
- Release any locking tabs or clamps
- Carefully twist hoses while pulling to free them
- Check remaining fittings for damage or wear
- Installing the New Connector
- Apply a small amount of coolant to O-rings or sealing surfaces
- Ensure proper orientation before final assembly
- Secure with appropriate clamps or locking mechanisms
- Verify proper seating and connection
- System Refill and Testing
- Refill with the proper coolant mix
- Start engine and let it reach operating temperature
- Check for leaks under pressure
- Top off coolant as needed after the system purges air
Important DIY tip: Always buy slightly more coolant than you think you’ll need. Air pockets are common after these repairs, and you’ll likely need to top off the system several times as air works its way out.
Replacement Part Options:
When selecting replacement parts, you have several options:
| Option | Pros | Cons | Approximate Cost |
|---|---|---|---|
| OEM Mopar Parts | Perfect fit, factory quality | Most expensive, same design that failed | $40-120 |
| Dorman Replacements | Affordable, widely available | Quality can vary | $15-50 |
| Upgraded Aluminum | Very durable, lifetime fix | Requires more modification, higher initial cost | $80-200 |
| DIY Custom Solution | Cheapest, immediate fix | Temporary, may cause future issues | $5-20 |
My recommendation: For a truck I plan to keep long-term, I always go with the aluminum upgraded replacements. They cost more upfront but eliminate the problem permanently. For a quick fix on a truck I might sell soon, the Dorman replacements are a reasonable middle ground.
Professional Repair Considerations
Sometimes, the location or complexity of the leak makes professional repair the smarter choice. Here’s what you need to know:
When to Choose Professional Repair:
- Difficult access locations that require dashboard disassembly
- Multiple leak points suggesting system-wide issues
- Integration with emissions components that require special tools
- When time is a factor and you need immediate, guaranteed results
Cost Expectations:
Professional repair costs vary widely depending on:
- Specific connector location (some require much more labor)
- Parts selection (OEM vs. aftermarket)
- Related repairs that might be recommended
- Shop rates in your area
Based on national averages, you can expect:
- Dealership repair: $350-600
- Independent diesel shop: $250-450
- General repair shop: $200-400
Money-saving tip: If you’re having a professional do the work, supply your own upgraded connectors. Many shops are happy to install customer-supplied parts, potentially saving you 30-40% on the parts markup.
Preventative Maintenance to Avoid Future Leaks
An ounce of prevention is worth a gallon of coolant when it comes to the 6.7 Cummins heater hose connector leak issues. Here’s my preventative maintenance approach:
Regular Inspection Routine:
Develop the habit of checking these connections:
- Every oil change: Quick visual inspection of accessible connectors
- Seasonally: More thorough inspection with flashlight
- Before long trips: Complete cooling system check
- After heavy towing: Inspect for new leaks or seepage
Cooling System Care:
- Use only the correct coolant (Mopar MS-12106 or equivalent)
- Change coolant per factory schedule (typically every 5 years/100,000 miles)
- Pressure test the cooling system annually
- Maintain proper coolant level at all times
Pro tip from experience: If you live in an area with hard water, use distilled water for coolant mixing. Mineral deposits can accelerate connector degradation and create other cooling system issues.
Prophylactic Replacement:
For high-mileage trucks or those used in severe conditions, consider:
- Preemptively replacing known problem connectors before they fail
- Upgrading to aluminum fittings during other major service
- Replacing all rubber hoses every 5-7 years regardless of condition
Upgraded Replacement Options
If you’re tired of dealing with recurring connector issues, several permanent solutions exist:
OEM vs. Aftermarket Comparison:
OEM Replacements:
- Direct fit with no modification
- Same materials and design as original
- Typically come with new O-rings and seals
- Full compatibility with factory components
Aftermarket Upgrades:
- Companies like Fleece Performance and BD Diesel offer aluminum replacements
- Complete kits available for most connection points
- Designed to address the fundamental flaws in the original parts
- Lifetime durability in most cases
Installation Differences:
Upgraded parts sometimes require:
- Minor modifications to hose routing
- Different clamp types
- Possible adapter fittings
- Slight changes to connection points
Worth noting: While aftermarket upgrades may require more work to install, they’re engineered specifically to solve these recurring issues permanently.
Related Cooling System Issues to Monitor
When addressing a 6.7 Cummins heater hose connector leak, it’s wise to check for these related issues:
Common Companion Problems:
- Water pump seepage (often mistaken for connector leaks)
- Radiator cap failure (causing system-wide pressure issues)
- EGR cooler leaks (can present similarly to heater hose issues)
- Blocked radiator fins (causing overall system stress)
- Failing thermostat (causing temperature fluctuations)
Warning Signs of Larger Issues:
Pay careful attention if you notice:
- Multiple leak points developing simultaneously
- Coolant mixing with oil (milky appearance on dipstick)
- Unexplained overheating even after fixing connectors
- White exhaust smoke accompanied by coolant loss
Critical advice: If you spot coolant in your oil or oil in your coolant, stop driving immediately. This indicates a potentially serious issue like a head gasket failure that requires immediate attention.
Real-World Experiences and Case Studies
After working on dozens of 6.7 Cummins engines and owning several myself, here are some noteworthy experiences:
Owner Testimony: John’s 2010 Ram 2500
John’s truck developed a minor seep at 87,000 miles that he ignored. By 95,000 miles, it left him stranded when the connector completely failed during a summer towing trip. The tow and emergency repair cost over $800, compared to the $200 it would have cost to address proactively.
Fleet Experience: Smith Construction
A local construction company with six 2013-2015 Ram 3500s implemented a proactive connector replacement program after two trucks experienced failures. By replacing all connectors with aluminum upgrades during regular service intervals, they eliminated emergency repairs completely and reported zero coolant-related downtime over the following three years.
My Personal Experience
On my 2014 Ram 2500, I replaced all plastic connectors with aluminum versions at 120,000 miles during other scheduled maintenance. The upgrade cost about $300 in parts and took a full Saturday to complete. Four years and 80,000 miles later, the system remains leak-free despite regular heavy towing.
The consensus among experienced owners: Proactive replacement with upgraded materials is the most cost-effective approach in the long run.
Cost Analysis: Repair vs. Ignore
Let’s break down the real costs of addressing—or ignoring—a 6.7 Cummins heater hose connector leak:
The Cost of Ignoring the Problem:
- Coolant replacement: $15-30 per refill (ongoing)
- Potential overheating damage: $3,000-10,000+
- Emergency roadside service: $150-500 per incident
- Unplanned downtime: Variable but often costly
- Reduced resale value: $500-1,500 due to known issues
The Cost of Proactive Repair:
- DIY basic repair: $50-150 in parts
- DIY upgraded solution: $200-350 in parts
- Professional basic repair: $250-600 all-in
- Professional upgraded solution: $400-800 all-in
The bottom line: Even the most expensive proactive repair costs less than a single major overheating incident or roadside breakdown.
Technical Service Bulletins and Recalls
While there haven’t been specific recalls solely for heater hose connectors, several related Technical Service Bulletins (TSBs) have been issued:
Notable TSBs:
- TSB 07-001-12 – Addresses cooling system air bleeding procedures after repairs
- TSB 07-002-15 – Covers coolant loss diagnosis procedures
- TSB 14-004-11 – Discusses proper cooling system maintenance
Important note: While these aren’t recalls (meaning free repairs), they do provide valuable information for technicians and DIYers tackling these issues. You can request copies of these TSBs from your dealer or find them through online diesel forums.
Conclusion
The 6.7 Cummins heater hose connector leak issue is one of those persistent problems that has plagued an otherwise excellent engine. While Ram has made improvements over the years, owners of any model year should be vigilant about inspecting these connection points regularly.
For those currently dealing with this issue, remember:
- Early detection saves money and prevents more serious problems
- Quality replacement parts are worth the investment
- Consider permanent upgrades if you plan to keep your truck long-term
- Regular cooling system maintenance pays dividends in reliability
For preventative-minded owners, my strong recommendation is to inspect your connections now, especially if your truck has over 80,000 miles or has been used for heavy towing. A small investment in upgraded connectors today can prevent a major headache tomorrow.
Remember, a little coolant on your driveway today could mean a lot of money out of your wallet tomorrow if left unaddressed. Your 6.7 Cummins is built to last hundreds of thousands of miles—don’t let something as simple as a plastic connector be its downfall.
Frequently Asked Questions
Can I use stop-leak products to fix a heater hose connector leak?
I strongly advise against it. While these products might temporarily seal the leak, they can clog small passages in your heater core, radiator, and other components. The proper repair is always to replace the failing connector.
Will a heater hose connector leak set a check engine light?
Not directly. However, significant coolant loss can eventually lead to overheating, which may trigger engine protection mode and associated warning lights.
How long does it take coolant to damage an engine if I have a leak?
This varies greatly depending on the severity of the leak and driving conditions. A small seep might take months to cause problems, while a major leak could cause overheating damage in minutes of operation. Never drive with a known active coolant leak.
Do the newer 2019+ Ram trucks still have this issue?
The newest generation has significantly improved connector designs, but they’re not immune to failures. The frequency and severity are much reduced compared to earlier generations, but vigilance is still recommended.
Can extreme cold weather cause these connectors to fail suddenly?
Absolutely. The rapid contraction of materials during cold snaps can cause already-compromised connectors to fail completely. This is why many failures seem to happen during the first cold spell of winter.
If one connector fails, should I replace all of them?
If your truck is over 100,000 miles, I recommend replacing all accessible connectors at the same time. They were all manufactured together and have experienced the same conditions, so others are likely close to failure as well.
Does towing affect the likelihood of connector failure?
Yes. Towing increases engine operating temperatures and system pressure, accelerating the aging process of these components. Heavy towers should inspect cooling system components more frequently and consider proactive upgrades.