Ram 1500 Air Suspension Reset, Diagnostics, and System Management
The Engineering of Modern Pneumatic Suspension
The integration of pneumatic suspension systems into light-duty pickup trucks represents a pivotal shift in automotive engineering, moving away from the purely utilitarian leaf-spring architectures of the past toward adaptive, multi-purpose chassis dynamics. The Ram 1500, particularly across its 4th Generation (DS) and 5th Generation (DT) iterations, has pioneered the use of the Active-Level™ Four-Corner Air Suspension system in the consumer truck market.
This system is not merely a comfort feature; it is a complex integration of fluid dynamics, electronic control capability, and load-management logic designed to bridge the gap between heavy hauling capability and luxury sedan ride quality.
However, the sophistication of this system introduces a matrix of potential failure modes and maintenance requirements that differ significantly from traditional steel-sprung suspensions. For the automotive technician or the informed owner, understanding the “Ram 1500 air suspension reset” is not simply about pressing a button; it requires a holistic understanding of the vehicle’s Air Suspension Control Module (ASCM), the pneumatic gallery, and the interaction between the chassis and the onboard telematics.
This report serves as an exhaustive technical dossier, synthesizing maintenance protocols, diagnostic strategies, and system reset procedures while contextualizing them within the broader scope of Ram truck engineering and maintenance.
Ram 1500 Air Suspension Guide
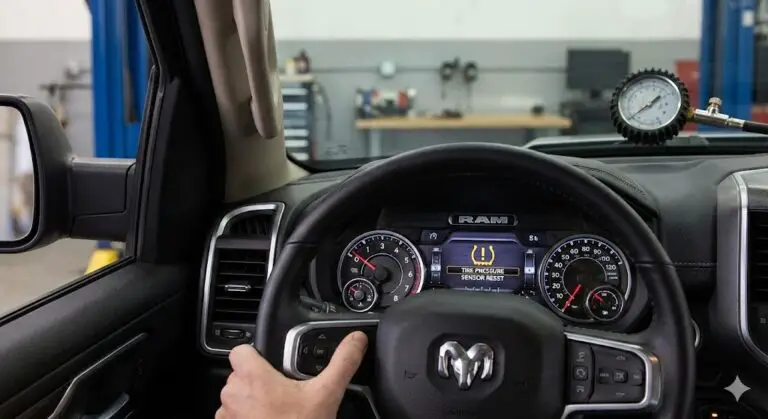
Troubleshoot & Reset Your “Service Air Suspension” Warning
This is the most common warning for the Ram’s Active-Level Four-Corner Air Suspension. It signals that the system has detected a fault. Often, this can be a simple software glitch, but it can also indicate a hardware problem.
Common Causes of a System Fault
Before you reset the system, it’s helpful to understand what might be wrong. While a reset can fix temporary glitches, most persistent warnings are tied to a few common issues. This chart shows a typical breakdown of reported failures.
Why the Light Comes On
The “Service” light indicates a fault, but not all faults are equal. A significant portion are temporary software glitches, often triggered by a sudden jolt, extreme cold, or a low battery. These are the issues a reset is most likely to fix.
However, physical hardware failures are also very common, especially as the truck ages. Air spring leaks are the most frequent culprit, followed by compressor failure and faulty height sensors.
- Glitches: Often fixed by a simple reset.
- Leaks: Require part replacement.
- Compressor: Fails from overwork (often due to leaks).
- Sensors: Can be damaged or send bad data.
How to Reset the Air Suspension System
A reset forces the system’s computer to reboot, clearing temporary faults. Try these methods in order, from simplest to most comprehensive. This process is free and requires no special tools.
Step 1: The Fuse Pull
This is the fastest way to “reboot” the Air Suspension Control Module (ASCM).
- Locate the main fuse box in the engine bay.
- Find the air suspension fuse (often labeled F97).
- Pull the fuse out with the engine off.
- Wait 30-60 seconds, then re-insert it.
- Start the truck to see if the light has cleared.
Step 2: Battery Disconnect (Hard Reset)
If the fuse pull fails, a full battery disconnect resets all vehicle modules, including the ASCM.
- Disconnect the negative battery terminal.
- Wait at least 15 minutes to ensure all capacitors discharge.
- Reconnect the negative terminal securely.
- Start the engine. The system may take a moment to re-initialize.
Step 3: System Cycle
Sometimes the system gets “stuck” in a specific mode (like Tire Jack Mode).
- With the truck running, use the Uconnect screen or dash controls.
- Manually enable “Tire Jack Mode” or “Transport Mode”.
- Manually try to raise or lower the suspension.
- Disable the mode you just enabled.
- This can sometimes force the system to re-check its status.
What If the Reset Doesn’t Work?
If the “Service” light returns after a reset, it signals a persistent hardware failure. A reset cannot fix a physical problem like a leak or a broken part. The chart below shows typical replacement costs for the most common failure points.
Common Hardware Failures
Persistent faults almost always trace back to one of these components. The repair cost can vary significantly based on dealer vs. independent shop labor rates and OEM vs. aftermarket parts.
-
■
Air Spring / Bag: The rubber bladders crack with age, causing leaks. The compressor runs constantly to compensate, eventually burning out.
-
■
Compressor: This is the heart of the system. It fails from overwork (due to leaks) or from moisture ingestion in cold climates.
-
■
Height Sensor: These plastic sensors tell the computer the truck’s ride height. They can be broken by debris or simply fail electronically.
Frequently Asked Questions
Can I drive with the “Service Air Suspension” light on?
Yes, but it’s not recommended for long. The system will likely default to a “safe” (often harsh) ride height. Driving with a leak can burn out your compressor, turning a cheap fix into an expensive one. The truck may also handle unpredictably.
Why does my suspension get stuck in cold weather?
This is a common issue. Condensation (moisture) can get into the air lines and freeze, blocking airflow or damaging the compressor. The system will set a fault until it thaws. A reset *may* clear it once the truck is warm.
What is “Aero Mode”?
Aero Mode is a standard feature where the truck automatically lowers itself by about 1 inch at highway speeds (typically over 60 mph) to improve fuel economy and stability. This is normal operation and not a fault.
The Role of Active-Level™ Suspension in Ram Dynamics
The Active-Level™ system differentiates the Ram 1500 from competitors by replacing standard coil springs (on the 4th/5th gen link-coil rear suspension) or leaf springs with pressurized air springs. These springs are fed by a reservoir-based closed-loop system (in theory) or an ambient-air open-loop system, depending on the generation and specific configuration. The system’s primary objectives are threefold:
- Load Leveling: Utilizing height sensors at all four corners to detect suspension droop caused by payload or trailer tongue weight, automatically increasing pressure to maintain a level chassis geometry. This is critical for maintaining proper headlight aim and steering geometry under load.
- Aerodynamic Optimization: At highway speeds, the system enters “Aero Mode,” lowering the vehicle by approximately 0.6 inches (15mm) to reduce the coefficient of drag and improve fuel efficiency—a critical factor given the Ram’s frontal area.
- Off-Road Clearance: The system provides two distinct lift modes (Off-Road 1 and Off-Road 2) to increase approach, departure, and break-over angles, effectively giving the operator a factory-installed lift kit on demand.
Understanding these operational modes is essential because a “stuck” suspension often indicates a failure in the logic governing these transitions. For further details on general Ram specifications and capabilities, referring to data on provides necessary baseline context for vehicle weights and dimensions.
The “Service Air Suspension” Imperative
The user query regarding a “reset” typically stems from the appearance of the “Service Air Suspension” warning message on the Electronic Vehicle Information Center (EVIC). This message is a catch-all indicator for a multitude of faults, ranging from a transient communication glitch in the CAN bus to a catastrophic failure of the compressor piston ring or a frozen valve block.
Unlike a Check Engine Light (CEL) which often allows for continued operation, an air suspension fault can render the vehicle undrivable if the suspension deflates to the bump stops, resulting in a jarring ride that can damage other chassis components.
This report prioritizes a hierarchical approach to resolution: beginning with non-invasive resets (HMI and battery cycles), moving to software diagnostics (AlfaOBD/JScan), and concluding with mechanical repair or system deletion logic.
Immediate Reset Protocols: The Human-Machine Interface (HMI)
Before disassembling components or utilizing diagnostic scan tools, the primary line of defense against logic-based suspension errors is the utilization of the vehicle’s built-in interface controls. These procedures are designed to force the ASCM to re-evaluate sensor inputs and attempt a self-calibration.
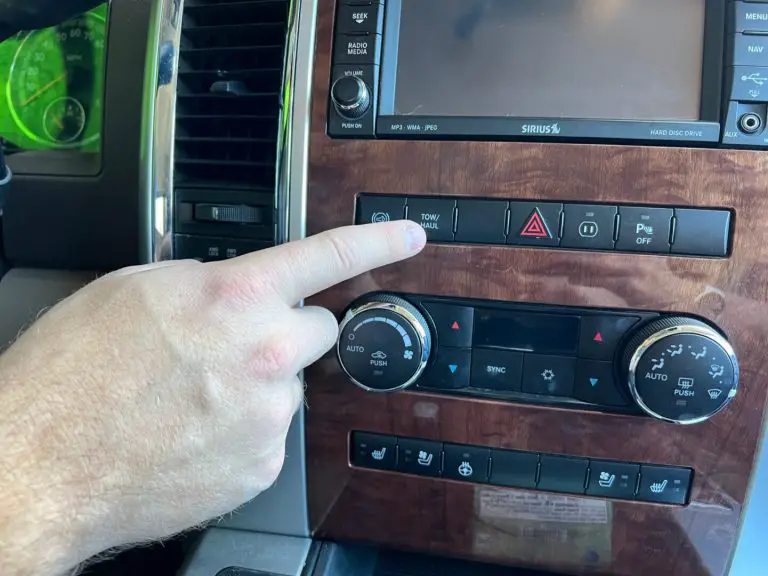
The Center Console Reset (The “Button Trick”)
The most widely cited yet often misunderstood reset method involves the physical toggle switches located on the center stack or center console, depending on the trim level (Rebel vs. Limited vs. Laramie). This procedure acts as a “soft reset” for the user interface and the command request logic.
Mechanism of Action:
The air suspension buttons (Up and Down arrows) communicate directly with the Body Control Module (BCM), which then relays requests to the ASCM. By holding both buttons simultaneously, the user sends a continuous, conflicting signal that triggers a diagnostic interrupt in the control logic.
Detailed Procedure:
- Vehicle State: The vehicle must be parked on a level surface. The engine should be running to ensure the alternator is providing full voltage (13.8V – 14.4V) to the system, as the air compressor is a high-amperage component sensitive to voltage drops. For owners experiencing power issues, checking the alternator health is a prerequisite; refer to for troubleshooting voltage irregularities.
- Execution: Press and hold both the UP and DOWN buttons simultaneously.
- Duration: Maintain the hold for approximately 30 to 40 seconds. It is crucial not to release the buttons early.
- Feedback: The system will emit an audible chime through the instrument cluster, and the LEDs on the switchgear may flash.
- Result: Upon release, the system attempts to recalibrate. The ASCM will poll the ride height sensors. If the readings are within an acceptable variance but logically “stuck” (e.g., the system thinks it is in Off-Road 2 but the sensor reads Normal Ride Height), this forced poll can reconcile the data.
Limitations: This method is effective for logic “glitches” or confusion caused by parking on uneven terrain. It will not clear hard fault codes (DTCs) such as C156E (Ride Height System Calibration) or C1556 (Compressor Circuit Open).
The Hard Reset: Battery and Capacitor Discharge
If the HMI reset fails, a hard electrical reset is necessary to clear the volatile memory of the ASCM. The ASCM, like many modern automotive controllers, contains capacitors that can retain a charge—and thus RAM data—for several minutes after the ignition is turned off.
Technical Protocol:
- Preparation: Ensure the vehicle is in Park. Open the hood.
- Disconnection: Using a 10mm socket (typical for Ram terminals), disconnect the Negative (-) battery cable first. This prevents accidental shorting if the wrench touches the chassis while working on the positive terminal.
- Isolation: Disconnect the Positive (+) cable. Secure both cables away from the battery posts.
- Discharge Interval: While some sources suggest 15 minutes, the most reliable discharge time for the ASCM is between 30 minutes and 1 hour. This ensures that all Keep-Alive Memory (KAM) power is drained.
- Reconnection: Reconnect Positive first, then Negative.
- Initialization: Start the vehicle. The ASCM will perform a “cold boot.” It will activate the compressor to pressurize the gallery and verify sensor positions.
Implications: This process resets all learned values in the truck, including transmission shift adaptives and Uconnect settings. Owners should be aware that the first few miles of driving may feel different as the Transmission Control Module (TCM) relearns shift points.
The Operational Drive Cycle Reset
The ASCM logic relies heavily on vehicle speed data to validate ride height decisions. For example, the system will not allow “Off-Road 2” height above a certain speed threshold to prevent rollover risk. Conversely, it may not attempt to level a vehicle that is stationary if it suspects a door is open or the vehicle is in a “protection” mode.
Procedure:
- Cycle ignition OFF then ON.
- Drive the vehicle on a straight, level road.
- Achieve a speed greater than 25 mph (40 km/h).
- Maintain this speed for several minutes.
Why this works: The system enters different logic states based on speed. Driving above 25 mph forces the system to evaluate whether it should be in “Normal Ride Height” or “Aero Mode.” If the suspension was stuck in “Entry/Exit” mode due to a sensor error while parked, the valid speed signal forces the ASCM to command the valves to open and the compressor to run to achieve a safe driving height.
Uconnect Integration: Prevention and Maintenance Modes
A significant portion of air suspension “failures” are actually instances of the system entering a protective lockout mode due to user error during maintenance. The Ram 1500 allows deep integration of suspension controls via the Uconnect infotainment system (versions 3, 4, 4C, and 5). Understanding these menus is critical for preventing damage during tire changes or towing.
Tire Jack Mode: The Critical Safety Step
When a Ram 1500 with air suspension is lifted by a jack (e.g., for a flat tire repair), the chassis rises while the wheels remain on the ground (until lifted). The height sensors detect this as an extreme “High” condition. If the system is active, the ASCM will open the vent valves to release air, attempting to lower the truck. When the jack is removed, the air bags are empty, and the truck collapses onto the bump stops.
Activation Protocol (Uconnect 4/5):
- Engine Status: The engine must be running to access these settings.
- Menu Navigation:
- Press the Vehicle icon on the bottom menu bar.
- Select Settings (or “Suspension” tab directly on some Uconnect 12-inch screens).
- Scroll to find “Tire Jack Mode”.
- Toggle the setting to ON.
- Verification: An indicator lamp (often Lamp 1 and 5) will illuminate on the instrument cluster or the switch bank to confirm the mode is active.
Auto-Disable Feature: It is important to note that Tire Jack Mode is speed-sensitive. If the vehicle is driven above approximately 5-10 mph, the mode will automatically disengage, and the system will resume auto-leveling. This is a failsafe to prevent driving in a disabled state, but relying on it is not recommended practice; manual disabling after work is preferred.
Transport Mode and Wheel Alignment Mode
Beyond tire changes, the Uconnect system offers modes for specific service scenarios.
- Transport Mode: This mode is designed for flatbed towing. It lowers the vehicle to “Entry/Exit” (or Bed Lowering Mode) and disables the leveling logic. This prevents the suspension from “fighting” the tie-down chains or straps as the truck bounces on the flatbed. If the suspension were active, it might try to compensate for the strap tension, potentially burning out the compressor or damaging the strap mounting points.
- Wheel Alignment Mode: This is a critical setting for technicians. Suspension geometry (camber, caster, toe) changes as the ride height changes. To perform an accurate wheel alignment, the suspension must be locked at a strictly defined “Normal Ride Height” pressure. Attempting to align a Ram 1500 without engaging this mode can result in the suspension adjusting mid-alignment, rendering the adjustments invalid and leading to rapid tire wear. For owners curious about other maintenance specs that impact alignment, such as torque values, referencing can be useful for cross-referencing legacy data.
Protection Strategy and Battery Logic
The ASCM employs a “Protection Strategy” mentioned in the Uconnect manuals. If the system detects high thermal load on the compressor (from repeated cycles) or low battery voltage, it will disable load leveling to preserve the vehicle’s ability to start.
- Implication: A “dead” air suspension may actually be a symptom of a dying battery. The Ram 1500 is highly sensitive to voltage. If the air suspension works only after the truck has been driven for a while (and the battery charged), the root cause is likely the battery, not the suspension. See for insights into the complex battery systems in newer Rams.
Electrical Topology: Fuses, Relays, and Power Distribution
Diagnosing a system that is completely unresponsive (no compressor sound, no light movement) requires a rigorous inspection of the electrical supply. The Ram 1500’s air suspension system draws significant current—often peaking at 40 Amps during compressor startup—making the fuse circuitry a common failure point.
Fuse Analysis: 4th Generation (DS) vs. 5th Generation (DT)
While the general function remains the same, the location and designation of fuses differ between the DS (2013-2018/Classic) and DT (2019+) platforms. Technicians must consult the specific lid diagram for the Power Distribution Center (PDC) under the hood.
Table 4.1: Critical Air Suspension Fuses (Common Configurations)
| Fuse ID | Amperage | Color | System Function | Typical Location | Failure Symptom |
| F05 | 40 Amp | Green (Cartridge) | Compressor Motor Power. This is the high-current feed for the pump motor. | Underhood PDC | Compressor will not run. System dead. |
| F50 | 20 Amp | Yellow (Micro) | ASCM Logic Power. Powers the control module’s brain (microprocessor). | Underhood PDC | No communication with module via OBD. “Service Air Suspension” immediately. |
| F87 | 10 Amp | Red (Micro) | Ignition/Wake-Up Signal. Often shared with Trailer Tow / Steering Column. | Underhood PDC | Module may not wake up with ignition. Steering wheel controls may also fail. |
Deep Dive on Fuse F05 (40A):
The F05 fuse is the most frequent casualty. It protects the compressor motor. If this fuse is blown, do not simply replace it. A blown 40A fuse indicates a massive over-current event, typically caused by:
- Mechanical Seizure: The piston in the compressor is stuck due to debris or thermal expansion.
- High Friction: The dryer beads are saturated with moisture and frozen (in winter), blocking airflow and forcing the motor to push against a “dead head” pressure.
- Electrical Short: Internal winding insulation failure in the motor.Action: Inspect the compressor and relay before assuming the fuse popped randomly.
Relay Logic
The air suspension relay is responsible for switching the high-current power from Fuse F05 to the compressor based on a low-current trigger signal from the ASCM.
- Location: In the underhood PDC. It is often a standardized relay shared with the horn or wipers.
- Diagnostic Trick: Swap the air suspension relay with the horn relay (if identical part numbers). If the horn stops working and the suspension starts, the relay was the fault.23
- Failure Mode: Relays can “weld” closed (compressor runs until battery dies) or “open” (compressor never runs).
Wiring Harness Vulnerabilities
The wiring harness running to the compressor (located behind the rear passenger wheel on DS models) is exposed to road spray, salt, and debris. Corrosion in the connector pins is a documented issue.
- Inspection: Unplug the main harness at the compressor. Check for “green crust” (copper oxide) on the pins. Clean with electrical contact cleaner and apply dielectric grease.
Advanced Diagnostics and Software Calibration (AlfaOBD & JScan)
For issues that persist beyond fuse replacements and HMI resets, the diagnosis moves into the digital realm. The Ram 1500’s ASCM is a “smart” module that stores proprietary “C-Code” (Chassis) DTCs that generic OBDII scanners cannot read. To access these, verify ride heights, and perform calibrations, specialized software is required. The two industry standards for Ram enthusiasts and independent shops are AlfaOBD and JScan.
AlfaOBD: The Power User’s Tool
AlfaOBD is an Android/Windows-based diagnostic software that rivals the dealer’s WiTech system in capability for Stellantis vehicles. It is particularly valued for its ability to reconfigure the Body Control Module (BCM).
Deleting the Air Suspension System
When an owner decides to remove the air suspension and install coil springs (a “delete”), the truck’s computer will continually search for the missing ASCM, throwing warning lights. AlfaOBD allows the user to tell the truck that it never had air suspension.
The “Delete” Procedure:
- Hardware: OBDLink MX+ or EX adapter is recommended. For 2018+ models, a Security Gateway (SGW) Bypass Module is required to write data to the CAN bus.
- Connection: Connect to the “Body Computer” (BCM).
- Navigation: Select “Car Configuration Change”.
- Parameter: Search for “P/T Chassis Net – ASCM (Air Suspension Control Module)”.
- Action: Change the value from “Enabled” to “Not Enabled”.
- Secondary Systems: You may also need to disable “Air Suspension” in the “ECU Config 3” or “Customer Programmable Features” sections to remove the menu from the Uconnect screen.
- Finalize: Perform a “Proxy Alignment” to synchronize the new configuration across all modules (IPC, BCM, RFHub).
- Physical Disconnect: Pull Fuse F50 and F87 to cut power to the now-dormant ASCM circuit.
Ride Height Calibration
If replacing a ride height sensor or a control module, the system must be calibrated.
- Menu: “Radio Frequency Hub (RFHub)” -> “Program/Compare” -> “Air Suspension Sensor Calibration” (Note: Menu location varies by year, sometimes under ASCM directly).
- Process: The software will ask you to measure the distance from the wheel center to the fender lip for all four wheels while on level ground. You input these values (in millimeters), and the system calculates the offset required to level the truck.
JScan: The Mobile Solution
JScan (OBD JScan) is an iOS/Android app that is highly popular for its user-friendly interface.
Capabilities:
- Nitrogen Operations: JScan includes specific macros for “Deflate to Reservoir” (ASCM-deflate into reservoir). This is crucial for replacing a strut without losing the expensive nitrogen charge. It pumps the gas from the strut back into the central tank.
- Tire Size & Speedometer: If an owner installs larger tires (e.g., 35-inch), the speedometer will be incorrect, and the transmission shift points will be off. This also affects the air suspension, which relies on speed data for “Aero Mode.” JScan allows for easy recalibration of tire size, ensuring the entire vehicle logic remains synchronized.5
Failure Modes and Environmental Factors: The “Cold Weather” Syndrome
The Achilles’ heel of the Ram 1500 air suspension is extreme cold. The system’s reliability drops precipitously when temperatures fall below freezing, leading to the widespread reputation of the system being “fair-weather only.”
The Thermodynamics of Failure
Although the system (especially on the DT platform) is described as “closed” and charged with nitrogen, leaks eventually develop. When nitrogen leaks out, the compressor must pull in outside air to maintain pressure. Outside air contains humidity.
- Mechanism: When this humid air enters the system, it passes through the dryer. Eventually, the desiccant beads become saturated. In sub-zero temperatures, this moisture freezes inside the valve block (the distribution manifold) or the plastic airlines.
- Symptom: The valve block solenoids freeze in the closed or open position. The truck may be stuck “down” (slammed) or “up” (max height). The compressor overheats trying to push air against a block of ice, blowing Fuse
The “Nitrogen Purge” Solution
To fix a system compromised by moisture, simply thawing it is not enough; the moisture remains.
- Evacuation: The system must be fully evacuated (vacuumed down) to remove air and moisture.
- Recharge: It must be refilled with Class 5 Purity Nitrogen (99.999% pure).
- Pressure: The reservoir typically requires a charge of roughly 175 psi (varies by service bulletin).
- DIY/Field Fixes: Some users inject a small amount of air brake antifreeze (alcohol-based) into the intake line. While effective at lowering the freezing point of the moisture, this can degrade the rubber seals and the desiccant membrane over time, voiding warranties.
Leak Detection
Leaks are the root cause of most burnout failures.
- Method: A spray bottle with soapy water is the most effective tool.
- Target Areas:
- Top of the Struts: Where the air line enters the elbow fitting.
- Valve Block: The manifold where all lines converge.
- Rear Air Bags: Look for fold-crease cracks in the rubber where the bag rolls over the piston.
Repair Strategy: Fix, Replace, or Delete?
Owners facing a $3,000 repair estimate often weigh the pros and cons of keeping the air system versus converting to coil springs.
OEM Repair Economics
- Cost: A replacement compressor and valve block assembly (often sold as one unit on newer models) retails for $1,200 – $1,800 (OEM Mopar).
- Labor: Dealership labor adds significantly to this.
- Pros: Retains load leveling and factory ride quality.
- Cons: High probability of recurrence if the root cause (leak) isn’t found.
7.2 Aftermarket Components
- Sourcing: Companies like Suncore, Arnott, and Aerosus offer replacement compressors for $200 – $500.
- Viability: These are cost-effective but often lack the longevity of the Hitachi/Continental OEM units. They are a good “flip” solution but risky for long-term ownership.
7.3 The “Delete” Conversion
- Concept: Removing the airbags and installing standard coil springs (like a lower-trim Ram 1500).
- Cost: High-quality kits (e.g., Strutmasters, Monroe, BDS) range from $1,500 – $1,600.
- Pros: “One and done” fix. No more air leaks, no more fuses blowing. Reliable in -40°F weather.
- Cons: Loss of auto-leveling. If you tow a heavy trailer, the rear will squat (sag) significantly compared to the air suspension. You may need to add helper bags or weight distribution hitches.
- Ride Quality: The ride is generally stiffer and less “floating” than the air suspension.
Preventative Maintenance and Best Practices
To prolong the life of the air suspension system, specific maintenance steps can be taken, though Ram does not list them in the standard owner’s manual.
- Nitrogen Refresh: Ideally, the system should be purged and recharged with fresh nitrogen every 2-3 years, especially in humid climates, to ensure the desiccant doesn’t become saturated.
- Visual Inspection: Inspect the rubber air bags for small cracks during every oil change. Catching a leak early saves the compressor.
- Battery Health: Maintain a healthy battery. A weak battery causes low-voltage logic errors in the ASCM.
- Use Jack Mode: Never lift the truck without enabling Tire Jack Mode. This simple habit prevents the most common cause of logic lockouts.
Conclusion
The “Ram 1500 air suspension reset” is a multi-layered procedure that ranges from a simple 40-second button hold to a complex software reconfiguration using OBDII tools. While the HMI reset and battery disconnect can clear transient errors, they are often temporary fixes for underlying mechanical issues such as leaks, moisture intrusion, or electrical fatigue.
For the Ram owner, the path forward depends on climate and usage. For those in temperate zones who tow often, maintaining the air system (with OEM parts and nitrogen fills) offers superior utility. For those in the frozen north facing “Service Air Suspension” messages every winter, the conversion to a coil-spring setup, managed via AlfaOBD to silence the dashboard, remains the most pragmatic long-term solution. Understanding the electrical topology (Fuse F05) and the digital architecture (ASCM logic) empowers the owner to make the right choice between repair and replacement.