How to Reset Dpf Pressure Sensor: A Step-by-Step Guide
Resetting a DPF pressure sensor can seem tricky. But it’s simpler than you think.
A Diesel Particulate Filter (DPF) helps reduce emissions in diesel engines. Over time, the sensor can get clogged or malfunction. Resetting the DPF pressure sensor ensures your vehicle runs smoothly. It also helps maintain efficiency and reduce emissions. In this blog, we’ll guide you through the steps to reset the DPF pressure sensor.
Whether you’re a car enthusiast or a regular driver, this easy-to-follow guide will help. Let’s dive in and keep your vehicle in top shape.
Tools Needed
Resetting a DPF (Diesel Particulate Filter) pressure sensor requires specific tools. These tools ensure the process is smooth and effective. Below is a detailed list of the essential and optional tools you might need.
Essential Tools
Certain tools are crucial for resetting a DPF pressure sensor. These tools include:
- OBD2 Scanner: This tool reads and clears error codes.
- Wrench Set: Necessary for loosening and tightening bolts.
- Screwdrivers: Both flat-head and Phillips types are needed.
- Safety Gloves: Protect your hands from dirt and injury.
- Service Manual: Provides specific instructions for your vehicle model.
Optional Tools
Some tools are not essential but can make the job easier. Consider having:
- Digital Multimeter: Checks the sensor’s electrical connections.
- Compressed Air: Cleans out any debris from the sensor.
- Torque Wrench: Ensures bolts are tightened to the correct specification.
- Protective Eyewear: Shields your eyes from dirt and debris.
Safety Precautions
Resetting the Dpf (Diesel Particulate Filter) pressure sensor can be a bit tricky, especially if you’re not familiar with car mechanics. Safety should always be your top priority. Before you start, take a moment to understand the important safety precautions. Let’s dive into how you can keep yourself and your vehicle safe during this process.
Personal Safety
Your personal safety is paramount. Here are some key steps to ensure you stay safe:
- Wear Protective Gear: Always wear gloves and safety glasses. They protect your hands and eyes from dirt, debris, and any accidental splashes of fluids.
- Work in a Well-Ventilated Area: Ensure your workspace is well-ventilated. Diesel fumes can be harmful if inhaled in large quantities.
- Disconnect the Battery: Before starting, disconnect the vehicle’s battery to avoid any electrical shocks or short circuits.
- Avoid Loose Clothing: Wear fitted clothes to prevent them from getting caught in moving parts.
Vehicle Safety
Your vehicle is an investment, and you want to ensure it stays in good condition. Follow these tips to keep your car safe:
- Use the Right Tools: Ensure you have the correct tools for the job. Using improper tools can damage parts of your vehicle.
- Follow the Manufacturer’s Instructions: Always refer to your vehicle’s manual for specific instructions on resetting the Dpf pressure sensor.
- Secure the Vehicle: Make sure the car is on a flat surface and use wheel chocks to prevent it from moving while you work.
- Check for Leaks: After resetting the sensor, check for any fluid leaks. This can indicate an issue that needs addressing.
Remember, safety first! By following these precautions, you’ll ensure a smooth and safe process while resetting your Dpf pressure sensor. Happy fixing!
Locating The Dpf Pressure Sensor
Struggling with your DPF pressure sensor? Don’t worry, you’re not alone. Many car owners face this challenge, but with a little guidance, you’ll be back on the road in no time. The first step to resetting your DPF pressure sensor is finding it. Let’s dive into how you can locate this elusive sensor.
Under The Hood
The DPF pressure sensor is usually found under the hood of your car. To locate it, follow these steps:
- Open the Hood: Pop the hood using the release lever inside your car. Secure it with the hood prop rod.
- Find the Engine: Look for the engine. The DPF pressure sensor is typically near the engine block.
- Locate the Exhaust System: Trace the exhaust system from the engine. The sensor is often attached to the exhaust pipe.
- Spot the Sensor: Look for a small device with wires connected to it. This is the DPF pressure sensor.
Feeling a bit lost? It’s completely normal. Cars can be confusing, but with patience, you’ll get there. Remember, the sensor is usually near the exhaust system, so keep an eye out for it.
Specific Models
Different car models have their DPF pressure sensors in varying locations. Let’s explore a few:
| Car Model | Sensor Location |
|---|---|
| Toyota Corolla | Near the front of the exhaust system, close to the catalytic converter |
| Ford F-150 | On the passenger side of the engine, near the firewall |
| Honda Civic | Attached to the exhaust pipe, just after the turbocharger |
Is your car model not listed above? No problem. Check your car’s manual or look online for specific information about your model. Each car is unique, but the sensor is usually in a similar location.
In conclusion, finding the DPF pressure sensor might seem like a daunting task, but with these tips, you’ll be able to locate it with ease. Take your time, follow the steps, and before you know it, you’ll be resetting your sensor like a pro.
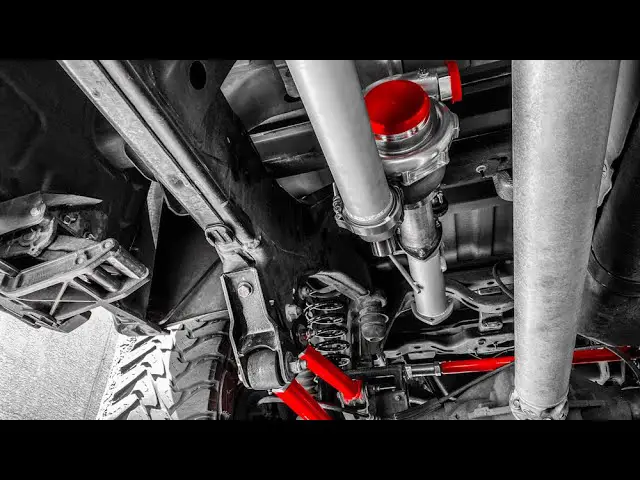
Credit: www.youtube.com
Removing The Sensor
Resetting the DPF pressure sensor can be crucial for your vehicle’s performance. Removing the sensor is a key step in this process. It requires careful handling and attention to detail to avoid damage and ensure proper reinstallation. Let’s break down the process into manageable steps.
Disconnecting The Battery
First, disconnect the battery to prevent any electrical issues. Locate the battery and find the negative terminal. Use a wrench to loosen the bolt on the negative terminal. Carefully remove the cable and secure it away from the battery. This step ensures safety while working with the sensor.
Detaching The Sensor
Next, locate the DPF pressure sensor. It is usually near the exhaust system. Check your vehicle’s manual for the exact location. Once found, identify the connector attached to the sensor. Press the release tab on the connector and pull it gently. Avoid using too much force to prevent breaking the connector.
Now, use a wrench to unscrew the bolts holding the sensor. Keep track of these bolts for reinstallation. Carefully lift the sensor from its position. Ensure no wires or hoses are connected before removing it completely. Handle the sensor with care to avoid any damage.
Cleaning The Sensor
Cleaning the DPF pressure sensor is crucial for maintaining your vehicle’s performance. Dirt and debris can affect its accuracy, leading to issues. Regular cleaning ensures the sensor works properly. Follow these steps to clean your DPF pressure sensor effectively.
Cleaning Solutions
Use a suitable cleaning solution for the DPF sensor. Choose a sensor-safe cleaner. Avoid harsh chemicals that can damage the sensor. Sensor cleaning sprays from auto parts stores work well. Ensure the cleaner is designed for delicate parts.
Proper Techniques
Disconnect the sensor before cleaning. This prevents electrical damage. Gently spray the cleaning solution onto the sensor. Use a soft brush to remove dirt. Be careful not to scrub too hard. Allow the sensor to dry completely before reinstallation.
Avoid using compressed air directly on the sensor. This can damage sensitive parts. Always follow the manufacturer’s instructions for cleaning. Regular cleaning ensures your sensor stays accurate and reliable.

Credit: www.dpfpartsdirect.com
Reinstalling The Sensor
So, you’ve managed to remove the DPF pressure sensor, and now it’s time to reinstall it. This process might seem a bit intimidating, but with a little patience and attention to detail, you can do it. Follow these steps to get your vehicle back in top shape. Let’s dive into the specifics of reinstalling the sensor.
Securing The Sensor
First things first, you need to secure the sensor in its place. This is crucial because a loose sensor can cause inaccurate readings and further complications. Here’s how you can do it:
- Position the sensor in its original spot. Make sure it aligns perfectly with the mounting points.
- Use the screws you removed earlier. Tighten them just enough to hold the sensor firmly, but don’t overdo it. Over-tightening can damage the sensor or its mount.
- Double-check the position. Ensure the sensor is seated properly and not at an angle.
Take your time with this step. A secure sensor is vital for accurate performance.
Reconnecting The Battery
Now that the sensor is securely in place, it’s time to reconnect the battery. This step is straightforward but essential for completing the reset process. Follow these simple steps:
- Locate the battery terminals. You’ll typically find them under the hood, but in some cars, they might be in the trunk.
- Reconnect the positive terminal first. Slide the clamp over the terminal and tighten it with a wrench. Make sure it’s snug but not overly tight.
- Next, reconnect the negative terminal. Again, slide the clamp over the terminal and tighten it securely.
- Once both terminals are connected, double-check to ensure they are secure and not loose.
Reconnecting the battery is a crucial step because it allows the vehicle’s computer to reset and start fresh. After this, start your car and let it idle for a few minutes. This helps the system recalibrate and recognize the newly installed sensor.
There you have it! By following these steps, you’ll have successfully reinstalled your DPF pressure sensor. It might take a bit of effort, but the reward is a vehicle that runs smoothly and efficiently. Plus, you’ve just saved yourself a trip to the mechanic. Isn’t that a win?
Testing The Sensor
Resetting a DPF (Diesel Particulate Filter) pressure sensor isn’t rocket science, but it does require some basic know-how. Before diving into the reset process, it’s crucial to test the sensor. Why, you ask? Well, testing helps you understand if the sensor is truly faulty or if something else is amiss. Let’s break it down into simple steps, ensuring you can follow along even if English isn’t your first language.
Initial Checks
Before you grab your tools, let’s do some initial checks. These simple steps can save you time and effort:
- Visual Inspection: Start by examining the sensor and its wiring. Look for any obvious signs of damage or corrosion. A damaged wire or connector can often be the culprit.
- Consult the Manual: Check your vehicle’s manual for the location of the DPF pressure sensor. Trust me, every vehicle is a bit different. The manual will also provide specific instructions related to your car model.
- Battery Check: Ensure your vehicle’s battery is fully charged. A weak battery can cause erroneous sensor readings. Think of it as giving your car a good breakfast before a busy day.
Troubleshooting
Now that the initial checks are done, let’s move to troubleshooting. This is where you’ll determine if the sensor is functioning correctly or if it needs a reset.
- Use a Diagnostic Tool: A diagnostic tool is like a doctor’s stethoscope for your car. Connect it to your vehicle’s OBD-II port. This tool will read the sensor data and display any fault codes. Make sure you have a basic understanding of the tool; a quick online search or the tool’s manual can help.
- Check Sensor Voltage: With the ignition on, use a multimeter to check the sensor’s voltage. The voltage should be within the range specified in your vehicle’s manual. If the voltage is off, the sensor might be faulty.
- Inspect for Blockages: Sometimes, the sensor isn’t the problem; it’s the DPF. Check for any blockages in the filter that could affect the sensor readings. A clogged DPF can lead to incorrect pressure readings.
- Resetting the Sensor: If everything checks out but the sensor still shows an error, it might be time to reset it. This can usually be done through the diagnostic tool. Follow the tool’s instructions carefully. If you’re unsure, don’t hesitate to consult a professional mechanic.
Remember, patience is key. Testing and troubleshooting require a bit of time and attention to detail. But once you get the hang of it, you’ll feel like a car maintenance ninja. And who doesn’t want to feel that way?
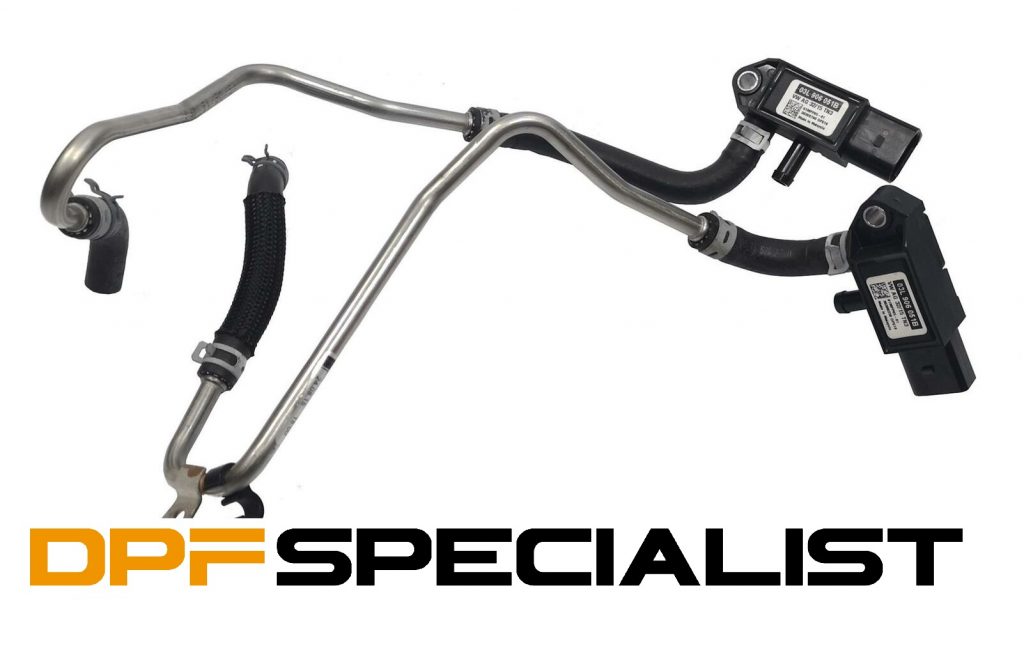
Credit: www.dpfspecialist.co.uk
Maintenance Tips
Maintaining your DPF pressure sensor is crucial for your vehicle’s performance. Regular upkeep ensures it functions properly and extends its lifespan. Below are some essential maintenance tips to follow.
Regular Inspection
Inspect your DPF pressure sensor regularly. Look for any signs of wear or damage. Ensure the sensor and its connections are clean. Dirt and debris can affect its accuracy. Check for leaks in the connecting hoses. Replace any damaged parts immediately.
Professional Servicing
Schedule professional servicing at least once a year. Technicians have the tools to diagnose and fix issues. They can clean or replace the sensor if needed. This ensures optimal performance and prevents future problems. Trusting professionals saves time and ensures safety.
Frequently Asked Questions
How Do I Know If My Dpf Pressure Sensor Is Bad?
Check for warning lights on the dashboard. Notice unusual engine performance, poor fuel economy, or difficulty accelerating. Inspect for exhaust leaks.
How Do I Clear My Dpf Warning?
To clear a DPF warning, drive at highway speeds for 15-30 minutes. Ensure RPM stays above 2500.
How Do You Clear A Dpf Sensor?
To clear a DPF sensor, perform a forced regeneration. Use a diagnostic tool to initiate the process. Regularly maintain your vehicle to prevent future clogs.
How To Do Dpf Reset?
To reset a DPF, connect a diagnostic tool to the vehicle’s OBD-II port. Follow the tool’s instructions to initiate the reset process. Ensure the vehicle is in a safe and well-ventilated area.
Conclusion
Resetting your DPF pressure sensor is essential for car maintenance. Follow the steps carefully to ensure proper functioning. Regular checks can prevent future issues. Remember, a clean sensor means better vehicle performance. Save money on repairs by doing it yourself.
Stay proactive with your vehicle’s health. Keep your car running smoothly with this easy guide. Happy driving!


![Dodge Journey Won’t Start & Brake Pedal is Hard: Fixing the Issue [2026]](https://truckguider.com/wp-content/uploads/2026/03/dodge-journey-won-t-start-brake-pedal-ha-featured.webp)

