2014 GMC Sierra Serpentine Belt Diagram: Routing Guide (2026)

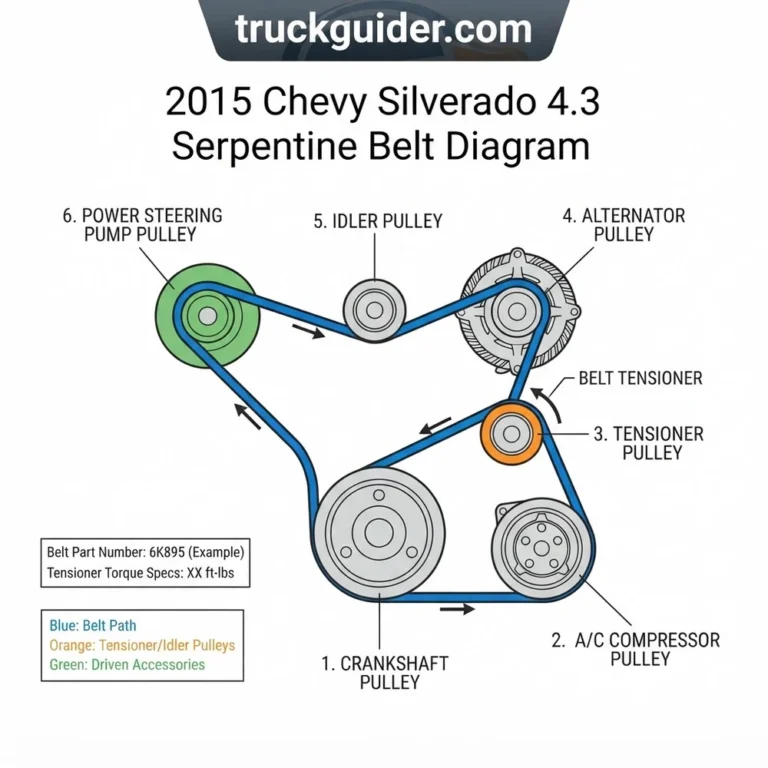
On the 2014 GMC Sierra (4.3L, 5.3L, and 6.2L EcoTec3), the serpentine belt routes ribbed-side down over the crankshaft pulley, around the water pump, up over the high-mounted alternator, under the grooved idler pulley, and across the automatic belt tensioner. Rotate the 15mm tensioner bolt counterclockwise to relieve spring pressure during installation.
📌 Key Takeaways
- 2014 Sierra 5.3L/6.2L V8 engines use GM OEM part #12626078 (Gates K060935, 6-rib, 93.5-inch effective length).
- Separate stretch-fit belt (GM #12658178) drives the A/C compressor directly from the inner crankshaft pulley groove.
- Automatic belt tensioner requires a 15mm socket; torque tensioner mounting bolt to 37 lb-ft (50 Nm) if replaced.
- Common squeal stems from dry bearings in the upper idler pulley or belt rib misalignment across the alternator.
- Inspect belt at 60,000 miles; replace if rib depth loss exceeds 10% or if more than three cracks per inch appear.
The 2014 model year marked the introduction of General Motors’ K2XX platform for half-ton pickups, debuting the fifth-generation EcoTec3 engine family. Whether working on the 4.3L LV3 V6, the 5.3L L83 V8, or the 6.2L L86 V8, the Front End Accessory Drive (FEAD) system deviates significantly from previous Vortec architectures. Most notably, the 2014 GMC Sierra 1500 utilizes Electric Power Steering (EPS), eliminating the traditional hydraulic power steering pump from the accessory drive loop. Consequently, the front engine configuration relies on a dual-belt architecture: a primary multi-rib serpentine belt driving the water pump and alternator, and an isolated, secondary stretch-fit belt powering the air conditioning compressor. Navigating this configuration requires a precise understanding of component placement, belt specifications, and proper tensioning protocols.
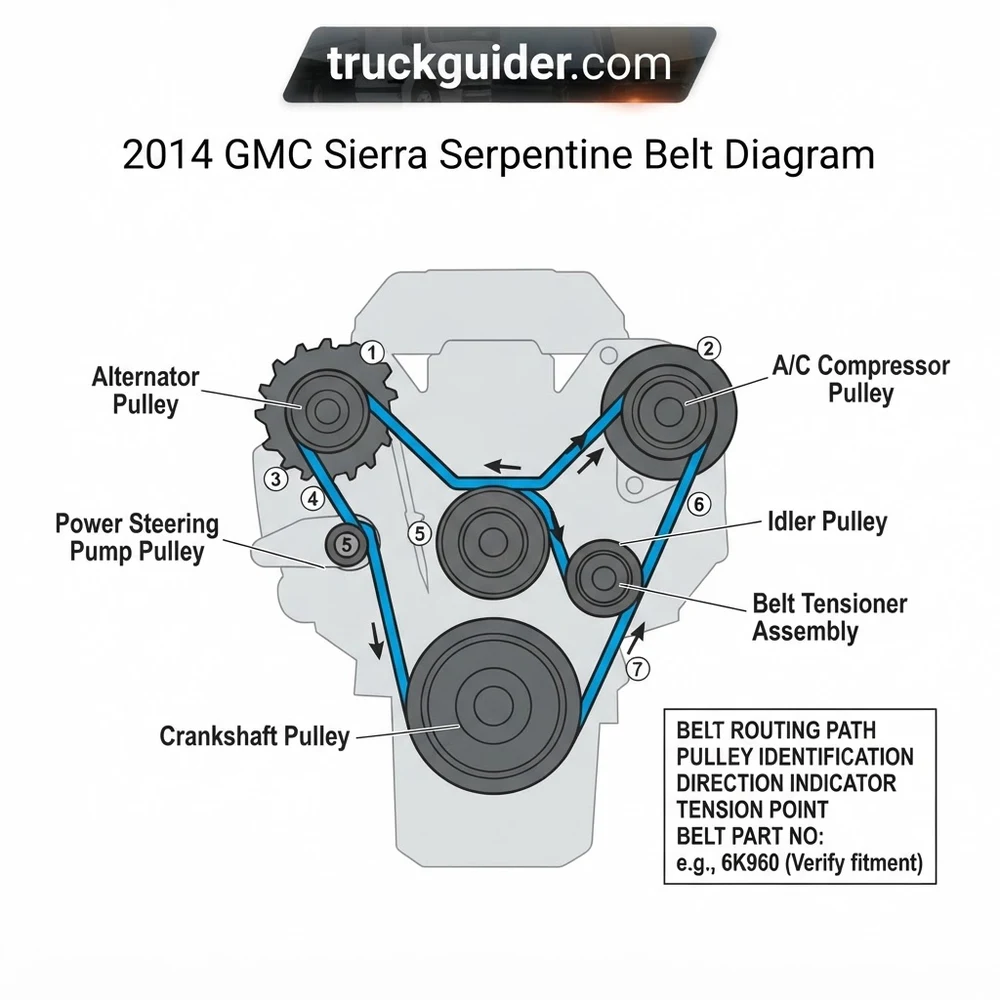
2014 GMC Sierra Serpentine Belt Diagram and Pulley Layout



The front accessory drive on the 2014 GMC Sierra EcoTec3 platform is engineered around a compact, high-efficiency geometry designed to minimize parasitic drag and optimize belt wrap angles. Understanding the role and position of each component within the 2014 gmc sierra serpentine belt diagram ensures that drive torque from the engine crankshaft is transferred smoothly to all high-load accessories without slippage or premature bearing failure.


Crankshaft Harmonic Balancer and Drive Geometry


The engine crankshaft pulley (harmonic balancer) serves as the primary mechanical driver for both accessory circuits. Cast with dual drive surfaces, the harmonic balancer features an outer six-rib track that drives the primary accessory circuit and an inner three-rib track dedicated exclusively to the air conditioning compressor. Because the Gen V small-block architecture utilizes a keyed crankshaft snout with high-torque friction washers, verifying that the harmonic balancer exhibits zero axial runout is critical during belt replacement. Radial deflection here will quickly degrade the outer ribs of your serpentine belt. For procedures detailing balancer inspection, reference our guide on crankshaft harmonic balancer replacement.
Water Pump and Alternator Pulley Integration
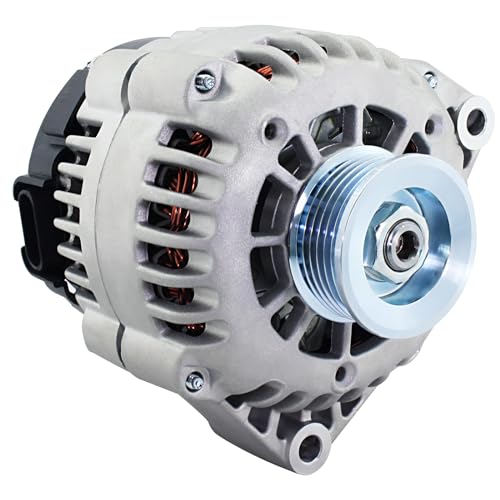
The water pump assembly on Gen V engines sits centrally on the front engine cover, cast directly into the aluminum housing. Unlike earlier Vortec engines where the water pump was driven by the smooth backside of the belt in a reverse-rotation setup, the 2014 EcoTec3 water pump pulley features a grooved design and rotates clockwise, driven directly by the ribbed inner surface of the primary serpentine belt. Directly above and to the passenger side sits the high-output alternator. Depending on the vehicle’s specific equipment package (such as snowplow prep or high-amperage trailering packages), the alternator pulley may incorporate an Overrunning Alternator Decoupler (OAD) or a one-way clutch to absorb torsional crankshaft vibration during aggressive downshifts. Diagnostics for these charging units are detailed in our overview of alternator decoupler pulley diagnostics.
Idler Pulley Alignment and Tensioner Placement
To maintain proper surface contact across both the alternator and water pump drive surfaces, the primary circuit utilizes a fixed, smooth idler pulley alongside an automatic spring-damped belt tensioner. The idler pulley is mounted high on the driver-side accessory bracket, redirecting the belt return path to achieve more than 120 degrees of wrap around the water pump pulley. The automatic belt tensioner is positioned between the water pump and the lower alternator run. It incorporates an internal coil spring and friction damping mechanism that maintains continuous, dynamic mechanical tension across varying engine loads and thermal expansions.
The 2014 GMC Sierra 1500 platform does not feature a deck engagement or manual adjustment bracket. All primary belt tensioning is dynamically managed by the internal torsional spring of the automatic tensioner assembly. Never attempt to adjust dynamic belt tension using bracket shims.
Step-by-Step 2014 GMC Sierra Belt Routing Path Instructions



Replacing the main accessory drive belt requires precise routing over both grooved and smooth pulley faces to ensure correct accessory rotational direction. Attempting to install the belt without following the exact 2014 gmc sierra serpentine belt diagram can cause the water pump to run backwards or bind the tensioner arm, resulting in rapid thermal overload.


Accessory Drive Preparation and Inspection


Before routing the new belt, disconnect the negative battery terminal to eliminate any risk of accidental starter engagement. Clear the forward engine compartment by releasing the upper radiator shroud clips and removing the intake air tube between the throttle body and the mass air flow sensor housing. Thoroughly inspect all pulley grooves for embedded debris, oil residue, or mechanical wear.
- Crankshaft Pulley Seating: Stand facing the front of the engine. Drop the lower loop of the new 6-rib belt downward, seating it firmly into the forward (outer) grooved sheave of the crankshaft harmonic balancer. Ensure the belt ribs seat uniformly into the balancer grooves without riding on the outer pulley retaining lips.
- Upward Route to Alternator: Draw the right-hand (passenger-side) run of the belt vertically upward from the crankshaft pulley. Guide this section over the top of the alternator pulley, confirming complete grooved engagement.
- Routing Through the Dynamic Tensioner: Route the length descending from the alternator pulley underneath and around the grooved pulley of the automatic belt tensioner assembly. The inner ribbed face of the belt must contact the ribbed tensioner pulley.
- Water Pump Drive Wrap: Pull the belt horizontally across the front casting, threading it over the top of the grooved water pump pulley. The ribbed surface of the belt must align precisely into the water pump’s machined tracks.
- Driver-Side Idler Pulley Under-Run: Guide the remaining left-hand run coming up from the crankshaft balancer around the smooth underside of the driver-side idler pulley. The back (smooth side) of the serpentine belt contacts the flat bearing face of this pulley to establish the required wrap angle.
- Tensioner Relief and Final Engagement: Fit a 15mm box-end wrench or long-handle serpentine belt tool onto the hex lug cast into the body of the automatic tensioner arm. Apply firm, controlled rotational force clockwise to compress the internal tensioner spring. With the tensioner collapsed, slide the slack belt over the final smooth idler pulley.
- Tension Release and Seating Verification: Slowly ease the tensioner back until it firmly engages the belt. Do not allow the tensioner arm to snap back under unconstrained spring pressure, as this can crack the cast aluminum housing. Inspect every pulley with a mirror and light to confirm the belt ribs are centered in their respective tracks.
Misaligning the belt by just one rib on any pulley will cause edge-fraying, cord severance, or thrown belts within several miles of operation. Confirm that the belt is fully seated across all grooved pulleys before starting the engine.
Automatic Belt Tensioner Operation and Stretch Belt Installation

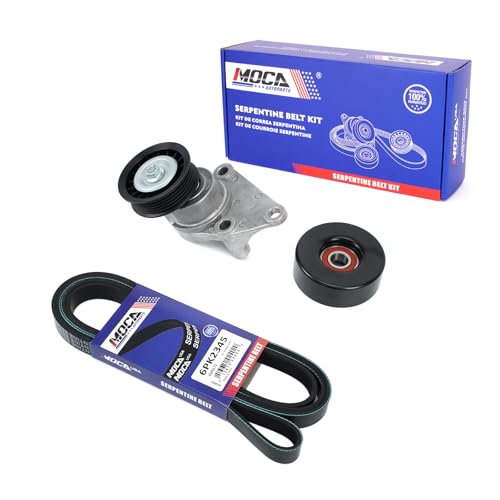

The accessory drive system on the 2014 Sierra relies on two distinct tensioning methodologies: an active, self-adjusting mechanical tensioner for the primary serpentine circuit, and a specialized stretch-fit design for the air conditioning circuit.
Automatic Tensioner Travel Limits and Torque Specs
The primary belt tensioner assembly contains dynamic operating range indicator marks cast into the base housing and the movable arm. When a new belt of correct OEM dimensions is installed, the indicator arrow must sit between the maximum and minimum operational limit marks. If the indicator lands on or beyond the wear stop line, the belt has stretched beyond its working tolerance, or an incorrect belt length was installed. When replacing a damaged tensioner assembly, tighten the mounting bolts according to manufacturer specifications to avoid stripping the aluminum engine block threads.


Automatic Belt Tensioner Bolt Torque: 43 lb-ft (58 N·m)
Fixed Idler Pulley Bolt Torque: 37 lb-ft (50 N·m)
Crankshaft Balancer Center Bolt (Installation Step): 110 lb-ft (150 N·m) plus an additional 120-degree torque angle pass.
Secondary A/C Stretch-Fit Belt Installation Methodology
The air conditioning compressor on 2014 EcoTec3 engines is mounted low on the passenger side of the block. Unlike earlier platforms, it does not utilize a spring-loaded tensioner. Instead, it relies on a stretch-fit belt that runs directly between the inner track of the crankshaft balancer and the A/C compressor pulley. Stretch belts are constructed with specialized polyamide tensile cords that allow momentary elongation during installation and maintain constant, calibrated operating tension throughout their service life.
Do not attempt to pry a stretch belt onto the pulleys with screwdrivers, pry bars, or generic levers. Doing so bends the pulley flanges and fractures the internal tensile cords of the belt. Removal is performed by severing the old belt with a utility knife, as stretch-fit belts are strictly non-reusable once unseated. For installation, secure an approved stretch-belt installation tool (such as GM tool EN-50654 or a universal tool like Lisle 59370) directly to the crankshaft balancer rim. Place the new stretch belt over the A/C compressor pulley grooves, hook the lower lead onto the installation tool guide, and rotate the crankshaft clockwise using a 24mm socket on the center balancer bolt. The tool guides the belt up, over, and down into the inner balancer groove without damaging the elastomer.
2014 GMC Sierra Serpentine Belt Part Numbers and Size Reference


Selecting the correct belt length and rib configuration is essential for keeping the automatic tensioner within its functional travel window. The table below lists factory OEM and trusted aftermarket replacement numbers across all 2014 GMC Sierra 1500 and mechanical twin 2014 Chevrolet Silverado 1500 EcoTec3 platforms.
| Engine / RPO | Drive Circuit | Rib Count & Profile | GM OEM Part # | Gates Part # | Effective Length |
|---|---|---|---|---|---|
| 4.3L V6 (LV3) | Primary Accessory | 6-Rib (Standard PK) | 12637204 | K060760 | 76.0 in (1930 mm) |
| 4.3L V6 (LV3) | A/C Stretch Belt | 3-Rib (Stretch PK) | 12639088 | K030349SF | 35.1 in (892 mm) |
| 5.3L V8 (L83) | Primary Accessory | 6-Rib (Standard PK) | 12626075 | K060768 | 76.8 in (1951 mm) |
| 5.3L V8 (L83) | A/C Stretch Belt | 3-Rib (Stretch PK) | 12658178 | K030375SF | 37.6 in (956 mm) |
| 6.2L V8 (L86) | Primary Accessory | 6-Rib (Standard PK) | 12626075 | K060768 | 76.8 in (1951 mm) |
| 6.2L V8 (L86) | A/C Stretch Belt | 3-Rib (Stretch PK) | 12658178 | K030375SF | 37.6 in (956 mm) |
Dimensional Sizing and Rib Profile Criteria
Modern EcoTec3 serpentine belts use Ethylene Propylene Diene Monomer (EPDM) synthetic rubber. Unlike older neoprene compounds that crack when worn, EPDM gradually sheds material from the rib profiles, much like a tire tread. Use a digital rib depth gauge or optical profile tool to measure wear. If rib depth drops by more than 0.8mm or if cords separate, replace the belt immediately. If replacing the water pump during maintenance, adhere to all manufacturer procedures found in our cooling system water pump torque specifications guide to ensure proper pulley alignment.


1500 EcoTec3 vs 2500HD Pulley Diagram and Drive Differences
Technicians often encounter confusion during the 2014 model year due to General Motors’ split-generation production rollout. While the 2014 Sierra 1500 moved to the redesigned K2XX chassis with EcoTec3 engines, the 2014 Sierra 2500HD and 3500HD heavy-duty models remained on the legacy GMT900 platform, carrying over the 6.0L Vortec V8 (L96) or 6.6L Duramax Diesel (LML).
| Feature / Specification | 2014 GMC Sierra 1500 (K2XX) | 2014 GMC Sierra 2500HD / 3500HD (GMT900) |
|---|---|---|
| Base Engine Architectures | 4.3L LV3 / 5.3L L83 / 6.2L L86 (Gen V) | 6.0L L96 Vortec (Gen IV) / 6.6L LML Duramax |
| Steering Assist Mechanism | Electric Power Steering (Rack-mounted EPS) | Hydraulic Power Steering (Belt-driven pump) |
| Power Steering Pulley Present | No (Removed from FEAD loop) | Yes (Upper driver side on 6.0L Vortec) |
| A/C Compressor Drive Type | 3-Rib Dedicated Stretch-Fit Belt | 4-Rib Belt with Dedicated Spring Tensioner |
| Primary Belt Routing Paths | Crank – Tensioner – Alt – WP – Idler | Crank – Fan/WP – PS Pump – Alt – Tensioner – Idler |
Platform Divergence: K2XX EcoTec3 vs GMT900 HD Architecture


Because the 2014 2500HD/3500HD retained hydraulic power steering to handle heavy front-axle loads, its serpentine belt path must route over a high-load power steering pump pulley. Consequently, the primary belt for the 6.0L L96 Vortec measures significantly longer (typically 92.5 to 93.5 inches, depending on whether it has single or dual alternators). Attempting to use a 2014 Sierra 1500 belt diagram or part number on an HD chassis will result in a belt that is far too short to clear the accessory bracket.
Pulley Component Structural Discrepancies
Furthermore, the 2014 HD truck lineup uses a traditional mechanical spring-loaded tensioner for the A/C compressor circuit rather than a stretch belt. The compressor belt on a 2500HD runs over a dedicated, smooth idler and a lower-mounted tensioner pulley. If your 2014 engine bay features a hydraulic power steering fluid reservoir and pump pulley on the upper driver-side bracket, you are servicing a GMT900 platform, and the K2XX EcoTec3 stretch belt procedures do not apply.
2014 GMC Sierra Serpentine Belt Diagram Diagnostic Solutions
How do you check automatic tensioner wear on a 2014 GMC Sierra?
Inspect the cast alignment marks located on the upper edge of the tensioner housing body. The base casting features three reference lines indicating maximum relaxed position, normal operating zone, and maximum travel limit. If the raised ridge on the pivoting arm points past the operating zone line while the belt is installed, the belt has either stretched or the internal torsional spring has lost calibrated tension. Additionally, with the belt removed, rotate the tensioner pulley by hand. Any bearing roughness, axial free play, or metal-to-metal noise indicates internal dry-bearing failure, requiring complete tensioner assembly replacement.
Can you reuse the A/C compressor stretch-fit belt after removal?
No, the secondary stretch-fit belt on the 2014 GMC Sierra 1500 cannot be reused. Stretch belts are manufactured with elastic polyamide cords designed to yield and permanently seat during the initial roll-on installation. Once removed or cut off, the internal tensile matrix is structurally compromised. Reinstalling a previously stretched belt will cause insufficient dynamic tension, leading to belt slip, extreme thermal buildup, and eventual throw-off under high A/C compressor head pressures.
What is the cause of chirping noise after installing a new OEM belt?


Chirping on newly installed belts on the 2014 EcoTec3 platform is typically caused by pulley misalignment, pulley groove contamination, or an overrunning alternator decoupler (OAD) that has seized. Because the water pump and alternator are aligned on a single plane, an axial deflection of as little as 1/32-inch on the fixed idler pulley will cause the belt ribs to chirp as they enter the alternator pulley grooves. Clean all pulleys with a wire brush and brake cleaner, verify with a straightedge that the idler pulley bearing hasn’t cocked in its mount, and confirm that the alternator decoupler pulley rotates freely in one direction while locking in the other.
Does the 2014 GMC Sierra 1500 belt diagram change with high-output alternators?
No, the 2014 gmc sierra serpentine belt diagram remains geometrically identical across standard and high-output alternator options (such as the 170-amp or 220-amp GM options). The accessory bracket casting and pulley diameters maintain the same centerline coordinates. However, models equipped with dual-alternator commercial configurations (standard on select chassis cabs or fleet upfitter packages) use a dedicated auxiliary belt loop running from an extra balancer sheave to the secondary high-mount driver-side alternator, requiring an independent secondary tensioner and routing diagram.
2014 Gmc Sierra Serpentine Belt Diagram: Frequently Asked Questions
What is the part number for the 2014 gmc sierra serpentine belt diagram?
For the 2014 GMC Sierra 1500 with the 5.3L or 6.2L V8, the OEM main accessory belt part number is GM 12626078 (ACDelco 6K935). The secondary A/C compressor stretch belt is GM 12658178. Aftermarket equivalents include Gates K060935 for the main drive and Gates K040378SF for the air conditioning circuit.
How do I route the 2014 gmc sierra serpentine belt diagram correctly?
Loop the belt ribs into the lower crankshaft pulley groove, extend it up and over the water pump pulley, wrap it around the top alternator pulley, route it underneath the grooved idler pulley, and guide the slack over the belt tensioner pulley while holding tensioner arm counterclockwise with a 15mm wrench.
What size belt does 2014 gmc sierra serpentine belt diagram use?
The main serpentine drive on the 2014 GMC Sierra 5.3L V8 utilizes a 6-rib belt with an outside circumference of 94.07 inches (effective length 93.5 inches, width 0.82 inches). The auxiliary A/C stretch belt is a 4-rib design with an effective length of approximately 37.8 inches.
How do I adjust belt tension on 2014 gmc sierra serpentine belt diagram?
The 2014 Sierra utilizes a spring-loaded automatic belt tensioner that self-adjusts; manual tensioning is unnecessary. Verify proper operation by observing the tensioner indicator marks on the housing: the pointer must rest squarely between the minimum and maximum wear travel stops while the engine is idling under full electrical load.
What causes the 2014 gmc sierra serpentine belt diagram belt to slip?
Slipping is typically caused by worn tensioner internal springs losing clamping force, oil contamination from a leaking front crankshaft seal, or glazed pulley contact surfaces. A seizing alternator clutch or failing idler pulley bearing can also increase rotational drag, overcoming tensioner capacity and inducing audible belt slip under throttle load.
Can I replace the 2014 gmc sierra serpentine belt diagram belt myself?
Yes, replacing the main serpentine belt takes approximately 30 minutes with a 15mm long-handle ratchet or serpentine belt tool. However, replacing the secondary A/C stretch belt requires a dedicated stretch-belt installation tool (or careful crankshaft rotation) since that circuit does not include a mechanical tensioner pulley.