2014 Chevy Silverado 4.3 Serpentine Belt Diagram: Routing 2026

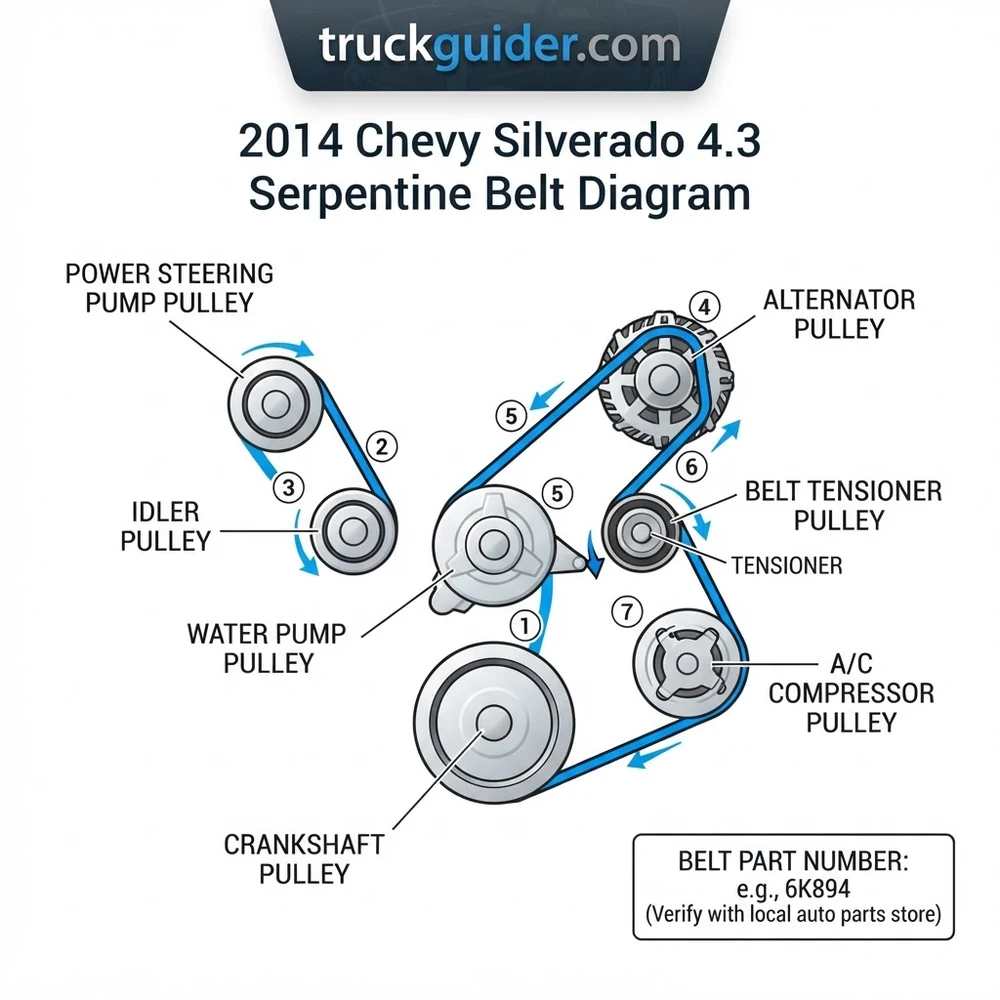
On the 2014 Chevy Silverado 4.3L LV3 V6, the serpentine belt routes around the crankshaft, alternator, water pump, idler pulley, and automatic belt tensioner. Loop the belt over the crank and alternator ribbed grooves, beneath the smooth water pump pulley, and under the tensioner pulley. Relieve tension rotating the 15mm bolt counterclockwise to seat GM part #12658178.
📌 Key Takeaways
- OEM GM main accessory belt part number is 12658178 (Gates K060824, 6-rib, 82.4-inch effective length).
- The 4.3L EcoTec3 LV3 engine features electric power steering (EPS), so the main belt drives only the alternator, water pump, and idler/tensioner.
- A 15mm socket on the spring-loaded belt tensioner arm is rotated counterclockwise to release operating tension.
- Worn idler pulley bearings or misaligned tensioner pivots represent the leading causes of belt chirping and premature edge wear.
- Replace the belt immediately if rib cracks exceed 3 per inch or depth reaches cords; seek professional assistance if tensioner mounting bolts seize.
The 2014 Chevrolet Silverado 1500 marked the structural debut of the fifth-generation EcoTec3 engine architecture, introducing the 4.3-liter LV3 V6. Operating on high-pressure direct injection and Variable Valve Timing (VVT), the LV3 accessory drive represents a sharp engineering departure from prior GM small-block pushrod iterations. Technicians servicing the front-end accessory drive (FEAD) encounter an updated dual-belt system featuring an auxiliary stretch-fit loop paired with a conventional grooved serpentine circuit. Accurately decoding the 2014 chevy silverado 4.3 serpentine belt diagram requires understanding component orientation, tension limits, reverse water pump rotation, and the complete elimination of a traditional hydraulic power steering pump pulley.
2014 Chevy Silverado 4.3 Serpentine Belt Diagram and Pulley Layout


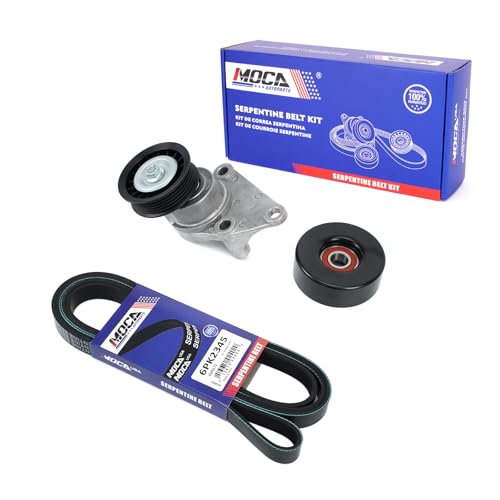

The front-engine accessory drive on the 2014 GM 4.3L LV3 engine relies on a bifurcated load configuration. Unlike older GM truck architectures where a single serpentine loop drove every peripheral component, the LV3 isolates the air conditioning compressor on an independent, tensioner-free sub-circuit directly coupled to the crankshaft. The primary circuit utilizes a serpentine belt running across five contact points: the harmonic balancer, the high-mounted mechanical water pump, an alternating current generator (alternator), a ribbed or smooth idler pulley depending on alternator amperage, and an automatic mechanical spring tensioner.


Crankshaft Pulley (Harmonic Balancer) Drive Dynamic


The harmonic balancer serves as the primary mechanical torque source for the entire drive package. On the LV3 engine, the crankshaft pulley features a dual-sheave configuration. The inner sheave plane—closest to the engine block—drives the secondary four-rib stretch-fit belt that exclusively turns the A/C compressor. The outer sheave plane carries the primary six-rib serpentine belt responsible for engine cooling and electrical generation. Maintaining zero radial runout is vital; any wobble exceeding OEM service limits (0.004 inches / 0.10 mm) will cause instantaneous belt unseating under sudden throttle transitions.
Water Pump Pulley and Reverse-Rotation Operation
The mechanical water pump pulley on the 4.3L EcoTec3 is situated in the central upper quadrant of the timing cover. A critical detail illustrated in the 2014 chevy silverado 4.3 serpentine belt diagram is that the primary belt interfaces with the water pump pulley via its smooth back side, rather than its grooved underside. Consequently, the water pump rotates counter-clockwise (reverse rotation) relative to the clockwise-spinning crankshaft. Technicians referencing our EcoTec3 cooling system diagnosis guide should note that improper belt routing around this pulley causes clockwise rotation, resulting in catastrophic cavitation, zero coolant flow, and instantaneous thermal runaway.
High-Output Alternator Pulley Specifications
Positioned high on the driver side (left-hand side of the engine bay when viewed from the driver seat), the alternator utilizes a decoupled or conventional ribbed pulley. The 2014 Silverado 4.3L was manufactured with either a 150-amp (standard) or 170-amp (optional high-output RPO KW7) alternator. High-output units feature an Overrunning Alternator Decoupler (OAD) or one-way clutch pulley designed to eliminate torsional crankshaft vibration spikes from transmitting into the rotor. The primary belt wraps over the top crest of the alternator pulley with grooved-to-grooved surface contact, delivering over 120 degrees of circumferential wrap to suppress slip under maximum electrical load.
Upper Smooth Idler Pulley Deck Engagement



Mounted below and inboard of the alternator, the stationary idler pulley provides targeted belt wrap around both the alternator and the dynamic tensioner. It utilizes a precision sealed ball bearing assembly secured by an M10 flanged fastener. The smooth steel or thermoplastic face of the idler pulley contacts the back (smooth) side of the EPDM belt, stabilizing the span against lateral whip during abrupt cylinder deactivation transitions (Active Fuel Management shifting between V6 and V4 operating states).



Because the 2014 Silverado 4.3L uses an Electric Power Steering (EPS) rack mounted directly to the subframe, you will not find a power steering pump or reservoir in this engine bay. Any pulley diagram showing a steering pump belongs to the older Vortec generation.
2014 Silverado 4.3 Belt Part Numbers and Size Specifications


Specifying replacement belts for the 2014 4.3L EcoTec3 requires verifying the vehicle’s production date and alternator option code. Installing an incorrect belt length alters the operating angle of the spring tensioner arm, reducing tension holding capacity and inducing premature bearing failure on peripheral components.
Main Serpentine Belt Rib Count and Dimensions
The main accessory drive relies on a 6-rib micro-V profile (ISO 9982 standard PK cross-section) constructed with heat-resistant synthetic elastomers. The overall effective length varies slightly between factory standard-output and heavy-duty charging packages. The table below lists the engineering specifications, OEM replacement part numbers, and trusted aftermarket equivalents.
| Application / Belt Role | OEM Part Number | Aftermarket Reference | Rib Count & Type | Effective Length |
|---|---|---|---|---|
| Primary Belt (150A Alternator) | GM 12626075 / ACDelco 6K718 | Gates K060718 / Dayco 5060718 | 6-Rib PK Micro-V | 71.85 in (1825 mm) |
| Primary Belt (170A Alternator) | GM 12658178 / ACDelco 6K722 | Gates K060722 / Bando 6PK1835 | 6-Rib PK Micro-V | 72.25 in (1835 mm) |
| A/C Compressor Sub-Loop | GM 12639088 / ACDelco 4K378 | Gates K040378SF (Stretch) | 4-Rib Stretch-Fit | 37.80 in (960 mm) |
| Main Belt Automatic Tensioner | GM 12668984 / ACDelco 38386 | Gates 38386 / Litens 999386A | Grooved 6-Rib Pulley | N/A (Complete Assembly) |
| Auxiliary Smooth Idler Pulley | GM 12668986 / ACDelco 36327 | Gates 36327 / Dayco 89527 | Smooth Contact Face | 76 mm Outer Diameter |
A/C Stretch-Fit Belt Construction Material
The secondary air conditioning compressor belt lacks any form of dynamic or slotted adjustment. Factory original units are manufactured from an advanced Ethylene Propylene Diene Monomer (EPDM) compound embedded with chemically treated polyamide (nylon) tensile cords. Unlike standard aramid or polyester cord belts—which permanently stretch when pulled beyond their elastic yield point—the polyamide tensile cords exhibit elastic memory. They can expand by up to 7% during specialized tool installation across the crankshaft and compressor pulley flanges and subsequently recover nominal working tension once seated within the sheave tracks.


Do not attempt to force a standard 4-rib serpentine belt onto the A/C compressor and crankshaft pulleys. Standard belts lack the high-modulus elastic cord structure required for self-tensioning. Installing a non-stretch belt will overload compressor nose bearings, fracture pulley lips, or cause instant belt failure.
Step-by-Step 2014 Chevy Silverado 4.3 Serpentine Belt Routing Path


Completing a replacement based on the 2014 chevy silverado 4.3 serpentine belt diagram requires accessing the front engine face from both the top engine bay and beneath the chassis. Prior to removal, verify battery disconnection to eliminate the risk of accidental starter motor engagement.
- Clear Air Intake Shrouding: Unclamp the mass airflow (MAF) sensor harness, loosen the worm-drive hose clamps securing the intake ducting to the throttle body and air filter box, and lift the secondary intake resonator assembly out of the engine compartment to expose the top deck pulleys.
- Relieve Main Tensioner Load: Locate the 3/8-inch square drive slot or the 15mm cast hex nut on the swing arm of the spring-loaded belt tensioner (positioned on the passenger/right side lower-mid block). Fit a dedicated low-profile serpentine belt breaker bar onto the interface.
- De-tension and Unseat Belt: Apply steady, progressive counter-clockwise torque to rotate the tensioner swing arm against internal spring tension. While holding the arm at its full stop, slide the primary 6-rib belt off the smooth water pump pulley first, as its flat surface presents no retaining lip. Slowly release the breaker bar; never allow the tensioner arm to snap back uninhibited.
- Extract Primary Belt: Unthread the de-tensioned belt from around the crankshaft outer sheave, alternator, idler, and tensioner pulleys, inspecting each bearing for roughness or end-play. Review our Silverado alternator replacement guide if excessive axial runout or bearing play is detected on the generator.
- Remove the Secondary A/C Stretch-Fit Belt: From underneath the vehicle (with the front splash pan unbolted via its four 15mm frame bolts), inspect the inner 4-rib stretch belt. As stated in GM workshop manuals, if the A/C belt is being replaced, sever the old belt with heavy shears. If you are servicing internal engine components and intending to reuse an undamaged stretch belt, install an OTC 5968 or equivalent stretch-belt removal tool between the compressor pulley and the belt, manually rotating the crankshaft clockwise via its 24mm harmonic balancer bolt to roll the belt off the grooves.
- Install New A/C Stretch Belt: Position the new 4-rib stretch belt into the inner rear groove of the harmonic balancer. Place the opposite loop over the lower radius of the A/C compressor pulley. Secure a magnetic stretch-belt installation guide tool onto the forward flange of the A/C compressor pulley. Using a 1/2-inch drive ratchet and 24mm socket on the crankshaft bolt, rotate the engine clockwise. Guide the belt along the tool ramp until it snaps securely into all four grooves of the compressor sheave. Verify complete rib seating by rotating the crank 720 degrees.
- Route the Primary 6-Rib Belt (Lower Loop): Lay the new primary belt around the outer groove of the harmonic balancer pulley, ensuring the ribbed profile aligns squarely into the balancer sheaves. Feed the right side upward over the grooved tensioner pulley.
- Route Upper Deck Run: Bring the left side of the belt run up from the crankshaft and route it around the stationary idler pulley. Wrap the belt over the high-mounted alternator pulley, ensuring ribs seat flush into the alternator grooves.
- Final Water Pump Bridge: Form a bight (loop) with the smooth backside of the belt facing inward toward the water pump pulley. Compress the tensioner swing arm counter-clockwise using your breaker bar. Slip the smooth back of the belt beneath the grooved water pump pulley.
- Verify Belt Seating: Slowly release the tensioner arm, letting it apply load to the belt. Before reassembling intake ducting, use an inspection mirror and flashlight to confirm every belt rib is dead-center within its corresponding pulley track across all five components.
Accessory Drive Fastener Torques:
• Belt Tensioner Assembly Mounting Bolt: 43 lb-ft (58 Nm)
• Smooth Idler Pulley Bolt: 37 lb-ft (50 Nm)
• Water Pump Housing Bolts: 89 lb-in (10 Nm) preliminary, followed by 18 lb-ft (25 Nm) final pass
• Crankshaft Harmonic Balancer Center Bolt: 111 lb-ft (150 Nm) first pass, back out 360 degrees, 59 lb-ft (80 Nm) second pass, plus 125 degrees final rotation (TTY bolt, replace if removed).
Automatic Belt Tensioner Operation and Tension Adjustment Notes


The primary belt drive utilizes a dynamic, spring-loaded mechanical tensioner engineered to self-compensate for thermal expansion, cord stretch, and high-frequency torque oscillations generated by the 4.3L LV3’s direct injection system. There is no manual jack-screw or slotted adjustment bolt; correct running tension is dictated entirely by an internal wound-wire torsion spring submerged in damping grease inside the cast aluminum housing.
Tensioner Drive Interface and Tool Clearances
Engineers integrated a female 3/8-inch square drive directly into the casting of the tensioner swing arm, augmented on some OEM production revisions with a raised 15mm hex head. Because clearance between the radiator cooling fan assembly and the front accessory drive measures less than 3.5 inches, standard 1/2-inch drive ratchets equipped with 3/8-inch adapters will clash with the fan shroud. A flat serpentine belt breaker bar (maximum profile thickness of 0.75 inches) is necessary to clear surrounding obstacles and maintain controlled leverage.
Cast Indicator Marks and Alignment Verification


To confirm whether a belt has stretched beyond service thresholds, inspect the cast limit marks on the tensioner body. The tensioner housing features three cast ribs: a center nominal operating mark, a minimum tension limit mark, and an over-extension maximum mark. The pivoting arm carries a single cast pointer arrow.


When a new OEM belt is properly routed according to the 2014 chevy silverado 4.3 serpentine belt diagram, the indicator arrow must align within the center nominal envelope. If the pointer rests on or past the minimum limit mark, the belt has suffered excessive internal elongation and must be replaced. Conversely, if the pointer contacts the stop under initial installation, either the belt length is undersized (e.g., standard 71.8-inch belt installed on a 170A charging system requiring a 72.2-inch belt) or the tensioner pivot pin is seized.
Under-hood Emissions/Routing Decal Discrepancies
Technicians must exercise caution when inspecting the under-hood vehicle emission control information (VECI) decal on the upper radiator core support. Due to manufacturing variations early in the 2014 model year, certain early-run trucks received universal decals illustrating the 5.3L V8 or older Vortec architectures. Always rely on engine-specific service data for the LV3 V6 rather than degraded or incorrect radiator support stickers.
2014 Chevy Silverado 4.3 Belt Routing Diagram vs Older Vortec Models
The 2014 model year represents an absolute divide in GM truck powertrain development. The transition from the GMT900 platform (carrying the 4.3L Vortec LU3 engine) to the K2XX platform (introducing the EcoTec3 LV3) radically reconfigured the belt drive. Technicians referencing historical GM truck technical guides must understand these distinct generational differences.
| Design Parameter | Pre-2014 Silverado 4.3L Vortec (LU3) | 2014 Silverado 4.3L EcoTec3 V6 (LV3) | 2014 Silverado 5.3L V8 (L83) |
|---|---|---|---|
| Belt Configuration Type | Single multi-rib serpentine belt (all accessories) | Dual-belt (Primary 6-Rib + Secondary Stretch A/C) | Dual-belt (Primary 6-Rib + Secondary Stretch A/C) |
| Power Steering Drive | Driven mechanical pump (smooth/grooved pulley) | None (Chassis-mounted Electric Power Steering) | None (Chassis-mounted Electric Power Steering) |
| A/C Compressor Drive | Integrated into main loop via spring tensioner | Dedicated stretch-fit belt, tensioner-free | Dedicated stretch-fit belt, tensioner-free |
| Water Pump Drive Face | Smooth back-side contact (Reverse Rotation) | Smooth back-side contact (Reverse Rotation) | Smooth back-side contact (Reverse Rotation) |
| Tensioner Location | Top-center/Driver side upper manifold level | Mid-lower passenger side cylinder head deck | Mid-lower passenger side block deck |
While the 2014 4.3L LV3 and 2014 5.3L L83 share internal design concepts under the Gen V small-block umbrella, their component centerlines differ. The deck height and cylinder bore spacing on the V6 alter the spatial triangle between the crankshaft, water pump, and alternator. Consequently, the primary serpentine belt on the 4.3L LV3 is shorter than that of the 5.3L V8. The A/C stretch belt is identical between both platforms, as both engines share common compressor casting bosses and balancer diameters. For additional bottom-end servicing instructions, see our harmonic balancer replacement procedures.
2014 Chevy Silverado 4.3 Serpentine Belt Diagram Technical FAQ
How can you tell if the 2014 Silverado 4.3L belt tensioner has failed?
Tensioner failure exhibits three distinct failure modes: structural, dampening, and bearing degradation. First, check for pulley wobble or mechanical grinding by rotating the tensioner pulley by hand with the belt removed. Second, inspect the cast housing for hydraulic oil or black dampening grease weeping from the pivot seam, which indicates dampening chamber breach. Third, start the engine with headlights and air conditioning turned on; if the tensioner arm fluctuates rapidly across an arc greater than 0.25 inches (6.3 mm), the internal dampening spring mechanism has lost progressive resistance, causing belt flutter, high-frequency chirping, and accelerated alternator bearing wear.
Can the 2014 Silverado 4.3L A/C stretch belt be reinstalled after removal?
General Motors engineering guidelines mandate replacing the A/C compressor stretch-fit belt any time it is dismounted from the pulleys. When a stretch belt is rotated off the sheaves using a roll-off tool, its polyamide internal tensile cords undergo localized shear loads that permanently distort cord alignment. Reinstalling a previously stretched belt creates uneven tensile pre-load, resulting in high thermal build-up, slippage under heavy compressor head pressures, and catastrophic belt snapping within 5,000 to 10,000 miles of secondary service.
Why does the belt chirp after installing a new belt on the 4.3 EcoTec3?
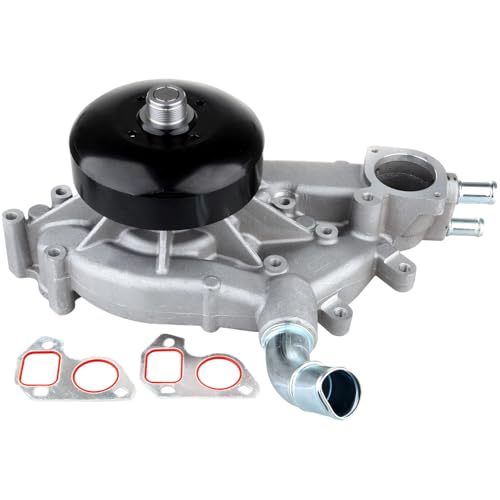


Post-installation noise on the LV3 is almost universally caused by axial misalignment between the smooth idler pulley and the alternator pulley. If a technician uses an incorrect torque spec on the smooth idler mounting fastener (spec is 37 lb-ft / 50 Nm), the mounting shoulder can sit cocked against the front timing case. Additionally, if an aftermarket replacement alternator lacks the factory Overrunning Alternator Decoupler (OAD) pulley and utilizes a solid steel pulley instead, the cyclic firing vibrations of the direct-injected V6 engine will cause momentary belt scrub against the water pump pulley during idle downshifts, generating a recurring chirp.
What tool is required to install the secondary A/C compressor belt without damage?
Installing the secondary stretch belt requires a dedicated universal stretch-belt installation tool (such as the OEM GM tool EN-50481, Gates Stretch Fit Tool, or Lisle 59370). The tool mounts securely onto the forward flange of the A/C compressor pulley. As the crankshaft is rotated clockwise via a 24mm socket, the tool acts as a guide ramp, safely sliding the inner belt edge over the front pulley lip without tearing the elastomeric jacket or shearing internal reinforcement cords. Using standard screwdrivers, pry bars, or picks to force the belt over the pulley flange will fracture the cast aluminum pulley edge and slice the belt core, voiding manufacturer warranties.