2015 Chevy Silverado 4.3 Serpentine Belt Diagram: 2026 Routing

On the 2015 Chevy Silverado 4.3L LV3, the 6-rib belt routes from the bottom of the crankshaft pulley up around the grooved water pump pulley, over the top alternator pulley, under the smooth idler pulley, and around the automatic belt tensioner. Rotate the tensioner 15mm bolt counterclockwise to relieve tension for installation.
📌 Key Takeaways
- Primary accessory drive requires a standard 6-rib, 82.1-inch effective length belt (e.g., Gates K060821).
- The 4.3L LV3 engine utilizes a dedicated secondary stretch-fit belt specifically for the air conditioning compressor.
- Automatic belt tensioner mounting bolts must be torqued to 37 lb-ft (50 Nm) during full assembly replacement.
- A worn internal tensioner spring or failing idler pulley bearing is the primary cause of belt squeal and edge fraying.
- Replace belts at home using standard 15mm hand tools; consult a technician if accessory pulley shafts show axial play.
Navigating the accessory drive layout on the third-generation K2XX platform requires understanding fundamental changes General Motors introduced to the small-displacement truck platform. The 2015 Chevrolet Silverado 1500 equipped with the GM 4.3L EcoTec3 LV3 V6 engine features a distinct front-engine accessory drive (FEAD) configuration that differs markedly from its predecessor Vortec architectures. This powertrain utilizes a primary serpentine drive loop alongside a direct-drive secondary stretch-fit belt dedicated exclusively to the air conditioning compressor. Referencing an exact 2015 chevy silverado 4.3 serpentine belt diagram ensures proper accessory rotation, prevents premature component shear, and eliminates high-load belt slipping across all driving conditions.
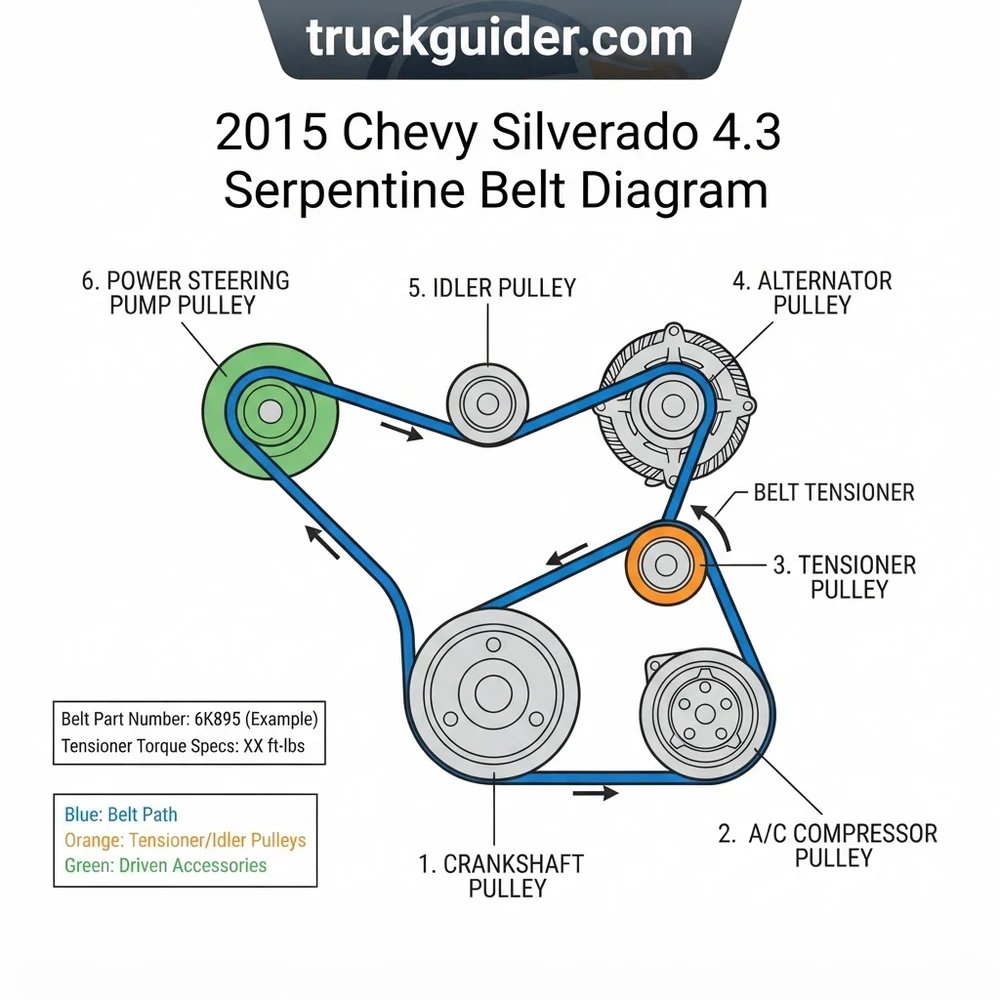
2015 Chevy Silverado 4.3 Serpentine Belt Diagram and Pulley Layout


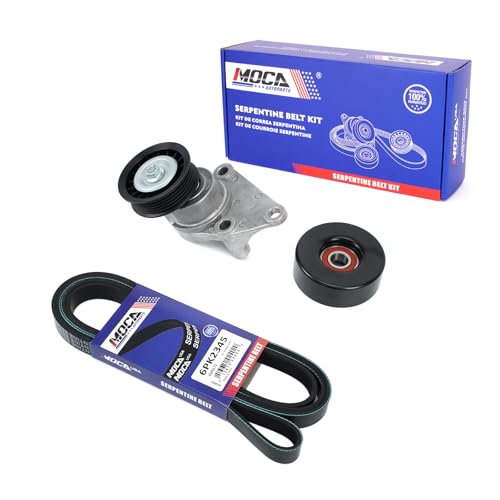

The front accessory drive system of the GM 4.3L EcoTec3 LV3 V6 engine represents a departure from traditional legacy V6 pushrod engines. Engineered on GM’s Gen V small-block architecture, the LV3 shares its timing, block layout, and accessory geometry directly with the 5.3L L83 and 6.2L L86 V8 engines. Visualizing the 2015 chevy silverado 4.3 serpentine belt diagram requires mapping six critical rotational centers on the main drive, operating in conjunction with an isolated secondary drive circuit.



Front Engine Accessory Drive Geometry and Pulley Identification



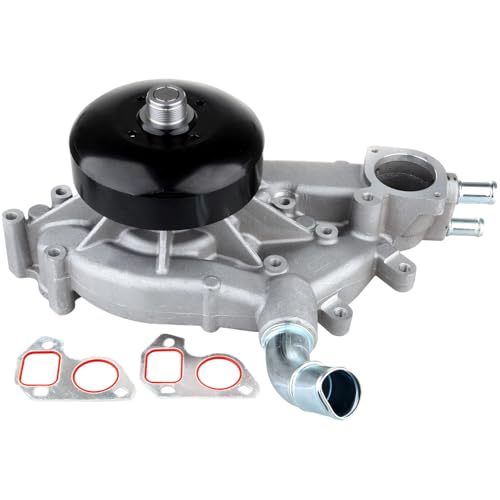
The primary accessory belt circuit transfers rotational torque directly from the crankshaft pulley (harmonic balancer) located at the bottom center of the timing cover. Directly above the crankshaft sits the reverse-rotation water pump pulley. Because the water pump operates off the smooth, non-ribbed dorsal side of the belt, its rotational direction is counter-clockwise, counter to the clockwise rotation of the crankshaft.
Mounted high on the driver (left) side of the engine deck sits the heavy-duty alternator (generator) pulley. The alternator is grooved and accepts direct driving force from the ribbed underside of the belt. Positioned inboard between the alternator and water pump sits a stationary, smooth-faced idler pulley, engineered to optimize the belt wrap angle around the generator. On the lower passenger (right) side of the block, an automatic belt tensioner assembly maintains dynamic running tension. The tensioner incorporates a smooth pulley running against the belt’s backside.
Impact of Electric Power Steering (EPS) on Belt Architecture
A critical detail when studying the 2015 chevy silverado 4.3 serpentine belt diagram is the complete absence of a hydraulic power steering pump pulley. Starting with the 2014 redesign of the Silverado 1500, GM transitioned the platform to an Electric Power Steering (EPS) rack mounted directly to the front crossmember. Eliminating the parasitic hydraulic pump cleaned up the driver-side lower bracket assembly, reducing total belt length and mitigating rotational drag. Technicians accustomed to older platforms should consult our Silverado electrical and charging system diagnosis guide, as the high-output EPS motor significantly increases dynamic alternator loads across the FEAD network.
The Isolated Secondary A/C Compressor Loop
The A/C compressor pulley occupies the lower passenger-side pocket of the engine block. Unlike older single-belt serpentine systems, the A/C compressor is driven entirely by a separate, secondary 4-rib stretch belt running directly off a dedicated inner or outer machined track on the crankshaft harmonic balancer. This secondary loop operates without a mechanical belt tensioner or idler pulley, relying instead on elastic cord tension engineered into the stretch belt itself.



OEM Belt Part Number and Size Specifications for the 4.3L LV3


Installing an incorrectly sized serpentine drive belt or secondary A/C belt compromises tensioner operating range, leading to rapid bearing degradation or slip-induced harmonic vibration. Modern GM OEM belts utilize ethylene propylene diene monomer (EPDM rubber) compounds, which resist heat cracking but slowly lose rib profile thickness over extended service intervals.
The primary accessory loop requires a 6-rib serpentine belt, while the secondary air conditioning circuit demands a heavy-duty 4-rib stretch-fit profile. The following reference data outlines precise dimensional measurements and OEM/aftermarket cross-reference numbers for the 2015 Silverado 1500 4.3L LV3 powertrain:
| Drive Circuit | OEM GM / ACDelco | Gates Part # | Continental # | Rib Count & Effective Length |
|---|---|---|---|---|
| Primary Accessory Drive | 12637204 / 6K790 | K060790 | 4060790 | 6-Rib; 79.0 in. (2007 mm) |
| Secondary A/C Compressor (Stretch) | 12639590 / 4K376SF | K040376SF | 4040376S | 4-Rib; 37.6 in. (955 mm) |
Main Drive Belt Nominal Width: 0.82 inches (21 mm). A/C Drive Belt Nominal Width: 0.56 inches (14 mm). Automatic tensioner mounting bolt torque specification: 43 lb-ft (58 Nm). Water pump pulley bolt torque specification: 18 lb-ft (25 Nm). Always verify that replacement stretch belts indicate an “SF” (Stretch Fit) suffix.
When selecting an OEM belt replacement, verify the manufacturing build date and alternator rating of your vehicle. Silverado 4.3L models equipped with high-amp alternator packages (such as the 170-amp or 220-amp RPO KW7 / KW5 options) require the identical 79.0-inch belt length, as the alternator casing geometry compensates for rotor size variations to maintain universal FEAD belt routing dimensions.


Step-by-Step 2015 Chevy Silverado 4.3 Belt Routing Path Guide


Replacing both belts on the 2015 Silverado 4.3L EcoTec3 requires working sequentially. Because the secondary A/C stretch belt is positioned inward on the crankshaft balancer, removal of the main accessory belt is necessary whenever performing full FEAD maintenance or water pump servicing. Follow this verified technical sequence to ensure exact belt routing path alignment.
Step 1: Engine Bay Preparation and Intake Baffle Removal


Park the vehicle on level ground, apply the parking brake, and disconnect the negative terminal from the primary battery using a 10mm socket to avoid accidental engine cranking. To gain unobstructed top-down access to the front accessory drive, loosen the worm-gear clamps securing the large plastic intake air resonator tube between the mass air flow sensor and the throttle body. Disconnect the PCV breather lines from the tube and remove the entire resonator assembly from the engine compartment.
Step 2: Releasing Main Drive Belt Tension
Locate the automatic belt tensioner on the passenger side of the engine block below the water pump outlet neck. The cast tensioner body features a square drive receiver or a 15mm hex head integrated into the pulley hub center. Insert an extended serpentine belt tensioner tool or an 18-inch breaker bar equipped with a low-profile socket onto the tensioner lug. Rotate the tool clockwise (toward the driver side) against the internal spring resistance. This action swings the tensioner pulley downward and inward, releasing tension along the primary belt routing path. Slide the slackened belt off the smooth, elevated water pump pulley first, then gently let the tensioner arm return to its stop.
Do not allow the tensioner arm to snap back freely under spring tension without a belt installed. The sudden dynamic impact can shatter the internal cast-aluminum mechanical travel stops, rendering the tensioner unserviceable and requiring full assembly replacement.
Step 3: Removing and Installing the Secondary A/C Stretch Belt
Inspect the secondary A/C belt. If you are replacing a worn unit, cutting the old belt with utility shears is acceptable according to GM service manuals, as stretch belts undergo structural deformation upon removal and cannot be reused safely. If you intend to preserve the belt during engine service, install a magnetic A/C stretch belt tool onto the outer rim of the crankshaft pulley. Turn the crankshaft clockwise using a 24mm socket on the balancer center bolt to guide the belt off the compressor pulley grooves.


To install the new 4-rib stretch belt, hook the belt over the lower grooves of the A/C compressor pulley. Loop the opposite end over the bottom edge of the crankshaft pulley drive ring. Mount the specialized stretch-fit installer tool onto the balancer lip. Using your 24mm socket, rotate the crankshaft pulley clockwise. The tool will wedge the elastic EPDM cords outward, slipping the belt over the balancer outer rim and seating the 4 ribs squarely into the pulley tracks. Rotate the engine through two full 360-degree crank revolutions to verify the stretch belt is fully tracked.
Step 4: Threading the Primary Serpentine Belt
Begin routing the primary 6-rib belt from the bottom of the engine compartment upward. Follow this precise sequence according to the 2015 chevy silverado 4.3 serpentine belt diagram:
- Lay the ribbed surface of the belt into the outer grooved track of the crankshaft harmonic balancer.
- Route the right (passenger) upward run over the ribbed alternator pulley located at the top-left portion of the block.
- Loop the belt under the smooth idler pulley situated just inward of the alternator, ensuring the smooth back of the belt contacts the idler wheel.
- Bring the belt downward across the top of the smooth water pump pulley. The backside of the belt must sit flat against the water pump pulley surface.
- Route the remaining lower segment around the smooth pulley of the automatic tensioner on the passenger side.
- Hold the final loop near the alternator or smooth water pump pulley. Apply clockwise leverage to your serpentine belt tensioner tool to compress the internal spring.
- Slip the belt over the water pump pulley rim (utilizing smooth pulleys as the final installation slip point eliminates the risk of rib slicing).
- Gradually release the tensioner tool until the pulley firmly applies upward load against the belt perimeter.
Prior to starting the engine, visually inspect every grooved pulley using an inspection mirror or shop light. Confirm the 6 belt ribs sit precisely inside the pulley valleys and are not riding up onto the outer alignment shoulders of the alternator or crankshaft pulleys.
Belt Tensioner Inspection, Indicator Marks, and Adjustment Notes


The automatic belt tensioner on the 2015 Silverado 4.3L LV3 is a maintenance-free, coil-spring dynamic damper designed to compensate automatically for transient thermal expansion and belt stretch. However, internal damping fluid degradation, spring fatigue, and pivot bushing wear frequently cause dynamic instability across the drive system.
Interpreting Belt Tensioner Cast Travel Indicator Marks


The tensioner base casting features three distinct index marks that align with a moving raised indicator ridge cast into the rotating pivot arm. These belt tensioner indicator marks provide an immediate visual diagnostic of overall belt stretch and drive health without requiring belt removal:
- Nominal Range (Center Zone): When a brand-new OEM belt is routed correctly, the moving indicator ridge aligns between the minimum and maximum functional index marks. This indicates the internal torsional spring is operating within its optimal 40–60% load window.
- Maximum Travel Mark (Over-Extension): If the moving ridge shifts past the extended limit line toward the block, the serpentine drive belt has elongated beyond its operational threshold, or an incorrect, oversized belt has been installed. At this point, static tension falls below standard operating parameters, permitting slip under high electrical or water pump loads.
- Minimum Travel Mark (Bottomed Out): If the indicator sits at or beyond the minimum operational stop with a new belt installed, the belt length is undersized, or the belt is misrouted across one or more pulleys. Running an undersized belt severely overloads the alternator and water pump front bearings, risking premature shaft failure.
Identifying Tensioner Internal Damping and Bearing Failure
To evaluate tensioner health beyond static indicators, run the engine at curb idle and observe the tensioner arm with the air conditioning system active. Excessive arm flutter exceeding 1/4 inch (6 mm) of continuous travel signifies a failed internal hydraulic or friction damping mechanism. A failing damper allows rapid harmonic oscillations between the crankshaft firing pulses and the accessory deck engagement, which accelerates belt rib abrasion. Additionally, spin the tensioner and idler pulley bearings by hand with the belt removed; any metallic grinding, roughness, or radial end-play exceeding 0.030 inches necessitates replacing the complete tensioner assembly.
2015 Silverado 4.3 Pulley Diagram Pitfalls and Belt Wear Diagnostics
Preventing premature failure across the 2015 Silverado 4.3L accessory system requires avoiding structural misconfigurations during installation and recognizing early wear patterns specific to Gen V EcoTec3 engine designs.
- Confusing Gen V LV3 with Pre-2014 Silverado 4.3L Vortec (LU3) Systems: The legacy Vortec 4.3L LU3 engine relied on a single wide belt that powered a hydraulic power steering pump, conventional mechanical fan, water pump, and alternator from a single loop. Attempting to route a 2015 Silverado 4.3L based on older 4.3L diagrams will result in total confusion due to the absent power steering pulley and the dedicated secondary stretch-fit A/C loop. If your vehicle shows balancer wobble while checking belt track, cross-reference our guide on crankshaft balancer runout and wobble inspection.
- Prying the A/C Stretch Belt Without an A/C Stretch Belt Tool: Attempting to install the secondary air conditioning belt using flat-blade screwdrivers, pry bars, or tire spoons will break the internal high-tensile polyamide cords within the belt core. Cord structural failure causes the belt to twist, run off-track, or shred within the first 500 miles of operation. Always utilize a dedicated universal or GM-specific stretch belt installer tool.
- EPDM Material Misdiagnosis: Modern EPDM rubber compounds rarely exhibit the traditional cracking, chunking, or dry-rot common to older neoprene rubber formulations. An EPDM belt can maintain zero visible cracks while suffering significant groove wear and loss of material depth. Utilize an EPDM rib depth gauge to measure clearance between the belt valleys and the pulley peaks; if the gauge bottoms out in the valley, the belt must be replaced to prevent hydroplaning across wet pulleys.
- Misidentifying Smooth vs. Grooved Pulley Engagement: Reversing the belt’s orientation across the water pump or idler pulley ruins both the belt and accessory performance. The water pump and primary idler on the LV3 feature entirely smooth operational faces designed specifically to run against the flat backside of the serpentine belt. If grooved tracks are routed over smooth pulleys, high-frequency chirping and rib degradation occur almost instantaneously.
- Deck Engagement Bracket Flex: If belt edge fraying appears along the outer shoulder, inspect the aluminum alternator bracket mounting bolts. Over-torquing or uneven tightening compromises accessory deck engagement alignment, canting the alternator forward and causing the belt to walk forward off the idler pulley shoulder. When replacing components, consult the K2XX EcoTec3 water pump service procedure to ensure proper surface mating and bolt torque staging.
2015 Chevy Silverado 4.3 Serpentine Belt Diagram Questions Answered
What is the recommended replacement interval for the 2015 Silverado 4.3L serpentine and A/C belts?
General Motors recommends inspecting both the primary serpentine belt and the secondary A/C stretch belt every 15,000 miles, with mandatory replacement scheduled at 100,000 miles or 6 years, whichever occurs first. However, operating in severe thermal conditions or dusty environments often degrades EPDM rib profiles around 60,000 to 75,000 miles. Always replace both belts simultaneously to maintain consistent tension loads across the crankshaft balancer.
Can the A/C stretch belt on the 4.3L EcoTec3 be reused after removal?
Manufacturer technical service bulletins advise against reinstalling an A/C stretch belt once it has been unseated from the pulleys. The internal tensile cords permanently yield and stretch during initial installation to maintain continuous tension without an idler arm. Unseating the belt alters this mechanical tension baseline, leading to belt slipping, high-load squeal, and eventual throw-off under sudden A/C compressor clutch engagement.
Why does my 2015 Silverado 4.3L belt chirp only upon cold engine startups?


Cold startup belt chirp typically points to minor pulley misalignment, bearing race drag on the smooth idler pulley, or a glazed belt surface. As ambient temperatures drop, EPDM rubber hardens, reducing friction against smooth pulleys. If the chirp disappears within 90 seconds as friction warms the rubber, check the alignment between the alternator and idler pulley, and verify the tensioner indicator marks have not moved into the over-extended zone.
What specific tool size is needed to release the main drive belt tensioner on the 2015 Silverado 4.3?
Depending on the OEM supplier configuration installed on the LV3 assembly line, the automatic belt tensioner utilizes either a 3/8-inch square drive cutout cast into the tensioner body or a 15mm hex bolt head molded into the center of the tensioner pulley. A low-profile serpentine belt breaker bar provides the required clearance between the fan shroud and the front accessory bracket.
Does the water pump spin clockwise or counter-clockwise on the 2015 Chevy Silverado 4.3L?
The water pump spins counter-clockwise (reverse rotation relative to the crankshaft) on the 2015 Silverado 4.3L LV3 engine. This reverse rotation is driven by the smooth backside of the primary serpentine belt running across the smooth water pump pulley. Connecting the belt incorrectly so that the grooved side contacts the water pump reverses coolant flow, inducing rapid engine overheating and water pump seal failure.