Cummins ISX Barometric Pressure Sensor Location: Complete Guide & Troubleshooting
If you’ve ever found yourself scratching your head trying to locate that elusive barometric pressure sensor on your Cummins ISX engine, you’re not alone. After working on these powerplants for over 15 years, I can tell you that finding the Cummins ISX barometric pressure sensor location can be frustratingly challenging—even for experienced mechanics. But don’t worry, whether you’re troubleshooting a check engine light or just doing preventative maintenance, I’ll walk you through exactly where to find this critical component across all ISX generations.
Understanding the Barometric Pressure Sensor
Before diving into specific locations, let’s understand what we’re looking for and why it matters to your truck’s performance.
What Is a Barometric Pressure Sensor and Why Does It Matter?
The barometric pressure sensor (often called the “baro sensor” in shop talk) is essentially an atmospheric pressure gauge that helps your engine’s computer understand the air density at your current altitude and weather conditions. This information is crucial because:
- It helps determine optimal fuel injection timing
- It affects turbocharger boost pressure targets
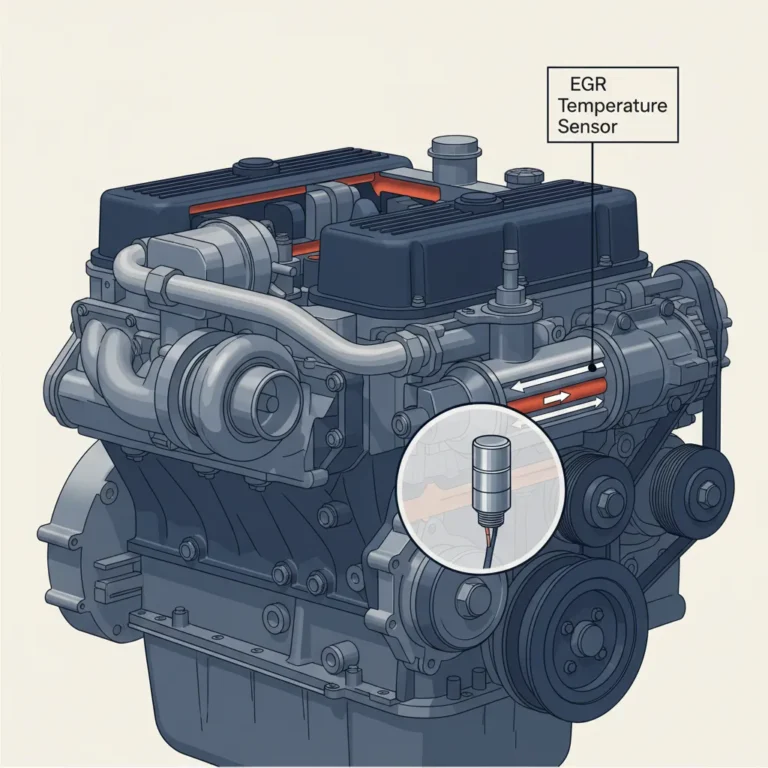
- It influences EGR (Exhaust Gas Recirculation) operation
- It impacts overall engine performance and fuel economy
- It plays a role in emissions control systems function
In simple terms, your Cummins ISX needs to know if it’s running in Denver’s thin mountain air or at sea level in Miami to adjust its systems accordingly. The baro sensor provides that critical information.
How the Sensor Works
The sensor itself is relatively simple—it contains a pressure-sensitive element that generates a voltage signal proportional to the atmospheric pressure. This signal typically ranges from about 0.5V at low pressure (high altitude) to 4.5V at high pressure (sea level or below).
The ECM (Engine Control Module) uses this voltage signal to calculate the current barometric pressure, which then factors into dozens of different engine management calculations.
Important fact you should know: An inaccurate baro sensor reading can reduce fuel economy by 5-15% and noticeably impact your truck’s pulling power, especially at higher altitudes. That’s why knowing the Cummins ISX barometric pressure sensor location is so important for proper diagnostics.
Cummins ISX Barometric Pressure Sensor Location – Detailed Guide
The exact location of the barometric pressure sensor varies depending on which generation of ISX engine you have. I’ll break it down by major engine versions to help you find yours.
Original ISX (1998-2002) Sensor Location
On the first-generation ISX engines, the barometric pressure sensor is located on the ECM itself. This means:
- The sensor is actually integrated into the ECM housing
- It’s not serviceable as a separate component
- If it fails, the entire ECM typically needs replacement
Where to look: The ECM is usually mounted on the driver’s side of the engine, often on a bracket near the valve cover. The sensor itself isn’t visible externally since it’s built into the ECM.
ISX EGR Models (2003-2007) Sensor Location
With the introduction of EGR systems, Cummins moved to an external barometric pressure sensor. On these models:
- Look on the front of the engine, passenger side
- The sensor is typically mounted on a bracket near the intake manifold
- It’s a small cylindrical component with a electrical connector
Visual identification markers: The sensor has a single 3-pin electrical connector and is roughly 1-2 inches long with a cylindrical shape.
From experience: On Freightliner applications in particular, this sensor can be difficult to spot because it’s often hidden behind coolant pipes and electrical harnesses. A flashlight and inspection mirror can be invaluable tools when looking for it.
ISX CM871/CM2250 (2007-2013) Sensor Location
For the CM871 and CM2250 electronic control systems, Cummins again relocated the barometric pressure sensor:
- Check the driver’s side of the engine
- Look for it mounted on a bracket near the ECM
- It’s approximately at the midpoint height of the engine
- Often positioned near where the wiring harness connects to the ECM
Pro tip from experience: On these models, the sensor is frequently blocked from view by the main wiring harness. You may need to carefully move wiring aside to visualize it. Some technicians mistakenly remove the wrong sensor, so be certain you’re looking at the baro sensor and not one of the several similar-looking pressure sensors nearby.
ISX15/X15 (2013-Present) Sensor Configuration
The latest generations of the ISX (rebranded as X15 in newer models) feature yet another configuration:
- The sensor is integrated into the ambient air pressure/temperature module
- Located on the left side (driver’s side) of the engine
- Typically found near the top of the engine, often close to the valve cover
- Has a distinctive electrical connector with multiple pins
Worth noting: This combined sensor module handles both temperature and pressure readings, making it more complex than previous standalone sensors.
Evolution of Sensor Location Across ISX Generations
Cummins has changed the barometric pressure sensor location several times over the ISX’s production run, and there’s good reason for these moves:
| ISX Generation | Sensor Location | Design Rationale |
|---|---|---|
| 1998-2002 | Integrated in ECM | Simplified wiring, reduced points of failure |
| 2003-2007 | External, passenger side | Needed for more precise EGR control |
| 2007-2013 | External, driver’s side | Improved accuracy and serviceability |
| 2013-Present | Combined with temp sensor | Enhanced data collection, reduced components |
Real-world insight: The move from integrated to external sensors was a significant improvement for diagnostics. I’ve seen many cases where early ISX engines needed entire ECM replacements for what would later be a simple sensor swap on newer models.
Accessing the Barometric Pressure Sensor
Once you’ve located the sensor, getting to it can be another challenge entirely. Here’s what you need to know:
Tools You’ll Need:
- Basic hand tools (socket set, screwdrivers)
- Flashlight or work light
- Inspection mirror
- Trim removal tools (helpful for connector clips)
- Dielectric grease for reassembly
Access Challenges by Engine Generation:
1998-2002 Models: Since the sensor is integrated into the ECM, access means accessing the ECM itself. This usually requires:
- Removing an access panel or cover
- Disconnecting the main ECM connector
- Removing ECM mounting bolts
2003-2013 Models: External sensor access varies greatly depending on the truck make. Generally:
- Freightliner: Often requires removing coolant pipes for clear access
- Peterbilt/Kenworth: Usually better access but may require removing electrical harness clips
- International: Typically the most challenging, sometimes requiring intake component removal
2013-Present Models: The combined sensor module is designed for easier access, but:
- Typically located in a more visible area
- Often has better connector design for serviceability
- May still be surrounded by hoses and harnesses
From my toolbox: When working in the tight confines around these sensors, I prefer using a ratcheting wrench rather than a socket when possible. It provides better control and reduces the risk of damaging nearby components when leverage is applied.
Signs of Barometric Pressure Sensor Failure
How do you know if your baro sensor is the culprit behind engine issues? Here are the telltale symptoms:
Common Symptoms of Barometric Sensor Problems:
- Check Engine Light – Often the first indication
- Poor fuel economy – Can drop noticeably, especially during altitude changes
- Black smoke from exhaust under load
- Reduced power, particularly when climbing hills
- Hard starting in certain weather conditions
- Rough idle or inconsistent performance
- Turbocharger boost issues (over or under-boosting)
Diagnostic Trouble Codes to Watch For:
If scanning for codes, these are typically associated with baro sensor issues:
| Code | Description | Likely Cause |
|---|---|---|
| 129 | Barometric Pressure Sensor Circuit | Wiring problem or failed sensor |
| 2229 | Barometric Pressure Sensor Circuit Low | Sensor reading too low/open circuit |
| 2228 | Barometric Pressure Sensor Circuit High | Sensor reading too high/short circuit |
| 2111 | Unable to Verify Barometric Pressure | Conflicting sensor data |
Real-world example: I once had a customer whose truck would run fine in the morning but lose power every afternoon. Turns out the baro sensor was heat-sensitive and would fail as the engine bay warmed up. This kind of intermittent issue can be maddening to diagnose without knowing what to look for.
Testing the Barometric Pressure Sensor
Before replacing any parts, it’s wise to properly test the sensor. Here’s my approach:
Non-Removal Testing:
- Connect a scan tool that can read Cummins engine parameters
- Check the barometric pressure reading with the engine off
- Compare to actual local barometric pressure (available from weather services)
- The readings should be within 1-2 kPa of each other
Electrical Testing (If Removal Is Necessary):
- Disconnect the sensor electrical connector
- Set multimeter to DC volts
- Check reference voltage across appropriate pins (typically 5V supply)
- Measure sensor output voltage (should vary with altitude/pressure)
Expected values:
- At sea level: approximately 3.8-4.5V output
- At 5,000 ft elevation: approximately 3.3-3.7V output
- At 10,000 ft elevation: approximately 2.8-3.2V output
Pro tip from experience: Always check the wiring harness and connector first. I’ve seen numerous cases where corrosion or damaged pins at the connector caused symptoms identical to sensor failure. A quick inspection and cleaning of the connector can often save you the cost of a new sensor.
Replacement Procedures
If you’ve confirmed that your barometric pressure sensor needs replacement, here’s how to tackle the job:
External Sensor Replacement Steps:
- Disconnect battery negative terminal
- Locate the sensor using the guidance above
- Disconnect the electrical connector (usually has a tab to press)
- Remove any mounting bolts or clips holding the sensor
- Carefully remove the old sensor
- Install the new sensor in reverse order
- Apply dielectric grease to connector terminals before reconnecting
- Secure all mountings to factory specifications
- Reconnect battery and clear any fault codes
ECM Replacement (For 1998-2002 Models):
For the earliest ISX engines with integrated sensors, you’ll need to:
- Have your ECM calibration data on hand before starting
- Disconnect batteries and wait at least 5 minutes
- Remove ECM mounting hardware
- Carefully disconnect all ECM connectors
- Install new/remanufactured ECM
- Reprogram with correct calibration data
Important caution: When replacing an ECM, you’ll need to ensure the new unit is programmed with the correct calibration for your specific engine. Most shops use services like Cummins QuickServe Online to get the right calibration files.
OEM vs. Aftermarket Sensor Options
When it comes time to purchase a replacement sensor, you have several options:
Comparison of Replacement Options:
| Option | Pros | Cons | Approximate Cost |
|---|---|---|---|
| Genuine Cummins | Perfect fit, OEM quality | Highest cost, may have availability delays | $120-180 |
| Quality Aftermarket (e.g., Bosch) | Good reliability, widely available | Slightly less precise in some cases | $70-120 |
| Economy Brands | Lowest initial cost | Higher failure rate, inconsistent quality | $30-60 |
My recommendation: For a truck you depend on, I strongly suggest either genuine Cummins or a premium aftermarket brand like Bosch. The sensor is critical enough to engine performance that the extra cost is justified. I’ve seen too many economy sensors fail within a year to recommend them for anything but temporary fixes.
Common Mistakes and Pitfalls
Over the years, I’ve seen technicians and owners make these common errors when dealing with the Cummins ISX barometric pressure sensor:
Mistakes to Avoid:
- Replacing the wrong sensor – Several pressure sensors look similar
- Damaging the connector during removal/installation
- Not clearing fault codes after replacement
- Ignoring wiring harness issues that caused the original failure
- Using silicone sealant on sensors that don’t require it
- Overlooking altitude changes when diagnosing (sensor might be fine)
From the repair bay: The most common error I see is technicians replacing the manifold absolute pressure (MAP) sensor instead of the barometric pressure sensor. They look very similar and are often in proximity to each other. Always verify which sensor you’re working on before ordering parts.
Relationship to Other Engine Systems
The barometric pressure sensor doesn’t operate in isolation—it works in concert with other systems:
Critical System Interactions:
- Turbocharger control: Boost pressure targets are adjusted based on barometric readings
- Fuel injection timing: Altered based on air density calculations
- EGR operation: Flow rates modified according to ambient pressure
- Engine protection: Power may be reduced at extreme altitudes
Real-world performance impact: When driving from sea level into mountains, you can actually feel the engine adjusting as the barometric sensor feeds changing atmospheric data to the ECM. A properly functioning sensor makes these transitions smooth and nearly imperceptible. When the sensor fails, you’ll often notice significant power loss and black smoke as you climb in elevation.
Preventative Maintenance Best Practices
While barometric pressure sensors don’t have a specific replacement interval, these practices can help prevent premature failure:
Maintenance Recommendations:
- Inspect wiring harness for chafing or damage annually
- Check connector for corrosion or looseness during regular services
- Keep engine bay reasonably clean to prevent contaminant ingress
- Consider preventative replacement at major overhauls if the truck operates in harsh environments
- Use scan tool to verify sensor reading at annual inspections
Pro maintenance tip: Apply a small amount of dielectric grease to sensor connectors during any service that requires disconnection. This simple step dramatically reduces corrosion-related failures, especially in humid or salt-exposed environments.
Advanced Diagnostics for Technicians
For professional technicians dealing with complex barometric pressure sensor issues, these advanced techniques can help:
Sophisticated Diagnostic Approaches:
- Data logging during elevation changes to verify proper sensor response
- Comparative testing with a known-good sensor
- Monitoring real-time ECM adjustments as barometric conditions change
- Using smoke testing to find intake leaks that might affect pressure readings
- Testing under load using a chassis dynamometer to replicate symptoms
Tech tip from my diagnostic playbook: When dealing with intermittent issues, I often use a laptop with Cummins Insite and a long driving route that includes significant elevation changes. This allows me to log how the sensor responds to real-world conditions and can reveal failures that don’t show up in static tests.
Fleet Maintenance Perspectives
If you manage multiple trucks with ISX engines, here’s what large fleets have learned about barometric sensor issues:
Fleet Management Insights:
- Failure trends: Sensors typically last 4-7 years in normal operation
- Predictive indicators: Sensors often show drift before complete failure
- Cost impact: A failed sensor can reduce fleet fuel economy by 3-8%
- Common triggers: Extreme weather events (particularly rapid pressure changes) can precipitate failures
- Preventative approach: Some fleets replace baro sensors proactively during other major service work
From fleet experience: Major fleets have found that trucks operating in regions with frequent weather changes (like the Midwest) tend to experience sensor failures more often than those in stable climate regions. The repeated cycling of barometric pressure seems to accelerate sensor wear.
Conclusion
Understanding the Cummins ISX barometric pressure sensor location is essential for both diagnostics and maintenance of these popular heavy-duty engines. While the sensor’s position has changed across different generations, its importance to proper engine function has remained constant.
Remember these key points:
- Early ISX engines (1998-2002) have the sensor integrated into the ECM
- Mid-generation models (2003-2013) use external sensors in various locations
- Latest ISX15/X15 engines use a combined temperature/pressure module
- Symptoms of failure include poor fuel economy, reduced power, and check engine lights
- Quality replacement parts are worth the investment given the sensor’s impact on performance
Whether you’re a professional technician, fleet manager, or owner-operator, I hope this guide helps you tackle barometric pressure sensor issues with confidence. Addressing problems promptly can save fuel, restore performance, and prevent more serious complications down the road.
Frequently Asked Questions
Can a bad barometric pressure sensor cause a truck to derate or lose power?
Yes, absolutely. The ECM uses barometric pressure data to calculate proper fueling. When the sensor fails, the engine may default to a conservative fuel map that reduces available power significantly, especially at higher altitudes or during changing weather conditions.
How often do these sensors typically fail?
In my experience, the barometric pressure sensors on ISX engines typically last 4-7 years under normal conditions. However, environmental factors like extreme temperature swings, high humidity, or corrosive environments can shorten their lifespan considerably.
Can I drive with a faulty barometric pressure sensor?
While the truck will usually still run, I don’t recommend it for several reasons: you’ll experience reduced fuel economy, potential power loss, and possible emissions issues. In some cases, a severely faulty sensor can cause the engine to barely run at all, particularly at higher elevations.
Will the check engine light always come on when the sensor fails?
Not always. Gradual sensor drift might not trigger a check engine light immediately, but will still affect performance. The ECM typically only sets a code when the sensor reading falls completely outside expected parameters, which may not happen with partial failures.
Do I need to reprogram the ECM after replacing the sensor?
For external sensors (2003-present), no reprogramming is necessary. For 1998-2002 models where the sensor is integrated into the ECM, you’ll need to ensure the replacement ECM is programmed with the correct calibration for your specific engine.
Are there any weather conditions that can make diagnosis difficult?
Yes. Rapidly changing weather (like approaching storms with barometric pressure shifts) can sometimes mimic sensor issues or mask them during testing. For the most accurate diagnosis, test during stable weather conditions when possible.
Does altitude affect the diagnostic process?
Absolutely. When testing the sensor, you need to know the actual barometric pressure at your current altitude for comparison. Most scan tools can display barometric pressure in kPa, which can be compared to local weather reports or a dedicated barometric pressure gauge for verification.