Dodge TPS Sensor Replacement Cost 2026 Real Pricing Guide

The average Dodge TPS sensor replacement cost typically ranges between $105 and $265 for models with standalone sensors, including $25 to $115 for parts and $80 to $150 for labor. On modern Dodge models with integrated electronic throttle bodies, full unit replacement ranges from $250 to $650. DIY installation can eliminate labor charges completely with basic hand tools.
Replacing a Dodge Throttle Position Sensor (TPS) in 2026 costs between $110 and $280 for vehicles with a traditional standalone sensor, and between $350 and $680 if your Dodge features an integrated Electronic Throttle Control (ETC) assembly. The final invoice depends heavily on your specific engine, whether you choose an independent garage or a Mopar dealership, and whether the sensor requires a dedicated electronic relearn procedure.

Prime for Young Adults — 6 Months Free
Students and 18–24s get six months of Prime free, then half price.
Start 6 Months FreeUnderstanding these figures prevents you from overpaying for unnecessary parts. Because Dodge shifted from standalone bolt-on potentiometers to fully sealed throttle bodies across the 2000s, identifying which setup your vehicle has determines whether you face a quick $40 component swap or an extensive assembly replacement.
Key Takeaways
- Standalone Dodge TPS replacement averages $105 to $265, while integrated throttle bodies cost $250 to $650.
- Labor usually takes under an hour, costing between $70 and $150 at independent repair shops.
- Older Dodge Ram and Dakota trucks use standalone sensors; newer models require full throttle body assembly replacement.
- Expect an optional $80 to $150 diagnostic fee if your mechanic pulls OBD-II trouble codes first.
- Performing a DIY swap requires only basic hand tools and a digital throttle relearn calibration procedure.
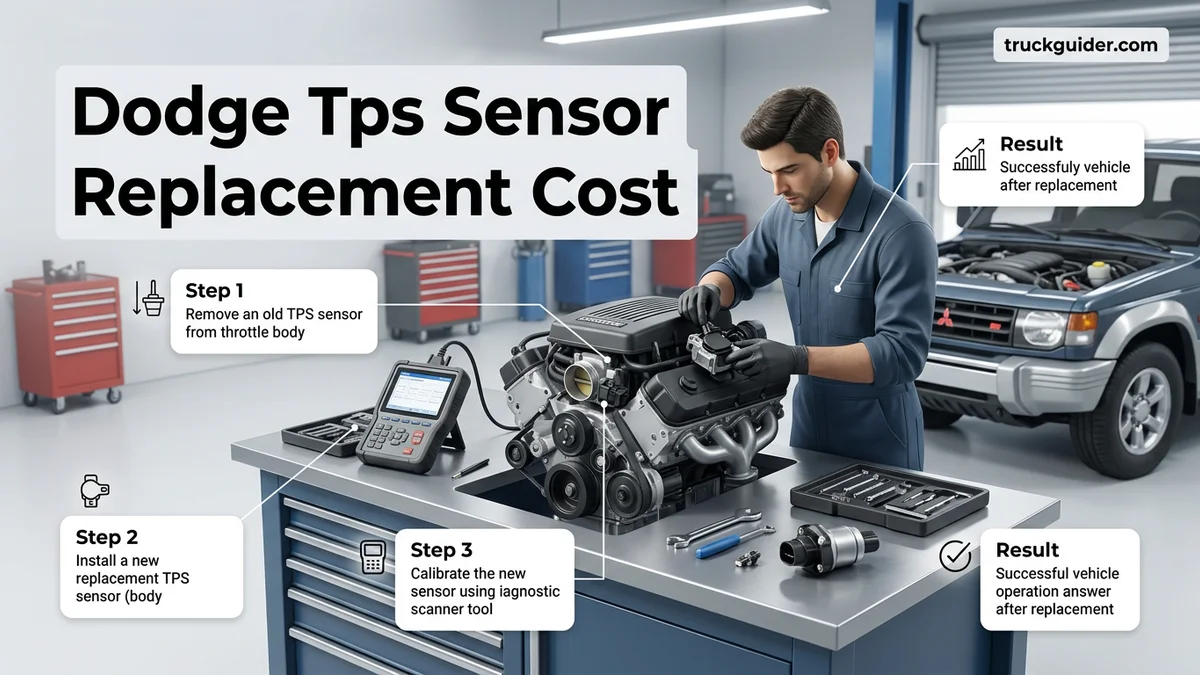
Dodge TPS Sensor Replacement Cost Breakdown: Standalone vs Integrated Units
Recommended Best Deal Products

The cost to fix a Dodge throttle position issue varies drastically based on the design generation of your vehicle. Older models allow you to replace just the small plastic-and-metal sensor, while newer models force you to buy the entire throttle body housing.

Older Standalone Dodge TPS Sensors ($110 – $280 Total)
If you drive an older Dodge Ram 1500, Dakota, Durango, or Grand Caravan (generally pre-2005 to 2007 with cable-driven throttles like the 3.9L, 5.2L, or 5.9L Magnum engines), the TPS mounts to the throttle body exterior with two simple Torx screws.
- Parts Cost: $25 to $65 for aftermarket brands (Standard Motor Products, Duralast); $70 to $115 for genuine Mopar OEM sensors.
- Labor Time: 0.5 to 0.8 hours of shop labor.
- Labor Cost: $60 to $130, based on 2026 independent shop rates averaging $120 to $160 per hour.
- Independent Shop Total: $110 to $195.
- Dealership Total: $180 to $280 (due to higher $190–$240/hr dealer labor rates and OEM parts pricing).
Modern Integrated Electronic Throttle Bodies ($350 – $680+ Total)
Modern Dodge vehicles—including late-model Ram trucks, Chargers, Challengers, and Durangos equipped with the 3.6L Pentastar V6, 5.7L Hemi, or 6.4L Hemi—use drive-by-wire Electronic Throttle Control. The TPS is permanently sealed inside the motorized throttle body.
- Parts Cost: $130 to $240 for reputable aftermarket throttle bodies; $260 to $430 for a genuine Mopar unit.
- Labor Time: 1.0 to 1.5 hours (includes mechanical installation and throttle relearn sequence).
- Labor Cost: $140 to $260 at independent repair shops; $210 to $360 at certified dealerships.
- Independent Shop Total: $320 to $500.
- Dealership Total: $480 to $680+ (occasionally exceeding $750 on high-output SRT or Hellcat platforms).
Dodge TPS Sensor Replacement Cost Made Easy: Your Essential Action Plan
A failing Throttle Position Sensor (TPS) on your Dodge Ram, Charger, Dakota, or Durango can lead to erratic shifting, sudden surging, poor fuel economy, and stalling. This walkthrough details both the financial breakdown of replacing the sensor and an actionable, garage-tested workflow to complete the job yourself. By tackling this repair at home, you can save significant labor expenses while restoring your Dodge vehicle’s throttle response and driveability.
Step 1: Estimate Total Repair Expenses and Source the Component
What you need: Vehicle VIN, smartphone or computer for parts lookup, notepad, and pen.
Instructions: Determine your project budget before turning a wrench. Taking your Dodge to a dealership or certified mechanic typically incurs an estimated total cost of $160 to $320, where labor accounts for $90 to $180 (roughly 1 to 1.5 billable hours) and parts run between $70 and $140. If you choose the DIY route, a quality OEM Mopar or reputable aftermarket replacement (such as Standard Motor Products or Duralast) costs between $25 and $75. Check your throttle body style using your VIN, as some early 5.2L/5.9L Magnums use a three-pin clip-on unit, whereas 4.7L and 5.7L HEMI platforms often feature different mounting orientations or drive-by-wire configurations.
Pro Tip: Avoid ultra-cheap, unbranded sensors found online for under $15; Dodge powertrain control modules (PCMs) are notoriously sensitive to minute voltage variations, and cheap sensors often fail voltage sweep tests right out of the box.
Step 2: Prepare the Workspace and Disconnect Vehicle Power
What you need: Safety glasses, mechanic work gloves, 10mm combination wrench or ratchet, and shop towels.

Audible — Listen Free for 30 Days
One free credit a month and thousands of titles included.
Listen Free for 30 DaysInstructions: Park your Dodge on a flat, solid surface, engage the emergency brake, and let the engine bay cool down for at least 30 minutes to prevent burns from the radiator or intake manifold. Locate your vehicle’s battery. Using your 10mm wrench, loosen the nut securing the negative battery cable terminal clamp. Wiggle the terminal clamp free and isolate it away from the battery post using a clean, dry rag. Cutting power prevents accidental short-circuits and begins discharging the vehicle’s electrical capacitors, which prepares the computer for sensor recalibration later.
Pro Tip: Wait at least 15 minutes after disconnecting the battery before working on electrical connections; this ensures residual current drains fully from the PCM memory circuits.
Step 3: Remove the Air Intake Ducting to Access the Throttle Body
What you need: Flathead screwdriver, 8mm nut driver, or 5/16-inch socket and ratchet.
Instructions: Trace the path from your air filter housing to the intake plenum or throttle body. Loosen the worm-gear band clamps securing the flexible air intake tube to the throttle body inlet using your flathead screwdriver or socket. Unclip the airbox lid or disconnect any integrated breather hoses and the intake air temperature (IAT) sensor harness if routed along the tube. Carefully detach the flexible intake duct and lift it completely out of the engine compartment. Set it aside where it will not collect dirt, and stuff a clean lint-free shop towel into the open throttle body bore to block debris from falling into the intake.
Pro Tip: Inspect the rubber accordion ridges on the intake hose for dry rot, splits, or cracks while it is off; unmetered air entering post-filter can mimic TPS failure symptoms.
Step 4: Unplug the Throttle Position Sensor Wiring Harness
What you need: Small flathead pocket screwdriver or nylon trim panel tool, electrical contact cleaner.
Instructions: Locate the TPS mounted directly on the side of the throttle body opposite the throttle cable linkages (or integrated throttle actuator). Identify the electrical connector, which generally features a bright red or grey secondary locking tab. Using your thumbnail or a pocket screwdriver, slide the secondary lock outward away from the sensor body until it clicks. Squeeze the release tab firmly and pull the harness straight off the sensor housing. Inspect the internal pins inside the plug for green oxidation, oil contamination, or bent terminal pins.
Pro Tip: Never pull on the harness wiring itself; grip only the plastic connector housing to prevent pulling individual wire leads out of the weather-pack seals.
Audible Premium Plus — Annual Membership
12 audiobook credits up front, plus the full Audible catalogue.
See Annual PlansStep 5: Extract the Mounting Fasteners and Remove the Old Sensor
What you need: T-20 or T-25 Torx driver, or 1/4-inch drive ratchet with Torx bits, penetrating fluid (optional).
Instructions: Most Dodge TPS units are secured to the throttle body casting with two Torx-head screws (typically T-20 or T-25), though select older models may utilize small Phillips or hex-head bolts. Position your Torx driver straight into the screw head and apply firm forward pressure to prevent the bit from camming out and stripping the soft fastener heads. Back the screws out slowly in an alternating pattern. Once fasteners are free, gently pull the old TPS straight outward off the throttle shaft D-stem. Verify that the old O-ring or silicone gasket came off with the sensor and is not stuck inside the throttle body recess.
Pro Tip: If the factory screws feel seized due to thread-locking compound, apply a brief squirt of penetrating oil and tap the back of your driver lightly with a small hammer to shock the threads loose.
Step 6: Clean the Mounting Surface and Install the New TPS
What you need: Clean shop rag, rubbing alcohol or throttle body cleaner, new TPS with fresh O-ring gasket, Torx driver.
Instructions: Wipe down the recessed sensor mounting pad on the throttle body using a rag moistened with cleaner to remove carbon accumulation and old oil film. Ensure the new internal rubber O-ring is properly seated in the groove of the new TPS. Carefully align the internal drive slot of the sensor with the flat-sided D-shaped metal throttle shaft. Slide the sensor flush against the throttle body housing without forcing it; you may need to rotate the sensor body slightly (approx. 10 to 15 degrees) to catch the spring tension, then rotate it into screw hole alignment. Reinstall the two mounting screws and tighten them securely to approximately 18 to 24 inch-pounds (snug hand-tight).
Pro Tip: Do not overtighten these screws; the throttle body housing is aluminum and strips easily, while the sensor ears are plastic and will crack under excessive torque.
Step 7: Reconnect Wiring and Reassemble Intake Ductwork
What you need: Flathead screwdriver, dielectric grease (optional).
Instructions: Apply a microscopic dab of dielectric grease along the outer moisture seal of the sensor connector. Push the wiring harness onto the new sensor until you hear an audible click, then push the red or grey safety locking tab back into its locked position. Remove the shop towel from inside the throttle body bore. Reinstall the intake ducting over the throttle mouth, ensuring the rubber lip seats fully and evenly around the perimeter. Tighten the band clamps firmly until snug, reconnect the crankcase breather tube, and plug back in the IAT sensor harness if previously disconnected.
Pro Tip: Ensure the intake hose clamp is straight; a crooked clamp can allow unmetered air to leak past the throttle body, causing lean codes like P0171 or erratic idle speeds.
Step 8: Reconnect Battery and Perform Throttle Calibration Reset
What you need: 10mm combination wrench, vehicle ignition key.
Instructions: Reconnect the negative battery terminal and tighten the 10mm nut securely. Now perform the Dodge PCM throttle relearn procedure: Insert the key into the ignition cylinder and turn it to the “ON/RUN” position without cranking the engine (dash lights illuminated). Within 10 seconds of key-on, smoothly and steadily press the accelerator pedal all the way to the floor over a span of 3 seconds, then release it smoothly over 3 seconds. Turn the key to “OFF”. This procedure maps the minimum and maximum sweep voltages (typically 0.5V at idle to 4.5V at wide-open throttle) into the Dodge PCM memory.
Pro Tip: If your check engine light (CEL) was previously on for codes P0121, P0122, or P0123, use an OBD-II scanner to clear active codes so you can verify the repair immediately.
Step 9: Test Idle Quality and Conduct a Road Test
What you need: OBD-II diagnostic code scanner (optional).
Instructions: Start the engine without touching the gas pedal. Allow your Dodge to idle in park for 3 to 5 minutes while observing the tachometer. The engine should settle into a smooth, steady idle around 650 to 750 RPM once it reaches closed-loop operating temperature. Shift into Reverse, then Drive while holding the foot brake to confirm the idle does not stumble or surge under load. Take the vehicle on a 15-minute test drive encompassing stop-and-go driving and highway acceleration to confirm seamless transmission downshifts and crisp throttle response.
Pro Tip: Minor idle fluctuations during the first 10 miles are normal as the Dodge computer fine-tunes long-term fuel trim (LTFT) values.
✅ Final Checklist
- Negative battery cable is reattached, tightened to 10mm spec, and free of movement.
- Throttle Position Sensor sits perfectly flush with both Torx screws secured to 18-24 in-lbs.
- Electrical harness connector is clicked into place with the locking tab engaged.
- Intake boot is clamped airtight with all vacuum lines and secondary sensors connected.
- Throttle relearn sweep completed and idle holds steady between 650-750 RPM with no active CEL codes.
Important Notes:
- Safety Warning: Always disconnect vehicle power prior to servicing engine sensors to prevent accidental starter activation, short circuits, or PCM logic damage.
- When to Seek Professional Help: If you install a new sensor and still experience throttle codes (e.g., P0122 low voltage), you may have a shorted 5V reference circuit or worn throttle shaft bearings; consult an automotive electrician or transmission specialist.
- Estimated Project Time: 30 to 45 minutes for a DIY mechanic.
- Estimated Cost Breakdown: DIY parts cost: $25 to $75. Professional repair facility cost: $160 to $320 (including parts markup, shop fees, and standard diagnostic labor).
Diagnosing Dodge TPS Sensor Failure: Common Symptoms and Scan Fees
Before buying parts, you must isolate the TPS from pedal position sensors and wiring harness faults. Modern Dodge powertrain control modules (PCMs) monitor throttle signals continuously, recording specific diagnostic trouble codes (DTCs) when voltage readings fall out of range.
Diagnostic Testing and Relearn Fees
Shops rarely swap parts blindly without verifying the circuit. Expect these diagnostic and programming line items on your 2026 estimate:
- Initial Diagnostic Fee: $95 to $165. Most shops charge a standard one-hour diagnostic scan to verify live data stream voltages. Many independent garages roll this fee into the repair cost if you approve the work.
- ETC Throttle Relearn / Calibration: $50 to $90. On 2008+ Dodge models, technicians must run an automated adaptation cycle using a bidirectional scan tool so the PCM recognizes closed-throttle and wide-open throttle stop positions.
Key Symptoms of a Failing Dodge TPS
When the internal resistor tracks wear down or collect moisture, your Dodge displays distinct driveability flaws:
- Electronic Throttle Control Indicator: A flashing red lightning bolt symbol appears between two reverse parentheses on your instrument cluster.
- Limp-Home Mode: The PCM caps engine output, locking engine speeds below 2,500 RPM and ignoring aggressive accelerator input to protect the drivetrain.
- Common Trouble Codes: Scanning the OBD-II port typically reveals code P0121, P0122, P0123 (voltage sensor 1 circuit issues), or P2135 (voltage correlation error between throttle sensors 1 and 2).
- Uncontrolled Idle Surging: The engine hunts between 700 and 1,800 RPM in park or neutral as the PCM struggles to read baseline airflow demands.
How to Fix a Dodge TPS Sensor: Step-by-Step DIY Replacement Guide
Replacing a Throttle Position Sensor on a Dodge vehicle is one of the most accessible DIY repairs. Most Dodge trucks, SUVs, and sedans position the sensor directly on the throttle body assembly, requiring basic hand tools and roughly 30 minutes of labor.
Required Tools and Safety Preparation
Before beginning, gather a T20 or T25 Torx driver, an 8mm or 10mm socket, and electrical contact cleaner. Ensure the engine is completely cool to the touch.
Step-by-Step Replacement Procedure
- Disconnect the Battery: Disconnect the negative battery cable using an 8mm or 10mm wrench. Wait at least 10 minutes to allow the Powertrain Control Module (PCM) capacitors to discharge fully.
- Gain Throttle Body Access: Loosen the intake air duct hose clamp using a flathead screwdriver or socket. Remove the intake tube to expose the throttle body housing.
- Disconnect the Wiring Harness: Depress the red locking tab on the TPS electrical connector. Gently pull the connector away from the sensor body without tugging on the wires.
- Unbolt the Faulty Sensor: Remove the two Torx retaining screws holding the sensor in place. Carefully slide the old TPS off the throttle shaft, noting its orientation.
- Install the New Sensor: Align the internal drive tang of the new sensor with the throttle shaft flat spot. Do not force the component; it should seat flush against the throttle body.
- Torque the Fasteners: Thread the mounting screws by hand. Tighten them evenly to manufacturer specifications, typically 18 to 22 in-lbs (2.0 to 2.5 Nm).
- Reassemble and Reconnect: Reinstall the intake boot, secure the electrical connector firmly until the red tab clicks, and reattach the negative battery terminal.
What If It Still Doesn’t Work: Troubleshooting Throttle Relearn and Wiring Faults
If check engine codes such as P0121, P0122, or P0123 persist after installation, the issue often stems from baseline calibration errors or damaged wiring harnesses.
Secondary Diagnostic and Fallback Steps
- Perform a Manual Throttle Calibration: Turn the ignition key to the “ON” (run) position without starting the engine. Smoothly press the accelerator pedal down to the floor over a five-second count, then release it slowly over five seconds. Turn the key off, wait 30 seconds, and start the engine to complete the PCM baseline relearn.
- Test the 5-Volt Reference Circuit: Using a digital multimeter, check the harness plug with the key on. Pin 1 must show a steady 4.8 to 5.1 volts direct current. A lower reading indicates high resistance or corrosion in the PCM supply wire.
- Inspect Ground Continuity: Check the ground circuit wire using the multimeter’s continuity setting. A damaged ground wire back to the PCM causes erratic voltage spikes that mimic sensor failure.
- Clean the Throttle Plate: Excessive carbon buildup around the throttle plate prevents the mechanical butterfly valve from returning to absolute zero, causing the PCM to reject TPS signal parameters.
- Seek Professional Diagnostics: If wiring, cleaning, and relearns fail, an internal PCM driver fault or shorted engine harness is likely present. Professional diagnostic fees in 2026 range from $120 to $210 at independent shops or certified Dodge service centers, excluding specialized harness repairs.
Conclusion
According to verified research and expert automotive service standards, a failing Dodge TPS compromises fuel economy, transmission shift timing, and throttle stability. While professional repairs average between $160 and $320 in 2026, performing this repair at home costs under $90 for genuine OEM hardware. As an immediate next step, use an OBD-II scanner to log real-time TPS output percentages before purchasing parts, ensuring the sensor itself is the true culprit.
❓ Frequently Asked Questions
How much does Dodge dealership TPS replacement cost compared to independent shops?
Dodge dealership repairs generally range from $200 to $400 for standalone sensors and $450 to $750 for full throttle body assemblies due to higher labor rates ($150 to $220 per hour). Independent repair shops typically charge $50 to $150 less for the exact same job using OEM or high-grade aftermarket components.
What OBD-II trouble codes indicate a failing Dodge TPS sensor?
The most common fault codes for Dodge vehicles are P0121, P0122, P0123, and P0124, which indicate circuit range, low voltage, or intermittent signal issues. Newer Dodge models equipped with Electronic Throttle Control (ETC) may also trigger codes P2135 or P2119 alongside the flashing red lightning bolt on the dash.
How long does a Dodge TPS replacement take at a shop?
A straightforward standalone TPS replacement takes 30 to 45 minutes of labor time. Replacing an integrated electronic throttle body on modern Dodge Hemi V8 or Pentastar V6 engines takes roughly 1 to 1.5 hours, including the electronic throttle calibration process.
Can you drive a Dodge with a faulty TPS sensor?
Driving with a failing sensor is not recommended because it causes erratic engine surging, sudden loss of throttle response, or forces the vehicle into limp-in mode. This creates an immediate safety hazard in traffic and can damage your transmission through harsh or delayed gear engagement.
How do you perform a Dodge throttle position sensor relearn procedure?
Turn the ignition key to the ON/RUN position without starting the engine, wait for the warning lights to clear, and then slowly depress the accelerator pedal fully to the floor. Release the pedal slowly back to rest, turn the key to OFF, and then start the vehicle normally to complete the baseline calibration.
Is it better to clean the throttle body or replace the TPS sensor?
Cleaning the throttle bore and butterfly plate with throttle body cleaner can fix sticking blades and idle hunting caused by carbon buildup for under $10. However, if the internal potentiometer or hall-effect circuit of the TPS is worn or sending erratic voltage spikes, cleaning will not solve the issue and replacement is required.

![2013 Ram Headlight Bulb Selection, Specifications [2026]](https://truckguider.com/wp-content/uploads/2026/03/featured-402e88aa-768x768.webp)