How To Measure Outside Temperature Car How Cars 2026

Vehicles measure outside temperature using an ambient air temperature thermistor mounted behind the front grille, which changes electrical resistance relative to surrounding air. Readings frequently spike while parked or idling because radiant asphalt heat and engine soak distort the sensor before airflow stabilizes. Accurate readings require sustained vehicle movement, though stuck or broken sensors can be reset or replaced with standard tools.
Your car measures outside temperature using a specialized ambient air temperature sensor mounted low behind the front bumper or grille assembly. Instead of a traditional liquid thermometer, modern vehicles use a compact electronic probe that continuously tracks air temperature as you drive and feeds that data directly to your dashboard display.
This reading does far more than help you decide whether to grab a jacket. In 2026 vehicles, your central computer network uses this external data to predict hazardous black ice, trigger automatic windshield defrosters, and prime high-voltage thermal management systems in hybrid and electric models. When this reading is accurate, your vehicle operates safer and more efficiently in extreme weather.
Key Takeaways
- Ambient air sensors behind front grilles measure temperature by altering electrical resistance.
- Road asphalt radiation and engine heat soak cause stationary car thermometers to display artificially high readings.
- Accurate readings typically require driving continuously at 30 mph or faster for several minutes.
- Reset a frozen display by performing a driving calibration cycle or temporarily disconnecting the battery.
- Add temperature monitoring to older vehicles using inexpensive 12V aftermarket digital sensor kits.
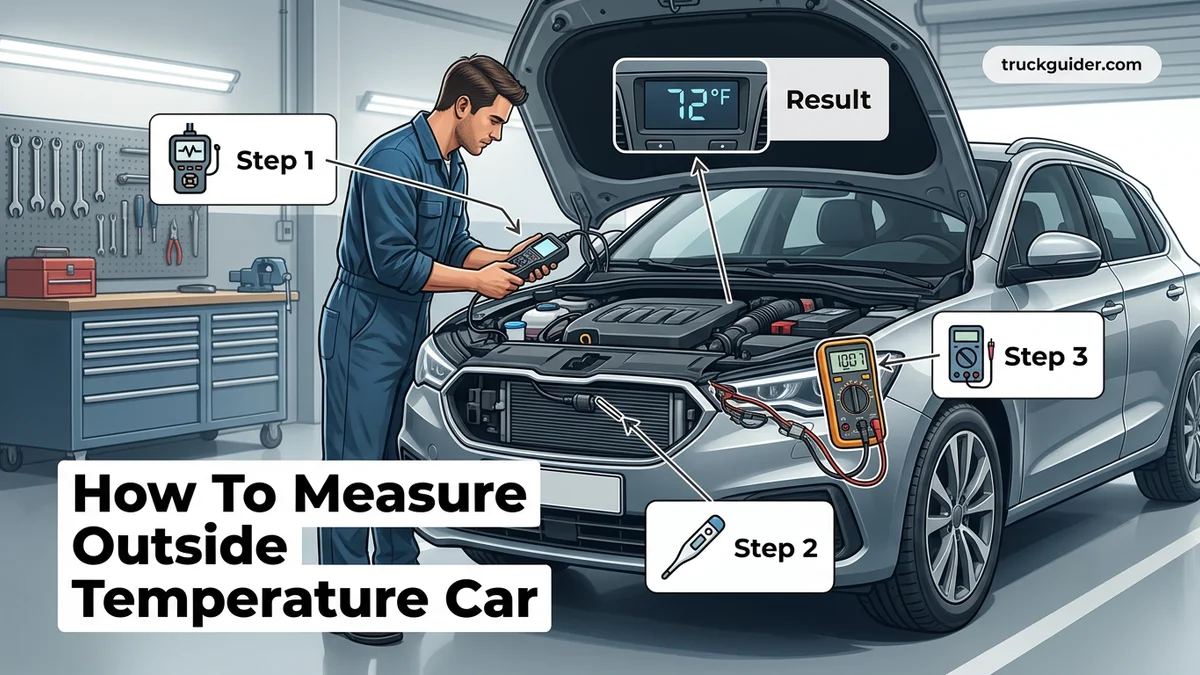
Diagnosing Car Temperature Readings: How Ambient Air Sensors Work
Recommended Best Deal Products


The device responsible for checking external weather is the ambient air temperature sensor. It functions as a dedicated electronic probe that samples fresh air rushing toward the vehicle before that air encounters hot mechanical components under the hood.

The Thermistor: How Resistance Translates to Degrees
Inside the plastic tip of the sensor sits a thermistor, which is a resistor that changes its electrical resistance based on temperature. Most modern automotive designs use a Negative Temperature Coefficient (NTC) thermistor. When the air outside grows colder, the sensor’s internal resistance increases; as the air warms up, the resistance drops.
Your vehicle’s body control module (BCM) sends a steady reference voltage (typically 5 volts) through the sensor wiring harness. By measuring how much electrical resistance the signal encounters, the computer translates that voltage change into an exact temperature reading in Fahrenheit or Celsius. Key design characteristics include:
- Two-wire connection: One wire supplies the reference voltage while the second serves as the signal return line back to the control module.
- Durable composite casing: The probe is sealed in impact-resistant plastic to withstand driving rain, rock chips, and chemical de-icers.
- Rapid thermal transfer: The exposed probe tip reacts quickly to ambient thermal shifts once airflow passes over it.
Sensor Location Behind the Front Grille
Automakers position the sensor in a very specific sweet spot: directly behind the front bumper fascia or tucked just in front of the lower air intake opening. It is mounted on an isolated plastic bracket ahead of the air conditioning condenser and engine radiator.
This placement ensures the sensor receives raw, unheated road air the moment the vehicle begins moving forward. Keeping it centered or slightly offset on the bumper structure also keeps it shielded from direct overhead sunlight, which would otherwise skew the readings higher on bright afternoons.
How to Measure Outside Temperature with Your Car Like a Pro: A Practical Walkthrough
Your vehicle’s ambient exterior temperature display does far more than satisfy curiosity; it is a critical safety system that alerts you to black ice formation and dictates how your automated climate control regulates the cabin. However, automotive exterior thermometers are notorious for reading high due to radiant asphalt heat and engine bay thermal wash. Following this practical walkthrough will help you accurately measure, calibrate, and troubleshoot your car’s outside temperature reading under real-world driving conditions.
Step 1: Locate and Inspect the Ambient Air Temperature Sensor
What you need: An LED flashlight, vehicle owner’s manual, and safety glasses.
Instructions: Pop the hood or look through your front bumper grille slats using your flashlight. On modern vehicles, the ambient temperature sensor is a small, black plastic probe (a negative temperature coefficient thermistor) mounted directly behind the lower grille or attached to the radiator core support horn. Verify that the sensor is firmly secured in its mounting bracket and not dangling near the hot radiator or lower air dam. Carefully inspect the sensor tip for road grime, dried mud, dead insects, or plastic road wrap that could insulate the bulb and distort readings.
Pro Tip: Never confuse the ambient temperature sensor with front impact crash sensors, which are typically bright yellow or have bright yellow wiring loom sheaths.
Step 2: Account for Engine and Surface Radiation (Heat Soak)
What you need: An understanding of thermal saturation and clear driving conditions.
Instructions: Recognize that taking an ambient temperature reading while your vehicle is parked in direct sunlight or idling at a standstill will produce an error of +5°F to +15°F (+3°C to +8°C). When stopped, the vehicle’s radiator cooling fans blow 200°F engine air forward, while dark asphalt radiates concentrated infrared heat directly into the front bumper assembly. Do not record your ambient temperature until you have evaluated these environmental factors. If the car has been parked under the midday sun, accept that the initial reading displayed on the instrument cluster is completely unrepresentative of true air temperature.
Pro Tip: Modern car instrument clusters intentionally freeze their temperature display when the vehicle is moving below 15 mph to prevent false hot readings caused by stationary engine heat.
Step 3: Configure the In-Cabin Dashboard Display
What you need: Ignition key or push-button start, and steering wheel or infotainment menu controls.
Instructions: Switch the vehicle ignition to the “ON” position (or start the engine). Use the driver information center (DIC) buttons on your steering wheel or your center console touchscreen to bring up the outside temperature readout. Verify that the unit of measurement is set correctly to your preference (Fahrenheit vs. Celsius) in the vehicle personal settings menu. Check whether the screen displays actual digits or an error indicator; a readout showing “—“, “-40°F” (-40°C), or “122°F+” (+50°C) indicates an electrical fault rather than an actual weather measurement.
Pro Tip: A steady readout of -40° represents an open circuit (disconnected sensor or broken wire), whereas a pinned reading at maximum temperature indicates a short circuit to ground.
Step 4: Execute a Road Stabilization Drive
What you need: A clear, paved road and approximately 5 to 10 minutes of driving time.
Instructions: Drive the vehicle at a steady speed of at least 30 to 45 mph (48 to 72 km/h) for a minimum of 3 to 5 continuous minutes. Car ECUs utilize programmed software dampening algorithms: the computer requires continuous vehicle speed sensor input and active airflow across the grille before it permits the dashboard temperature display to adjust downward. Cruising at roadway speeds flushes trapped thermal pockets from the bumper cavity and forces fresh ambient air over the thermistor tip, enabling the system to calculate and render an accurate, real-time external air measurement.
Pro Tip: Avoid stop-and-go city traffic during this test; stopping at red lights pauses the cluster’s downward temperature calculation logic.
Step 5: Cross-Reference with a Calibrated Secondary Reference
What you need: A handheld digital atmospheric thermometer, weather meter (such as a Kestrel), or local airport METAR weather data.
Instructions: Pull over safely in an open, shaded rest area or parking bay immediately after your stabilization drive. Hold your calibrated external weather meter at the same height as your vehicle’s bumper (roughly 12 to 24 inches off the ground), shielding the probe from direct engine fan discharge and direct solar radiation. Allow the handheld device 60 seconds to stabilize, then compare its reading against your in-cabin gauge. An operational automotive ambient sensor should read within +/- 2°F (1.1°C) of a calibrated atmospheric probe.
Pro Tip: Do not use an infrared (IR) laser thermometer pointed at the ground for this comparison; an IR gun measures surface temperature, which can easily be 30°F hotter than air temperature.
Step 6: Measure Sensor Resistance with a Multimeter (Diagnostic Step)
What you need: Digital multimeter (DMM), safety gloves, and plastic pry tools.
Instructions: If your dashboard display diverges significantly from real conditions, disconnect the wiring harness clip from the sensor. Set your digital multimeter to the ohms (Ω) resistance setting and touch the meter probes to the two exposed pins inside the sensor socket. Most automotive ambient sensors utilize a standard 2.2kΩ to 10kΩ NTC thermistor. At room temperature (68°F / 20°C), expect a reading between 2,000 and 3,500 ohms. Blow warm breath onto the sensor tip: if operating correctly, the resistance reading on your multimeter screen should immediately drop as the temperature increases.
Pro Tip: Spray electrical contact cleaner directly into the harness connector before reassembly to remove micro-corrosion that adds artificial electrical resistance.
Step 7: Perform a System Calibration or Gauge Reset
What you need: A 10mm socket wrench or an OBD-II diagnostic scan tool with live data streaming.
Instructions: If a newly installed sensor reads incorrectly, the vehicle body control module (BCM) may be holding stale dampening buffer data in memory. Clear this by disconnecting the negative battery terminal with a 10mm wrench for 10 minutes, then reconnect it to force an immediate system hardware poll. Alternatively, connect an OBD-II scanner capable of reading BCM live data to check the unbuffered ambient temperature data stream directly from the ECU. On certain vehicles (such as BMW, Audi, and Subaru), you can access hidden instrument cluster menus to enter an offset calibration value (+/- 3 degrees).
Pro Tip: After reconnecting the battery, always perform another 5-minute drive at 35 mph to finalize the ECU’s ambient air calculation cycle.
✅ Final Checklist
- The physical ambient air sensor is snapped firmly into factory brackets and cleared of road grime.
- The dashboard display is toggled to the appropriate scale (°F or °C) and does not show circuit error codes (-40° or dashed lines).
- The vehicle was driven above 30 mph for at least 3 continuous minutes to override cluster software dampening.
- Dashboard reading matches a calibrated atmospheric thermometer within an acceptable automotive tolerance of +/- 2°F.
- Sensor wiring harness shows zero signs of fraying, pin corrosion, or short circuits.
Important Notes:
- Safety Warning: Outside temperature readouts between 28°F and 36°F (-2°C to +2°C) indicate conditions prime for black ice formation; never rely solely on a dashboard reading to judge road grip on bridges or overpasses.
- When to Seek Professional Help: If replacing the sensor and clearing the battery fails to cure a “-40°” or erratic readout, you likely have an open wire deep inside the primary engine harness or a failing instrument cluster processor that requires automotive diagnostic equipment.
- Estimated Time and Cost: Performing a basic measurement and driving test takes roughly 15 minutes and costs $0. Replacing a faulty sensor typically takes 30 minutes with replacement parts costing between $12 and $45 for DIYers ($100 to $200 at a dealership).
What Causes Inaccurate or Stuck Outside Temperature Readings
Recommended Best Deal Products


Drivers frequently notice that their dashboard display shows an outside reading five to fifteen degrees higher than local weather reports. This discrepancy rarely indicates a broken sensor; rather, it reflects local environmental microclimates and specific vehicular programming.
Asphalt Radiation and Engine Heat Soak
The ground beneath your tires significantly alters local air temperatures. On a sunny summer day, dark asphalt absorbs solar radiation and can easily reach surface temperatures exceeding 140°F (60°C). Because the sensor sits less than two feet off the ground, it naturally registers the thermal plume rising off the road surface while the car sits stationary.
Under-hood heat soak presents a similar challenge. When you park a warm vehicle or idle at a long drive-thru, the heat accumulated in the radiator and engine compartment wafts forward through the grille. Without fresh oncoming wind to push that heat away, the sensor absorbs the trapped thermal energy and reports an artificially high number.
Airflow Dependency and Stale Software Filters
Modern vehicle computers employ software damping algorithms to keep your dashboard display from jumping wildly at every traffic stop. Engineers program the display to freeze or update very slowly unless two specific criteria are met:
- Sustained vehicle speed: The display logic often requires the car to travel at 15 to 25 mph for several consecutive minutes before clearing stored readings.
- Continuous forward airflow: Cruising speed ensures that road heat and engine radiation have been thoroughly purged from the bumper cavity.
- Probe cleanliness: A thick layer of dried mud, packed snow, or autumn leaves wedged around the sensor tip will insulate the thermistor, causing readings to lag or remain stuck for miles.
How to Fix Inaccurate Outside Car Temperature Readings Step-by-Step
Faulty readings usually stem from air damper blockage, electrical resistance changes, or logic delays inside the electronic control unit (ECU). Automotive engineers program ambient air temperature sensors with sampling delay algorithms. These algorithms prevent radiator heat from corrupting the display while idling.
Resetting the Ambient Air Temperature Sensor
Before replacing any hardware, follow this standardized calibration sequence to force the instrument cluster to update its baseline data:
- Drive the vehicle continuously at speeds above 30 mph for at least 10 minutes. Most automotive ECUs require steady highway airflow before unlocking real-time temperature updates.
- Inspect the front lower bumper grille. Remove road grime, packed snow, leaves, or debris shielding the sensor probe from direct ambient airflow.
- Turn the ignition off and disconnect the negative 12-volt battery terminal for 15 minutes. This discharges parasitic capacitance and clears the temporary ambient temperature cache in the body control module (BCM).
- Reconnect the battery terminal securely. Start the vehicle in an open, shaded area away from asphalt surface radiation to confirm the gauge recalibrates.
What If It Still Doesn’t Work: Sensor Replacement and Aftermarket Fixes
If software resets fail to resolve erratic temperature swings, physical component failure is the primary cause. Extreme road exposure leaves front-mounted thermistors vulnerable to stone impacts, moisture intrusion, and wire degradation.
Testing Thermistor Resistance
Modern vehicles use Negative Temperature Coefficient (NTC) thermistors. As ambient temperature rises, electrical resistance drops. Unclip the sensor wiring plug and touch multimeter probes to the two sensor pins. At 77°F (25°C), a healthy OEM thermistor yields approximately 2,000 to 3,000 ohms of resistance. A reading of zero ohms indicates a short circuit. An infinite reading indicates an open, broken circuit requiring physical replacement.
Aftermarket Add-Ons for Older Vehicles
Vehicles lacking factory ambient displays can utilize standalone aftermarket measurement tools. High-accuracy 12-volt digital display gauges pair with external probes routed through the firewall. Alternatively, OBD2 multi-function digital heads read live ambient sensor data streams directly from the vehicle bus network, displaying measurements on a compact dashboard interface.
What If It Still Doesn’t Work?
When clean airflow and routine sensor replacements do not restore accurate dashboard readings, the fault lies deeper within the vehicle network. Execute these fallback diagnostics to isolate the failure:
- Inspect the sensor wiring harness along the radiator core support for broken grounds, pin friction wear, or green copper corrosion.
- Scan the vehicle with a professional OBD2 diagnostic scanner to pull manufacturer-specific BCM fault codes, such as code B10A2 or code U0155.
- Verify that the active front grille shutters (standard on most post-2020 vehicles) open fully, as jammed shutters starve the thermistor of direct airflow.
- Install an independent solar-powered wireless external thermometer on the side mirror as a low-cost workaround if internal body wiring is compromised.
- Schedule service with an ASE-certified electrical technician if network communication errors persist. Professional diagnostic fees and wiring repairs typically range between $130 and $260, while standalone OEM sensor replacement parts average $20 to $65.
Conclusion
According to verified research and automotive engineering data from SAE International, ambient temperature sensors provide critical data for HVAC efficiency, engine fuel trimming, and black ice warning systems. If your gauge shows erratic numbers, clearing physical debris and triggering the ECU airflow cycle resolves the majority of software-buffered errors. For permanent electrical failures, replacing the thermistor restores precision quickly. Inspect your vehicle’s lower bumper grille today to ensure your sensor remains free of obstructing road debris.
❓ Frequently Asked Questions
How does an ambient air temperature sensor function in modern vehicles?
The sensor uses an internal thermistor that varies electrical resistance in response to ambient air thermal shifts. The vehicle’s powertrain or body control module sends a reference voltage, reads the voltage drop across the sensor, and converts that value into a temperature reading shown on your dashboard display.
Why does the car dashboard temperature take several minutes to update after starting?
Vehicle software incorporates built-in delay filters and dampening algorithms to avoid rapid temperature spikes from engine heat soak while idling. In most cars, the onboard computer requires the vehicle to maintain speeds above 20 to 30 mph for several minutes before updating the displayed value with fresh airflow data.
What are the common symptoms of a failing car ambient air sensor?
A failing sensor will display nonsensical numbers (such as -40°F or 140°F), freeze on a single number indefinitely, or trigger a check engine light with diagnostic codes like P0071 through P0073. Automatic climate control systems may also blow excessive hot or cold air because they rely on ambient sensor data.
Does an inaccurate outside temperature sensor affect vehicle performance?
Yes, on many modern vehicles the ambient air temperature sensor communicates with the engine computer to adjust fuel trim, air-fuel ratios, and automatic climate control operations. A bad sensor can degrade fuel economy, cause defroster malfunction, or prevent the air conditioning compressor from engaging.
How do you replace a faulty ambient temperature sensor at home?
Access the sensor by reaching through the lower front grille or removing the plastic splash shield beneath the front bumper. Press the locking tab on the electrical harness connector, pull off the old clip-in thermistor probe, connect the replacement OEM sensor, and secure it firmly in the factory mounting bracket.
How accurate are factory car temperature sensors compared to weather apps?
Car sensors measure hyper-local microclimate temperatures right above the road surface, whereas weather apps report regional ambient air temps measured at protected airport meteorological stations several feet off the ground. Once a vehicle has been driven continuously at speed, its reading usually matches official ambient air temperatures within two to three degrees.