Subaru 2.5L SOHC Torque Specs: Head Bolts, Cam & Rod (EJ251/EJ252/EJ253)

Working on a Subaru EJ25 SOHC engine — Forester, Impreza, Legacy, Outback, or Baja — means getting torque specs exactly right, on an engine family with a well-documented head gasket weak point.
This guide covers the EJ251, EJ252, and early EJ253 SOHC variants. The core procedure is shared across them, but small differences by model year mean the numbers below are a reliable starting reference, not a replacement for your VIN-specific factory service manual.


Key Takeaway: The EJ25 SOHC uses a multi-step, torque-plus-angle head bolt procedure — not a single torque number — and this engine family is specifically known for external head gasket leaks if that procedure isn’t followed precisely.
Why This Engine Is Especially Torque-Sensitive
The EJ251, EJ252, and pre-2010 EJ253 SOHC engines share a well-known design weak point: composite head gaskets sealing against aluminum-to-aluminum contact between the block and heads.
This makes them more prone to external coolant leaks than most engines on the market — and precise, correct head bolt torque is one of the few variables that’s actually in your control when addressing it.
Subaru moved to a multi-layer steel (MLS) gasket design around 2009-2010, which significantly reduced (but didn’t eliminate) the issue on later production.
Common failure signs to watch for, so you know when this guide actually applies to your situation:


- A faint sweet smell from the engine bay, especially on cold start — coolant vaporizing on the exhaust as it seeps from the rear of the head-to-block joint
- Slow, gradual coolant loss that requires topping off periodically, with no obvious puddle underneath
- Dried, chalky coolant residue or staining where the cylinder head meets the block
- The leak often seals itself once the engine reaches operating temperature, which is exactly why it’s easy to miss during a routine inspection or pressure test
- Most commonly shows up between 80,000 and 100,000 miles on SOHC EJ engines
If you’re already seeing these signs, a proper head bolt re-torque (or full head gasket replacement, done correctly) is the actual fix — not just topping off coolant.
Which Engine Do You Actually Have?
| Engine Code | Common Application | Years | Notable Difference |
|---|---|---|---|
| EJ251 | Impreza, Forester, Legacy, Outback (non-turbo) | ~1999-2004 | Standard 49-state calibration |
| EJ252 | Legacy, Outback (5MT) | ~2000-2001 | California-emissions variant — unique intake manifold and throttle body, rated slightly lower at 156 hp / 167 lb-ft |
| EJ253 (pre-2010) | Legacy, Outback, Forester, Baja | ~2005-2010 | Same gasket weak point as EJ251/EJ252 until the MLS redesign |
The head bolt procedure below applies to all three, but always confirm your exact engine code (stamped on the block, or check your VIN/build sheet) before ordering parts or starting a rebuild — camshaft and rod bolt specs in particular can shift between these variants.
Cylinder Head Bolt Torque — Step by Step
| Step | Action | Torque | Notes |
|---|---|---|---|
| 1 | Oil bolt threads & washers | — | Reduces friction for accurate torque reading |
| 2 | First pass | 21-22 ft-lbs (29 N·m) | Crisscross pattern, center bolts first, working outward |
| 3 | Second pass | 51 ft-lbs (69 N·m) | Same crisscross sequence |
| 4 | Back off | 180° | Reverse order (outside to inside), repeat twice |
| 5 | Center bolts (1, 2) | 25 ft-lbs (34 N·m) | Middle pair only |
| 6 | Outer bolts (3-6) | 11-14 ft-lbs (15 N·m) | Remaining bolts |
| 7 | Angle tighten | 80-90° | Original sequence |
| 8 | Final angle | 80-90° | Same order again — total angle should stay under 180° combined |
Verify before you wrench: These figures are widely corroborated across Subaru service references, but always cross-check against your specific model-year factory manual before final assembly. On an engine already known for gasket sealing issues, a mistorqued head bolt isn’t a minor mistake — it’s the difference between a dry engine bay and a comeback leak.
Common Mistakes That Cause Comeback Leaks
- Skipping the back-off step — going straight from the second torque pass to the angle steps without the 180° back-off leaves uneven clamping load across the gasket
- Torquing bolts out of sequence — the crisscross pattern exists specifically to prevent head warping; a spiral or random pattern can leave one side over-compressed
- Reusing stretched bolts — these are torque-to-yield fasteners; reusing a bolt that’s already been stretched past its limit means it can’t develop proper clamping force a second time
- Skipping the oil-the-threads step — dry threads create inconsistent friction, throwing off every torque reading that follows
- Eyeballing the angle steps — a rough “quarter turn” guess instead of using an angle gauge is one of the most common causes of an uneven final torque
Rocker Arm Bolt Torque
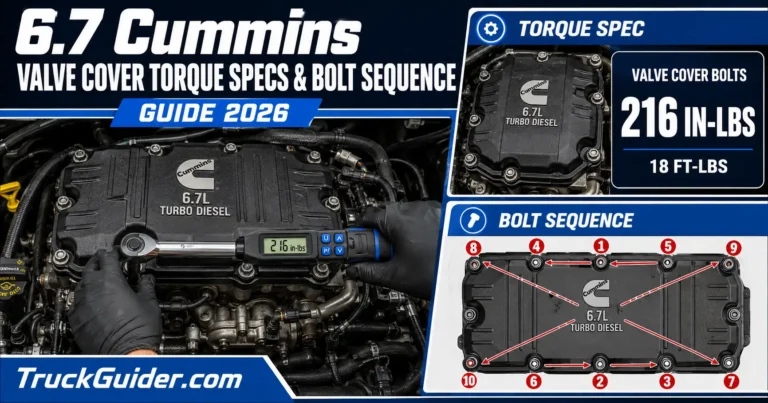
18 ft-lbs (24.5 N·m) is the commonly cited spec for rocker arm/valve cover hardware on this engine family. Confirm against your manual, as this can shift slightly by model year.


Camshaft Sprocket & Cam Cap Torque
- Camshaft sprocket bolt: approximately 58 ft-lbs — sources show some spread (roughly 54-61 ft-lbs), so verify against your factory manual rather than treating this as an exact figure.
- Cam cap bolts: varies by bolt size — commonly cited as roughly 14-15 ft-lbs for the larger M8 bolts and around 7 ft-lbs for the smaller M6 bolts. This is the spec with the widest variance across sources, so this one especially needs manual confirmation before you torque it. Cam cap bolts are also sequence-sensitive (center-out, like the head bolts) — check your manual’s specific tightening order before starting.
Connecting Rod Cap Bolts — Manual Required
Connecting rod bolts are torque-to-yield fasteners on this engine — they stretch during installation and must be replaced, never reused, on any rebuild. Because the exact torque-and-angle sequence varies meaningfully by model year and whether OEM or aftermarket (ARP-style) rod bolts are used,
we’re not publishing a single number here — the risk of citing the wrong figure for your specific engine code is too high for a fastener this critical to bottom-end integrity. Pull the exact spec from your factory service manual or the rod bolt manufacturer’s spec sheet before assembly.
Tools You’ll Need
- Torque wrench, 1/2-inch drive, 10-150 ft-lbs range
- Angle gauge (for the 80-90° steps — don’t eyeball these)
- 10mm or 12mm socket set
- Clean engine oil for bolt lubrication
- Your model-year factory service manual
FAQs
Why does the head bolt procedure have so many steps?
The torque-plus-angle method distributes clamping force evenly across the head gasket, which a single torque pass can’t achieve reliably on this engine — especially important given this family’s known gasket sealing weak point.
Can I reuse the head bolts?
If they’re not stretched or damaged, sometimes — but for a full head gasket job, new bolts are the safer call. Check your manual for reuse limits.
Is the EJ251 spec the same as EJ252 and EJ253?
The head bolt procedure is broadly shared, but always confirm your exact engine code before relying on any spec here for camshaft or rod bolt components — those show more variance between the variants.


How do I know if I already have a head gasket leak?
Look for a faint sweet smell on cold start, gradual coolant loss with no visible puddle, and dried residue where the head meets the block. It often seals itself once warm, so a routine pressure test can miss it — a careful visual inspection while cold is more reliable.
Did Subaru ever fix this head gasket issue?
Yes — Subaru moved to a multi-layer steel (MLS) gasket design around 2009-2010, which significantly reduced (though didn’t fully eliminate) the external leak tendency on later production engines.