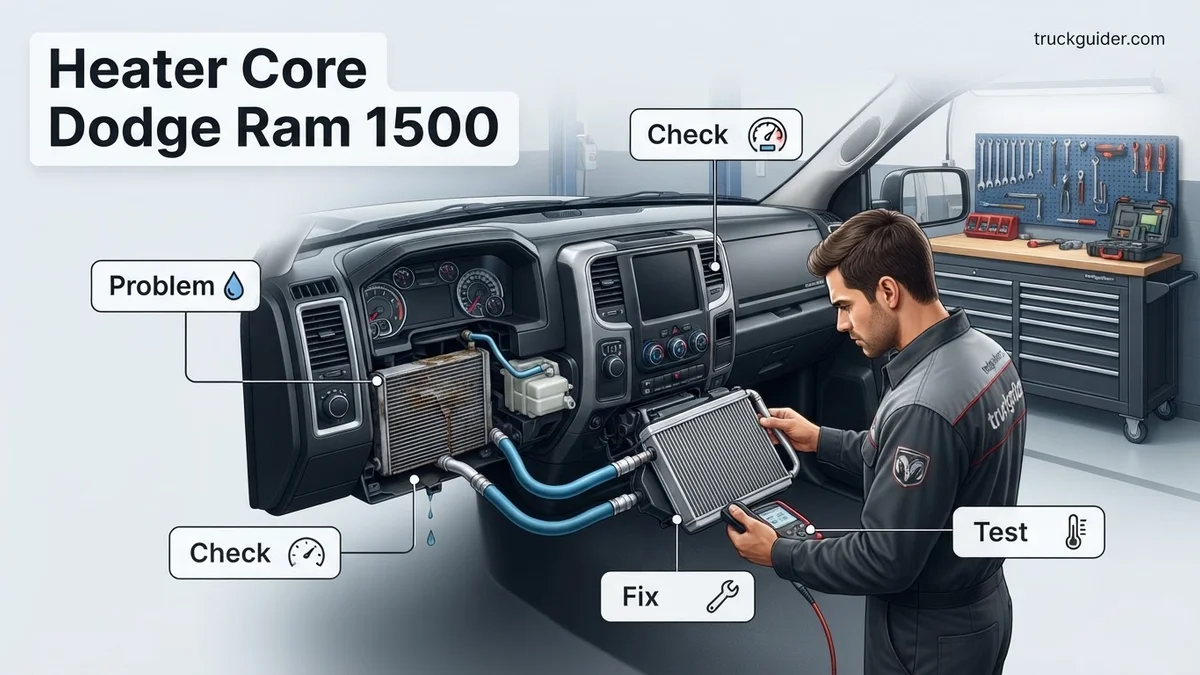
Heater Core Dodge Ram 1500 2013 Dodge Ram 1500 Heater 2026

A failing 2013 Dodge Ram 1500 heater core typically manifests as weak cabin heat, sweet coolant odors, or wet passenger carpeting. While replacement components cost under $150, professional labor ranges between $1,000 and $1,800 due to an exhaustive 7-to-10 hour dash teardown. Accurately diagnosing a clogged core versus a failed blend door actuator saves hundreds of dollars and unnecessary labor.
If your 2013 Dodge Ram 1500 is blowing lukewarm air on the passenger side or fogging your windshield with a sweet-smelling mist, your heater core has either clogged or ruptured. Fixing it requires pulling the entire dashboard down to the steering column and firewall. That makes it an exhausting 8-to-12-hour job where labor accounts for over 85% of your final repair bill in 2026.

Prime for Young Adults — 6 Months Free
Students and 18–24s get six months of Prime free, then half price.
Start 6 Months FreeA replacement core usually costs between $80 and $160, but professional shop estimates easily reach $1,200 to $1,900. Because the labor investment is so massive, you must verify that the heater core is genuinely at fault before you unbolt a single piece of your interior trim. Jumping the gun on a misdiagnosis can turn a cheap 30-minute blend door swap into an unnecessary weekend teardown.
Key Takeaways
- Check both heater hoses with an infrared thermometer to verify core flow before dashboard teardown.
- Faulty blend door actuators mimic heater core failure and take 30 minutes to replace.
- A chemical backflush frequently clears casting sand or scale, restoring heat without dash removal.
- Expect 7 to 10 hours of intensive labor and full steering column dropping for replacement.
- Always replace the blend door actuators and evacuate the A/C system properly when removing HVAC housings.
Diagnosing 2013 Dodge Ram 1500 Heater Core Symptoms vs. Blend Door Actuators
Recommended Best Deal Products



The fourth-generation Ram 1500 HVAC box frequently mimics heater core failure when an internal blend door actuator strips its plastic gears. To avoid pulling your dash needlessly, you need to isolate fluid restriction from mechanical airflow failure.
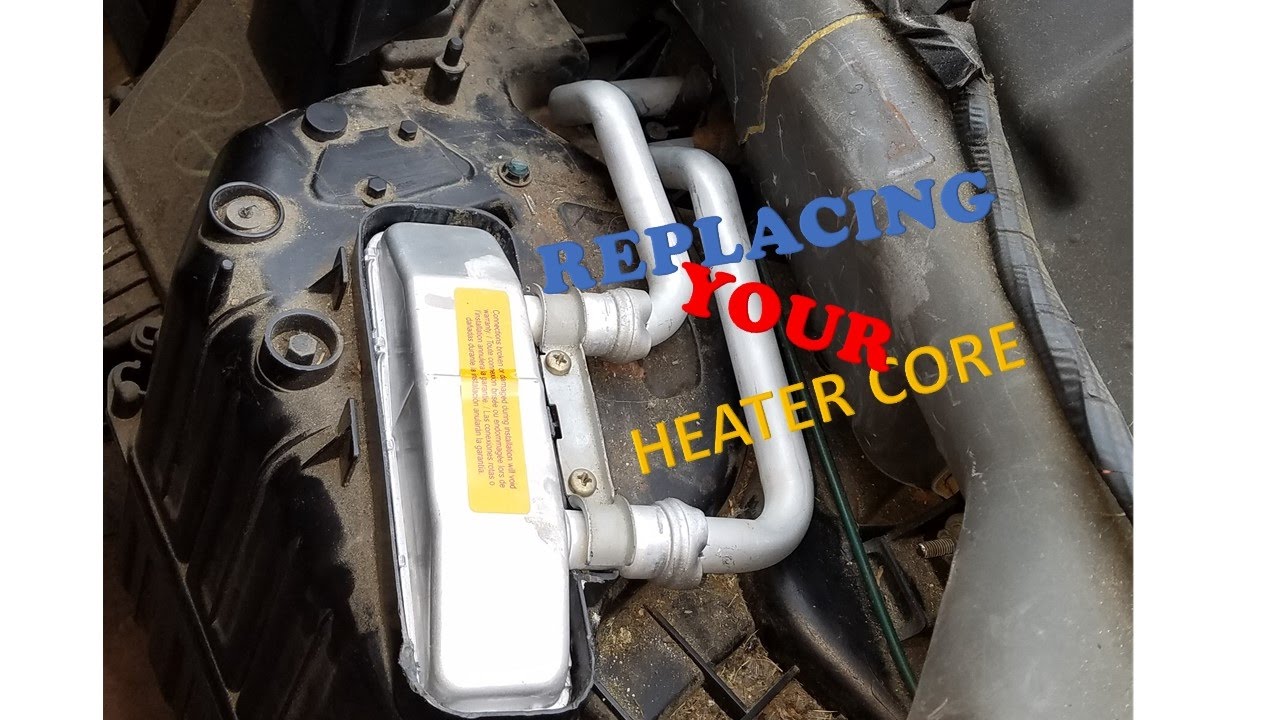
Classic Symptoms of a Failing 2013 Ram Heater Core
A heater core is essentially a miniature radiator mounted inside your HVAC housing. When it degrades, you will notice specific thermal and chemical clues inside the cabin:
- Passenger-Side Heat Loss: The 2013 Ram heater core flows from bottom to top. Sediment settles on the passenger side first, leaving driver vents warm while passenger vents blow ambient, cold air.
- Sweet Coolant Odor: A sharp, syrup-like smell fills the cabin as soon as you turn on the blower motor.
- Greasy Windshield Film: Atomized coolant vents through the defroster, leaving an oily haze on the glass that smudges when wiped.
- Wet Passenger Floorboard: Coolant leaks through the HVAC condensation drain or directly into the passenger footwell carpet under the dash.
- Unexplained Coolant Loss: Your degas bottle level drops slowly over weeks, but you cannot find wet spots under the water pump or radiator hoses.
The Blend Door Actuator Check (The Great Imposter)
If your Ram blows cold air on one side but has zero leaks or smells, test the blend door actuator first. The 2013 Ram uses electric stepper motors to turn internal plastic flaps. These actuators strip their nylon teeth, freezing the door on cold.
You can verify this without dismantling the dash using an infrared thermometer on the heater core inlet and outlet hoses at the engine firewall:
- Heater Core Clog: The inlet hose is scorching hot (around 180°F to 200°F), but the outlet hose is noticeably cooler (under 130°F). Coolant is blocked inside the core.
- Blend Door Failure: Both the inlet and outlet hoses are equally scalding hot (within 10°F of each other), yet the interior vents blow cold air. The core flows fine, but the door is stuck routing air around it.
- Actuator Noise: Listen behind the glovebox while turning the temperature dial from full cold to full heat. Rapid clicking or ticking points directly to a broken actuator gear, not a bad core.
How to Replace a 2013 Dodge Ram 1500 Heater Core Like a Pro: A Practical Walkthrough
Replacing the heater core on a 2013 Dodge Ram 1500 is one of the most involved DIY interior repairs you can tackle, as it requires accessing the HVAC distribution housing tucked deep behind the instrument panel. Whether you are dealing with a sweet antifreeze smell, perpetual windshield fogging, or a wet passenger floorboard, this guide walks you through safely extracting the dashboard, splitting the climate box, and restoring reliable cab heat without breaking expensive plastic trim.
Step 1: System Depressurization, A/C Evacuation, and Fluid Drainage
What you need: Fluid catch pan, 8mm wrench, certified A/C recovery machine (or professional shop service), safety glasses, and nitrile gloves.
Instructions: Begin by having a certified shop recover the R-134a refrigerant from your truck’s air conditioning system, as the evaporator core shares the HVAC housing with the heater core. Next, disconnect the negative battery terminal using an 8mm wrench to deactivate the airbag system; wait at least 15 minutes before proceeding to let the backup capacitor discharge. Place a clean drain pan beneath the radiator petcock on the driver’s side. Open the valve and remove the radiator pressure cap to drain approximately two gallons of engine coolant.
Pro Tip: Never vent A/C refrigerant into the atmosphere; it is illegal and hazardous. Getting it professionally evacuated beforehand allows you to legally and cleanly disconnect the line fittings under the hood.

Audible — Listen Free for 30 Days
One free credit a month and thousands of titles included.
Listen Free for 30 DaysStep 2: Engine Bay Disconnections at the Firewall
What you need: Heater hose disconnect tool (5/8-inch and 3/4-inch), 10mm and 13mm deep sockets, ratchet, and shop rags.
Instructions: Move to the passenger side of the engine bay near the firewall bulkhead. Locate the two rubber heater core lines entering the firewall. Use your quick-disconnect tool to disengage the plastic locking collars, pulling the rubber hoses free from the aluminum core inlet and outlet tubes. Plug the open hoses with clean rags to minimize residual spillage. Unbolt the A/C expansion valve block from the firewall using a 10mm socket, carefully storing the sealing washer. Finally, remove the three exterior HVAC housing retaining nuts mounted to the firewall studs surrounding the line pass-through area.
Pro Tip: Dodge quick-connect tabs become brittle from exhaust heat. Spray a shot of silicone lubricant into the connector collar before twisting to prevent snapping the internal plastic lock fingers.
Step 3: Center Console and Lower Interior Trim Removal
What you need: Plastic trim removal wedges, Phillips screwdriver, T20 Torx driver, and 7mm, 8mm, and 10mm sockets.
Instructions: Inside the cab, pry up the rubber liners in the center console cup holders and storage bins to expose the mounting screws. Remove the bezel surrounding the center console and console shifter (if equipped). Unbolt the main console frame from the floor pan using a 10mm socket, disconnect all 12V and USB harness plugs, and lift the console entirely out of the cab. Move to the dashboard bottom to unclip both lower knee bolsters and the glove box assemblies. Squeeze the sides of the upper and lower glove boxes inward to drop them past their stops, then unhook their hinges.
Pro Tip: Organize fasteners into labeled plastic bags corresponding to each trim piece; the 2013 Ram uses multiple similar-looking 7mm and 8mm coarse-thread interior screws with different shoulder lengths.
Step 4: Steering Column Dropping and Dash Harness Prep
What you need: 13mm socket, ratchet with 6-inch extension, T25 Torx driver, and a bungee cord or wooden support block.
Instructions: Remove the two halves of the plastic steering column clam shell using a T25 Torx driver. Detach the lower dash metal reinforcement plate underneath the column. Locate the four 13mm nuts securing the steering column assembly to the dashboard cross-member. Carefully loosen and remove these nuts, then lower the steering column gently until the steering wheel rests safely on the driver’s seat cushion, securing it with a bungee cord so it does not stress the lower intermediate shaft joint. Disconnect the main wiring harnesses along the bottom of the driver’s side A-pillar and kick panel junction block.
Audible Premium Plus — Annual Membership
12 audiobook credits up front, plus the full Audible catalogue.
See Annual PlansPro Tip: Lock the steering wheel completely straight before dropping the column. Allowing the wheel to spin freely while detached will snap the internal clockspring ribbon, disabling your steering controls and airbag.
Step 5: Dash Support Unbolting and Dash Rollback
What you need: 10mm and 13mm sockets, long extension, pry tool, and a helper.
Instructions: Pop off the driver and passenger A-pillar trim covers (pull handles) to reveal and remove their 10mm bolts. Pry off the long defrost grille strip spanning the base of the windshield to reveal the five 10mm cowl-support bolts. Remove the two bottom 13mm frame bolts located down near the kick panels on either side. With a helper on the opposite side, grip the structural dashboard frame firmly, lift up to clear the alignment dowels, and pull the complete assembly roughly 12 to 18 inches rearward. Rest the dashboard assembly on heavy foam blocks or across the front seat bases.
Pro Tip: You do not need to pull the dashboard completely out of the truck door. Rolling it backward onto the seat frames provides ample clearance to access the HVAC box while cutting your reassembly time in half.
Step 6: HVAC Housing Extraction
What you need: 10mm socket, ratchet, and a flathead screwdriver.
Instructions: Inspect the structural HVAC box frame now exposed against the firewall. Locate and extract the remaining interior 10mm mounting bolts holding the housing bracket to the steel firewall support. Unplug the main HVAC wire harness connector leading to the blower motor and blend door actuators. Pull the plastic housing straight back toward the rear of the cab to slide the heater core tubes and A/C evaporator studs clear of their firewall pass-through grommets. Carefully lift the bulky HVAC unit out of the passenger side footwell and place it on a clean, sturdy workbench.
Pro Tip: Keep the HVAC unit level while transferring it out of the cab. Residual engine coolant inevitably remains trapped inside the failing heater core passages and can leak onto your cab carpeting if tilted aggressively.
Step 7: Splitting the Case and Replacing the Core
What you need: T15 Torx driver, 5.5mm socket, replacement OEM-spec heater core, foam tape, and all-purpose cleaner.
Instructions: Remove the series of perimeter screws (typically 5.5mm or T15 Torx) securing the top and bottom halves of the plastic air distribution box together. Carefully separate the clam-shell halves without forcing the plastic snaps. Lift the old, leaking heater core straight out of its molded cradle. Clean any pooled coolant, dirt, and mildew out of the plastic basin using a degreaser and clean shop towels. Adhere the new closed-cell foam insulation strip around the perimeter edges of your replacement heater core to prevent air bypassing. Seat the new core firmly into place, ensure all blend doors seat properly into their pivot holes, and rejoin the housing halves.
Pro Tip: Test the movement of all internal blend and mode doors by hand before reinstalling the assembly screws. A door knocked off its pivot pin will result in no temperature regulation once the dash is back in.
Step 8: Reinstalling Dashboard Assembly and Reconnecting Hardware
What you need: Torque wrench, full socket set (7mm, 8mm, 10mm, 13mm), and trim tool.
Instructions: Lift the HVAC housing back into the footwell, guiding the heater tubes and evaporator fittings through the firewall insulation seals. Fasten all interior and engine-bay firewall nuts securely. With your helper, guide the dashboard assembly back forward over its locating pins. Reinstall the five cowl bolts along the windshield base and the lower structural frame bolts, torquing structural 13mm fasteners to 18-20 ft-lbs. Raise the steering column back into place, torque its mounting nuts to 15 ft-lbs, and reconnect all electrical bulkheads, A-pillar connectors, ground lugs, center console wiring, and body panels in the reverse order of removal.
Pro Tip: Reconnect the battery temporarily to switch the ignition to ‘Run’ (engine off) to test HVAC blower speeds, actuator calibration, and dash cluster lights before reinstalling final trim bezels and cup holders.
Step 9: Coolant Refilling, Bleeding, and A/C Recharge
What you need: Spill-free coolant funnel kit, 2 gallons of genuine 50/50 OAT coolant (MS-12106), and A/C manifold gauges/vacuum pump.
Instructions: Reconnect the heater core quick-disconnect hoses and A/C lines under the hood, replacing all O-rings with fresh, lubricated seals. Reconnect the negative battery terminal. Mount a spill-free funnel to the radiator/expansion neck and fill it with fresh purple OAT coolant. Start the engine with the cab heat set to full blast. Allow the truck to reach operating temperature (around 205°F to 215°F) until the thermostat opens, burping out trapped air pockets over 15 to 20 minutes. Check the firewall hose connections for leaks, ensure scorching hot air blows from the vents, and conclude by having your A/C professionally pulled to a vacuum and recharged.
Pro Tip: The 2013 Ram 1500 requires OAT (Organic Acid Technology) coolant. Never mix in older HOAT (orange) or universal green coolant, or it will create a gel-like sludge that will quickly clog your brand-new heater core.
✅ Final Checklist
- Verify that both quick-connect heater hoses under the hood are locked securely and leak-free under system pressure.
- Ensure the steering column mounting hardware is torqued to factory spec and that the steering wheel returns freely without clockspring resistance.
- Confirm the temperature blend door sweeps smoothly from freezing cold to scorching hot across all vent zones (defrost, dash, floor).
- Check that passenger carpet padding is dry and that no sweet ethylene-glycol odors linger inside the cabin during blower operation.
- Verify the engine coolant level in the recovery bottle sits at the ‘Max Cold’ line once the truck cools completely.
Important Notes:
- Safety Warning: Always disconnect the battery and allow the supplemental restraint system (airbag) capacitors to discharge before touching dashboard wiring or dropping the steering column.
- When to Seek Professional Help: If you lack the tools to legally recover refrigerant, or if your dash wiring harnesses show signs of previous aftermarket tampering or brittle connections, consult an ASE-certified technician.
- Estimated Time and Cost: This project typically takes 7 to 10 hours of focused labor. Doing it yourself costs between $80 and $220 for parts and coolant, compared to professional dealership quotes running between $1,200 and $2,000.
What Causes 2013 Ram 1500 Heater Core Clogs and Leaks
Recommended Best Deal Products


Heater cores on the 2013 Ram fail prematurely compared to earlier model years due to specific factory transitions, chemical vulnerabilities, and cooling system geometry.
The 2013 Coolant Transition and Gel Sludge
The 2013 model year marked Ram’s official transition from Chrysler’s older HOAT (Hybrid Organic Acid Technology) coolant to purple OAT (Organic Acid Technology) coolant. Mixing these two distinct chemistries creates a severe chemical reaction. If a previous owner or quick-lube shop topped off your 2013 Ram with standard green coolant or older HOAT fluid, the additives coagulate into a thick, silicated sludge.
Because the aluminum tubes inside the Ram’s heater core are barely wider than a pinhead, this gelled precipitate instantly plugs the passages. Once these narrow channels choke off, localized corrosion accelerates and eats pinholes through the thin aluminum walls.
Casting Sand Accumulation
Both the 5.7L Hemi V8 and 3.6L Pentastar V6 engines have historically shed residual engine block casting sand into the cooling jackets. This fine silicate grit circulates through the water pump and deposits in low-velocity zones. The bottom tank of the 2013 Ram heater core acts as a natural settling basin.
Over tens of thousands of heat cycles, this sand packs tight inside the internal baffles. It forms a solid barrier that chemical flushes can rarely dissolve, permanently starving your cabin of heat and requiring physical unit replacement.
How to Fix a 2013 Dodge Ram 1500 Heater Core: Step-by-Step Dash Removal
Replacing the heater core on a 2013 Dodge Ram 1500 requires complete extraction of the dashboard assembly. Factory service manuals allocate between 7.5 and 9.0 billable hours for this complex mechanical procedure.
Cabin and System Preparation
- Disconnect the negative battery cable and wait ten minutes to completely discharge the supplemental restraint system (SRS) capacitors.
- Recover the R-134a refrigerant using an EPA-certified recovery machine, then drain the engine coolant via the radiator petcock.
- Disconnect the heater core inlet and outlet quick-connect hoses at the engine firewall using a standard disconnect tool.
Instrument Panel and HVAC Housing Extraction
- Remove the front seats, center floor console, steering column lower shrouds, and instrument cluster bezel.
- Support the steering column, remove the four retaining nuts, and gently lower the column assembly to the floor.
- Remove the structural dash frame bolts along the windshield cowl, kick panels, and central transmission tunnel support brackets.
- Roll the instrument panel assembly backward toward the rear cab wall to expose the plastic HVAC distribution housing.
- Unbolt the HVAC case from the cabin side and firewall studs, remove the assembly, and slide the leaking heater core out of its internal cassette.
What If Replacement Isn’t Feasible: Chemical Flushes, Bypasses, and Cost Realities
Recommended Best Deal Products


Full mechanical replacement is labor-intensive. When dash removal is out of the question, temporary interventions can restore partial function or prevent engine damage.
Flushing and Emergency Bypassing
- Reverse Chemical Flushing: Disconnect both heater hoses at the firewall. Attach clear 5/8-inch vinyl tubing and push a mixture of warm water and cooling system cleaner through the outlet tube at under 15 PSI to dislodge scale without rupturing thin aluminum passages.
- Firewall Core Bypass: If the core leaks into the cab, connect the water pump supply hose directly to the engine return pipe using a 5/8-inch to 3/4-inch brass hose barb. This eliminates cabin coolant leaks entirely but terminates all cabin heat.
2026 Repair Cost Expectations
In 2026, replacement parts remain affordable, but labor drives total expenses. OEM Mopar heater cores average $190 to $270, while aftermarket alternatives cost roughly $75 to $130. However, professional labor rates averaging $140 to $190 per hour push total dealership and independent shop estimates to between $1,450 and $2,200.
What If It Still Doesn’t Work?
If coolant flushes or core replacements fail to restore heat, the fault often lies within peripheral climate control components. Take these sequential diagnostic steps:
- Recalibrate Blend Door Actuators: Remove the HVAC fuse for 60 seconds to force actuator relearn. Stripped plastic gears on the temperature blend door mimic a blocked heater core.
- Purge Entrained Cooling System Air: Elevate the truck’s front end on ramps. Attach a spill-free funnel to the radiator neck and idle the engine until the thermostat cycles twice to release trapped air pockets.
- Verify Coolant Operating Temperatures: Use an OBD-II live scanner to verify engine coolant hits 195°F to 203°F. A stuck-open thermostat prevents the coolant from absorbing sufficient combustion heat.
- Commission Professional Diagnostics: If you detect persistent sweet-smelling exhaust or cabin misting, schedule an inspection. Professional diagnostic charges range between $130 and $190 to pressure-test the cooling circuit and scope actuator doors.
Conclusion
According to verified research and expert automotive service data, resolving heating failures in the 2013 Dodge Ram 1500 requires distinguishing between clogged core tubes, blend door motor failures, and active coolant leaks. While flushing or looping the heater lines provides a short-term workaround, full component replacement remains the only permanent fix. As an immediate next step, verify heater hose temperatures at the firewall with an infrared thermometer to confirm whether your core is truly blocked before taking the dashboard apart.
❓ Frequently Asked Questions
What are the primary symptoms of a failing heater core in a 2013 Dodge Ram 1500?
Common symptoms include lukewarm or cold air from the vents, an oily film fogging the inside of the windshield, and a distinct sweet maple syrup smell inside the cabin. In severe cases of core rupture, passenger-side carpeting becomes soaked with engine coolant.
How long does it realistically take to replace a 2013 Ram 1500 heater core?
A trained dealership technician takes roughly 6 to 8 hours, while a DIYer working in a home garage should budget 8 to 12 hours across two days. The job requires removing the center console, steering column, instrument panel, and discharging the refrigerant to extract the HVAC suitcase.
Is it safe to bypass the heater core temporarily?
Yes, connecting the heater core inlet and outlet hoses together with a 5/8-inch to 3/4-inch brass connector allows you to drive safely without losing coolant or soaking your carpets. However, this eliminates all cabin heat and windshield defrosting capabilities until permanently repaired.
Should I buy an OEM Mopar heater core or an aftermarket replacement?
Given the 8-plus hours of labor required to access the part, high-grade OEM Mopar cores or premium aftermarket brands like Spectra Premium are recommended over bargain alternatives. Cheap replacement cores often suffer from thin tube walls and ill-fitting aluminum pipe bends that leak under pressure.
What type of coolant must be used after replacing the heater core on a 2013 Ram 1500?
The 2013 Ram 1500 transitioned to purple OAT (Organic Additive Technology) coolant meeting Chrysler MS-12106 specifications. Never mix OAT with older pink/orange HOAT coolants, as doing so causes chemical clumping that instantly plugs the new heater core.
What additional parts should be replaced while the dashboard is pulled?
While the HVAC box is accessible, replace the A/C evaporator core, the foam door seals, and the blend door actuators to prevent doing the job twice. Inspecting and replacing the quick-connect heater hose fittings at the firewall is also highly advisable due to plastic embrittlement.
![Ram 1500 Single Cab Short Bed Performance, Specifications, [2026]](https://truckguider.com/wp-content/uploads/2026/03/featured-7450283a.webp)
![Fix P0138 Code Dodge Ram 1500: Causes & Fixes [2026]](https://truckguider.com/wp-content/uploads/2026/03/p0138-dodge-ram-1500-featured.webp)
![5.7 Hemi Exhaust Manifold Upgrade [2026]](https://truckguider.com/wp-content/uploads/2026/03/featured-5f91c218-768x768.webp)