2019 GMC Sierra Fuse Box Diagram: Installation Setup 2026

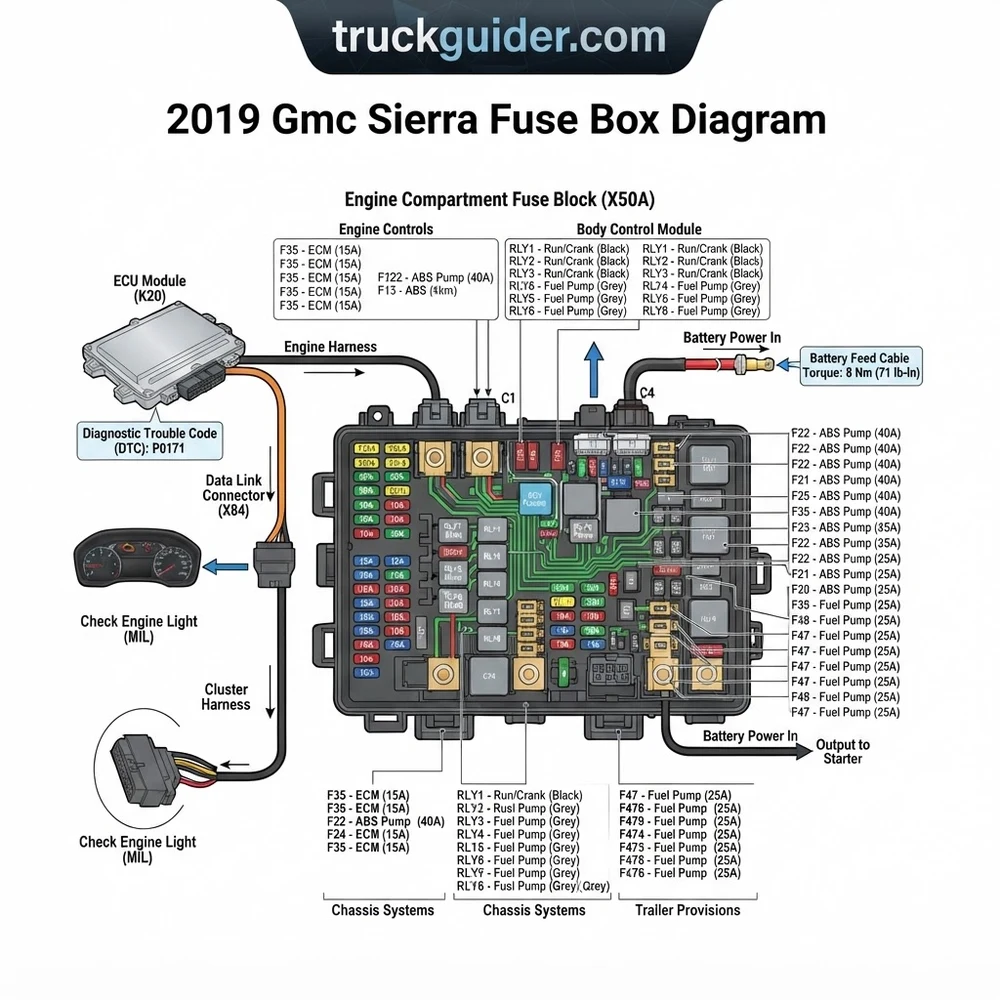
The 2019 GMC Sierra features two main fuse blocks: the Instrument Panel block (driver-side dash) and the Engine Compartment block (driver-side fender well). Use the underside cover legend to identify specific circuit amperages. Always verify fuse continuity using a multimeter before replacing components linked to OBD-II diagnostic codes or ECU communication failures.
📌 Key Takeaways
- The Engine Compartment block contains high-amperage J-Case fuses ranging from 20A to 60A for critical systems.
- Always cross-reference the diagram with your specific trim level, as diesel and gas configurations utilize different pinout layouts.
- Ensure a clean, dry surface when testing; torque spec for terminal nuts on the main power distribution stud is 12 Nm.
- A common failure point is the ‘BATT’ master fuse, which can trigger a total vehicle shutdown or ECU communication loss.
- Consult a certified technician if the check engine light persists after replacing a fuse, as it may indicate a deeper short-circuit.
Understanding the electrical architecture of your truck is essential for maintaining optimal performance, especially when dealing with complex subsystems like the ECU, transmission control, or secondary sensor arrays. For the 2019 GMC Sierra, navigating the electrical distribution system requires precision, as the vehicle was produced during a transition year featuring two distinct body styles. A misidentified circuit can lead to incorrect diagnostic codes, improper sensor readings, or accidental damage to sensitive electronic components. Whether you are troubleshooting a persistent check engine light, monitoring oil pressure sensor fluctuations, or verifying coolant flow solenoid activation, this guide provides the technical foundation for locating and interpreting the electrical distribution centers within your vehicle.


Identifying Your 2019 GMC Sierra Body Style and Fuse Layout
The 2019 model year presents a unique challenge for technicians because it includes both the K2 platform (often branded as the 2019 GMC Sierra Limited) and the new-for-2019 T1 platform. These platforms utilize entirely different wiring harnesses, fuse box configurations, and electrical distribution logic. Before referencing any 2019 GMC Sierra fuse box diagram, you must verify which chassis you are servicing. The K2 platform maintains the architecture of the previous generation, whereas the T1 platform introduces a more centralized Body Control Module (BCM) and a revised gateway module that communicates differently with the engine ECU.
Distinguishing Between K2 and T1 Electrical Architectures
To identify your vehicle, check the VIN or look at the exterior styling. The T1 generation features a much larger, more aggressive grille and integrated lighting elements that differ significantly from the K2 platform. If you reference a T1 diagram for a Limited (K2) truck, you will find that relay positions and fuse amperages do not align, leading to potential misdiagnosis. Consult your specific owner’s manual provided in the glove box, as it contains the definitive map for your specific build date. Electrical engineers at GMC updated the fuse block layout mid-year to accommodate additional accessories and power demands for the new infotainment and drive-assist systems found in the T1 Sierra.
Understanding the Hierarchy of Distribution Centers
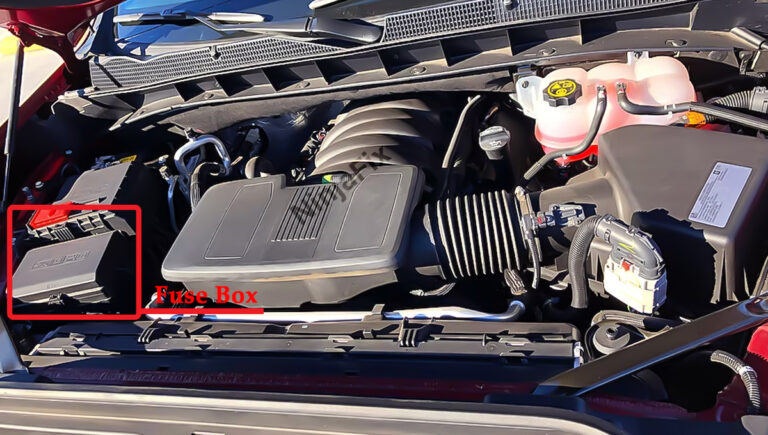
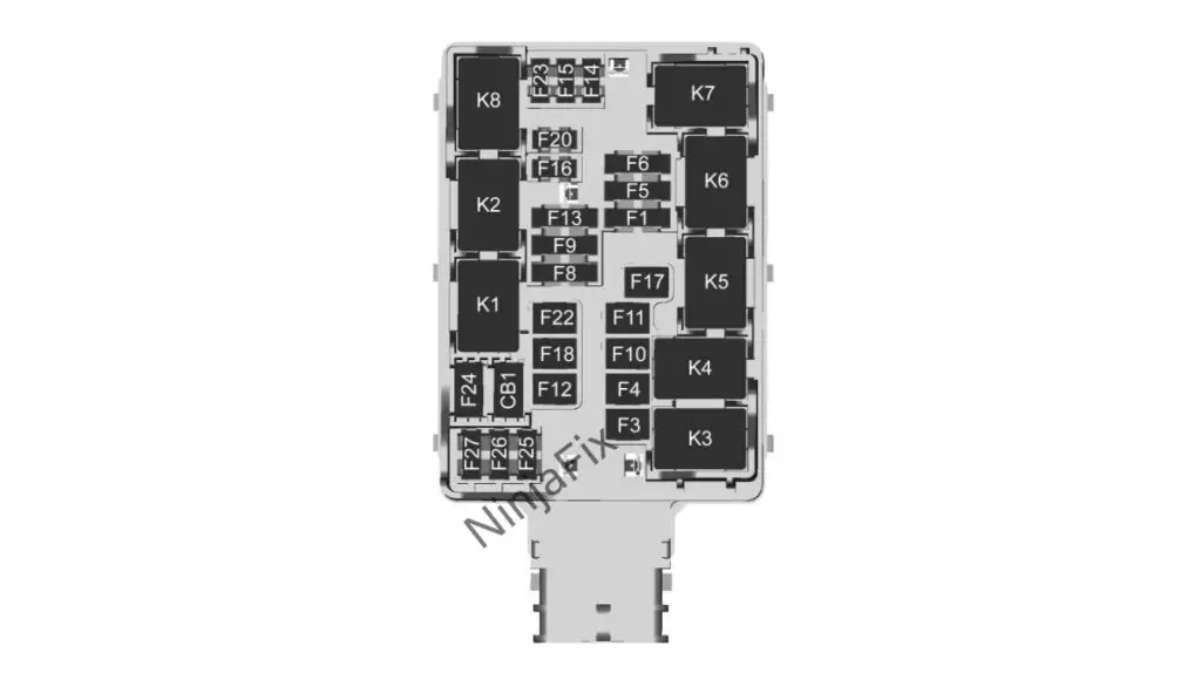
Your vehicle houses two primary electrical distribution centers. The first is located in the engine compartment, typically on the driver’s side near the fender well, and houses high-amperage J-Case fuses that protect primary systems such as the cooling fan, starter solenoid, and ECU power feed. The second is the instrument panel fuse block, usually positioned behind the passenger side kick panel or dashboard trim. This area manages lower-amperage circuits for lighting, cabin accessories, and OBD-II port communications. Always verify the physical label on the underside of the fuse box cover against the digital diagram before pulling any components, as factory mid-year revisions can occasionally result in localized discrepancies.
2019 GMC Sierra Fuse Box Diagram: Component Identification Guide
Proper identification of components within the 2019 GMC Sierra fuse box diagram is vital for maintaining the integrity of the vehicle’s electronic infrastructure. Relying on generic labels can lead to the accidental disabling of safety systems or the loss of adaptive cruise control functionality. The following table identifies the common categories found in the primary engine compartment and interior distribution centers.
| Fuse Type | Primary Application | Technical Function |
|---|---|---|
| J-Case (High Current) | Engine/Cooling | Protects main power feeds to cooling fans/alternator. |
| Mini/Micro Blade | Sensors/Lighting | Protects ECU logic circuits and interior illumination. |
| Mini-Relay | Switching | Electro-mechanical switching for high-draw pumps. |
| Micro-Relay | Logic Gates | Low-amperage control for signals to the transmission ECU. |
When investigating a specific diagnostic code related to oil pressure or engine timing chain synchronization, start by identifying the fuse powering the Engine Control Module (ECM/ECU). If the ECU power rail is compromised, the vehicle may experience erratic behavior, such as a fluctuating tachometer or a failure to enter closed-loop operation. Always cross-reference the amperage rating labeled on the plastic fuse body with your diagram. Replacing a 10-amp fuse with a 20-amp fuse is a critical error that can result in wire insulation melting during a short-to-ground event.
Ensure the engine is completely powered down and the ignition cycle is in the ‘OFF’ position before removing any high-amperage J-Case fuses. Residual capacitance in the ECU can store enough energy to trigger a false diagnostic code if a module loses power while the circuit is active.


Common Electrical Issues and 2019 GMC Sierra Fuse Symptoms
Electrical gremlins in the 2019 Sierra often manifest as intermittent system failures rather than total vehicle shutdown. A blown fuse related to the Body Control Module (BCM) might manifest as non-responsive power locks, while an ECU-related fuse failure will almost certainly trigger a check engine light and potentially force the truck into “limp mode.”
- Loss of Communication: If your OBD-II scanner cannot connect, the diagnostic port fuse or the gateway module power fuse is the first point of inspection.
- Accessory Failure: Blown fuses in the instrument panel distribution center often result in a loss of heated seats, infotainment display, or cluster illumination.
- Sensor Signal Errors: A short in the engine harness can cause specific sensor circuits—such as oil pressure or coolant flow—to report “Out of Range” values to the ECU.
- Clicking Noises: A relay that “chatters” or clicks repeatedly often indicates that the coil side of the relay is receiving inconsistent voltage, usually due to a corroded fuse pin or loose ground connection.
Be aware that a blown fuse is often a symptom of an underlying condition, such as a chafed wire loom near the engine block or a faulty solenoid. If you replace a fuse and it fails again immediately, you must perform a continuity test on the load side of the circuit to identify a potential short to ground before attempting to replace the fuse a second time.
Diagnosis Steps for 2019 GMC Sierra Circuit Failures
Systematic diagnosis prevents unnecessary parts replacement and ensures the long-term reliability of your electrical system. When addressing a failure on your 2019 GMC Sierra, follow these professional-grade steps to isolate the fault.
- Scan for Diagnostic Codes: Utilize an OBD-II scanner to pull all stored codes. Pay special attention to “Communication Lost” or “Circuit Low/High” codes, as these point directly to electrical distribution issues.
- Visual Inspection: Inspect the fuse block for signs of heat damage or melted plastic. A “browned” fuse terminal often indicates a loose connection or high resistance.
- Check Continuity: With the ignition OFF, use a digital multimeter set to Ohms (Ω) to test continuity across the fuse. A good fuse should show near 0Ω resistance.
- Verify Voltage at the Slot: Using a test light or multimeter, verify that battery voltage is present at the fuse terminal when the ignition is in the correct position. If power is missing at the supply side, the issue may be a relay or the master power feed.
- Check for Shorts: If the fuse is blown, do not replace it yet. Use a multimeter set to continuity mode between the load-side terminal of the fuse slot and the chassis ground. If the meter beeps, you have a short to ground that must be traced and repaired before reinstalling a new fuse.
Never use a “bypass” or bridge a fuse with metal wire. This negates the protective design of the circuit and creates a severe fire risk. Always use the specified amperage fuse as indicated by the manufacturer.
When working near the engine compartment, be mindful of surrounding components. If you are inspecting circuits related to the timing chain or coolant flow solenoids, ensure your tools are clear of moving parts. If you find it necessary to remove the ECU or major wiring harnesses, ensure all fasteners are torqued to OEM specification (typically 10-12 Nm for ground bolts) upon reinstallation to prevent future ground-related faults.
2019 GMC Sierra Fuse Box Diagram Questions Answered
Can a blown fuse cause a permanent check engine light?
Yes, if the fuse protects a critical emission control component or a sensor that the ECU requires for closed-loop operation, the ECU will set a diagnostic code. Replacing the fuse will clear the power interruption, but you may need to clear the code with a scanner to turn off the check engine light.
How do I know if I have the T1 or K2 chassis?
The T1 platform (the “all-new” 2019 model) has a significantly larger footprint and different headlamp design than the K2. Check your VIN—the 10th digit corresponds to the model year. For 2019, ‘K’ denotes the K2 and ‘L’ often denotes the T1, though physical visual verification of the fuse box cover is the most reliable method.



What if my OBD-II port has no power?
The OBD-II port is usually powered by a dedicated cigarette lighter or accessory fuse in the interior block. Check your 2019 GMC Sierra fuse box diagram for the “DLC” (Data Link Connector) or “AUX” labels, as these circuits often share the power supply required for diagnostic communication.
Does the torque spec matter when tightening fuse box bolts?
Yes. Electrical distribution centers rely on solid electrical contact. Over-tightening can crack the plastic housing, while under-tightening can cause intermittent voltage drops due to poor contact between the fuse pins and the receptacle clips.
For standard automotive blade fuses, ensure the puller tool is used correctly. Excessive force can bend the terminal clips, creating a permanent high-resistance connection that leads to future fuse failure.
Step-by-Step Guide to Understanding the 2019 Gmc Sierra Fuse Box Diagram
Identify – Locate the fuse box cover and cross-reference the internal legend with the provided diagram.
Locate – Gain access by removing the protective plastic shield; note the orientation to ensure accurate slot mapping.
Reference – Use the diagram to pinpoint the specific circuit associated with your check engine light or electrical failure.


Connect/Route – Test for voltage using a multimeter on the test points atop the fuse to verify power delivery.
Verify – Replace any blown fuses with the exact amperage rating; clear any stored diagnostic code using an OBD-II scanner.
Troubleshoot – If the fuse blows again immediately, inspect the downstream wiring harness for insulation wear or direct shorts.