6.7 Cummins Heater Hose Diagram: Component Identification And Routing Guide
For the 6.7 Cummins engine, the cooling system is the lifeline that prevents catastrophic thermal failure, yet the heater hose network is often the most overlooked component of this circuit. While the massive radiator and intercooler command the most attention, the intricate web of hoses responsible for cabin climate control and auxiliary cooling plays a critical role in maintaining the engine’s thermal equilibrium. When a heater hose fails or a 6.7 Cummins heater hose diagram is misunderstood, drivers face not only a loss of cabin heat but also the immediate risk of engine overheating and costly diesel repairs. This complete guide provides a comprehensive technical breakdown of the 6.7 Cummins heater hose diagram, routing specifications, and expert replacement procedures to ensure your engine remains reliable and trusted on the road.
Understanding the 6.7 Cummins Heater Hose System and Components
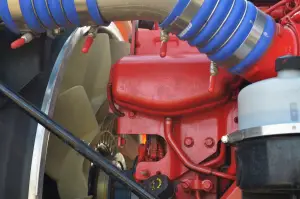
The 6.7L inline-six turbodiesel utilizes a robust, closed-loop cooling circuit designed to handle the immense thermal loads produced by heavy-duty towing and high-output operation. Unlike smaller gasoline engines, the Cummins cooling system must integrate with various emission components and auxiliary coolers, making the heater hose routing more complex than it appears at first glance. The primary function of the heater hose system is to circulate hot coolant from the engine block to the heater core—essentially a small radiator located behind the dashboard—which provides the heat energy for the vehicle’s HVAC system.
Key connection points in this system include the water pump housing, which acts as the “heart” of the circulation, and the thermostat assembly, which regulates fluid flow based on engine temperature. The hoses then travel to the firewall bulkhead, where they connect to the heater core stubs. In a standard setup, you have a supply line (transporting hot coolant from the engine) and a return line (bringing the slightly cooled fluid back to the engine’s suction side). While factory hoses are typically made of reinforced rubber, many professional diesel technicians recommend Cummins grade reinforced silicone upgrades for trucks operating in extreme high-heat environments or high-idle scenarios.
It is important to note that the introduction of the 6.7L platform in mid-2007 (2007.5) brought significant changes to routing due to the EGR (Exhaust Gas Recirculation) cooler integration. The EGR cooler often shares coolant paths with the heater circuit, particularly on the passenger side of the engine. Furthermore, 2013 and newer Ram models may feature a dual-radiator configuration in specific chassis-cab or high-output variants, which adds additional complexity to the reliable routing of coolant lines compared to the simpler 2010-2012 models.
Detailed 6.7 Cummins Heater Hose Diagram and Routing Analysis
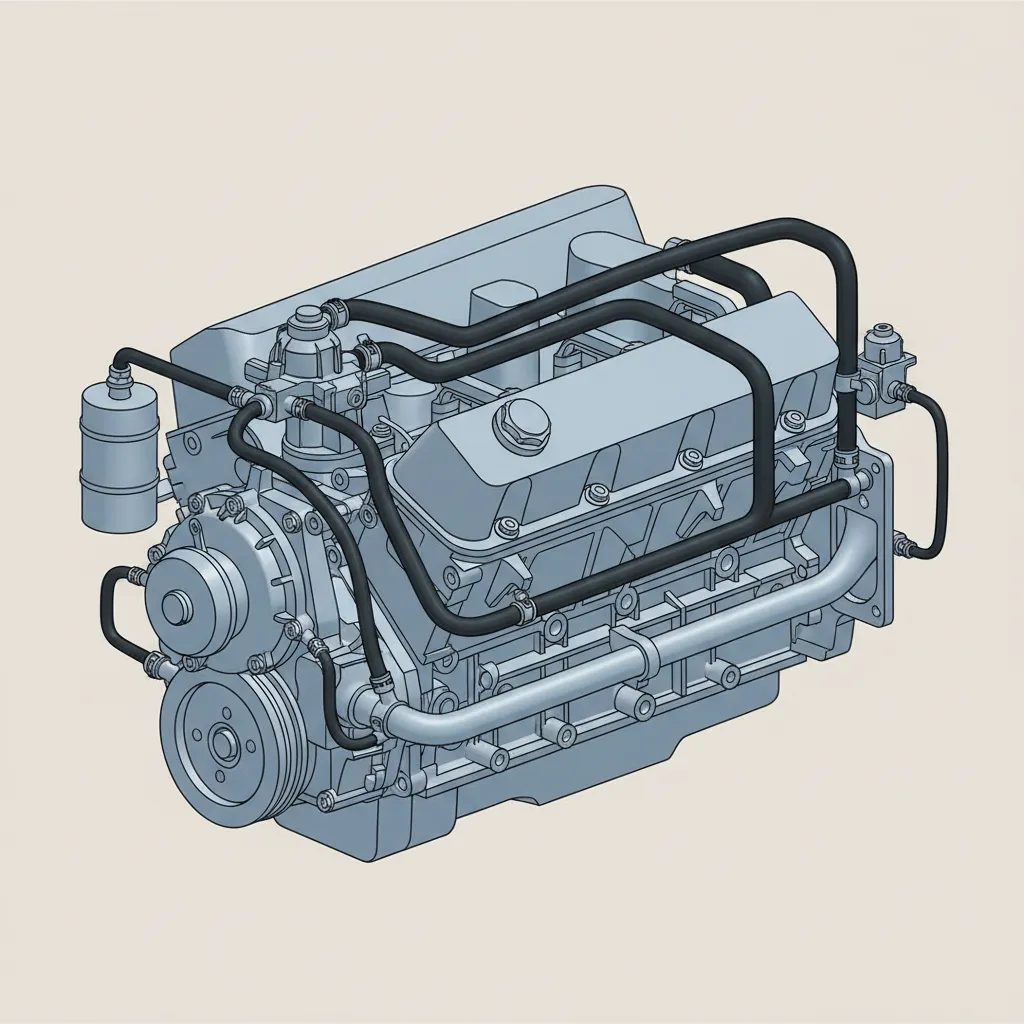
Visualizing the 6.7 Cummins heater hose path requires a systematic approach, starting from the passenger side of the cylinder head. The supply port is typically situated near the thermostat housing. From here, the hose must navigate a high-density area of the engine bay, passing near the turbocharger heat shield and the air intake assembly. Because this area is subject to intense radiant heat, the quality of routing is paramount. A trusted diagram will show the supply line running along the upper portion of the engine bay, secured by plastic clips or brackets to prevent contact with the hot exhaust manifold.
The return line follows a parallel path but often dives lower as it approaches the engine block. It typically connects back to either the suction side of the water pump or a coolant bypass pipe located on the lower passenger side. A common point of confusion for DIYers occurs near the firewall, where the heater hoses run adjacent to the EGR cooler lines. I have seen many instances where a technician misidentifies an EGR cooler line for a heater hose during a pressure test. Always verify the destination; heater hoses will always pass through the firewall bulkhead into the cabin, while EGR lines remain within the engine compartment.
On 2013+ Ram 2500/3500 models, pay close attention to the plastic “Y” pipes or “T” connectors. These are used to split coolant flow between the heater core and the transmission fluid cooler or EGR circuit. These composite plastic connectors are notorious for developing hairline cracks that only leak under full operating pressure.
The average 6.7 Cummins cooling system holds between 5.7 and 7.4 gallons of coolant, depending on the specific model year and radiator configuration. This volume means that even a small leak in a heater hose can lead to a significant drop in system pressure and cooling efficiency. When consulting a expert tips forum or service manual, look for specific visual cues such as the type of fittings used—older models utilize traditional worm-gear or constant-tension clamps, while newer iterations frequently use quick-connect plastic fittings that require specialized tools for removal without damage.
Identifying Common Failure Points and Diagnostic Symptoms
With 15 years of hands-on experience in diesel maintenance, I can attest that heater hoses are often the “smoking gun” in mysterious coolant loss cases. While high-quality rubber is used in the factory, the extreme heat-cycling of a diesel engine—where temperatures reach over 200°F and then drop to ambient temperature repeatedly—eventually breaks down the internal reinforcement of the hose. Research suggests that the average lifespan for these components is 5-7 years. Beyond this window, the rubber becomes “spongy” or develops internal cracks that can lead to a sudden rupture under load.
By The Numbers
Average Hose Lifespan
Roadside Cooling Failures
Operating Temperatures
Common failure points include:
- The “Plastic Y-Pipe” Issue: Factory composite connectors are a primary failure point on 4th-generation Ram trucks. These connectors become brittle and shatter, often without warning.
- Exhaust Proximity: The hose section located closest to the turbocharger and exhaust manifold is subject to extreme radiant heat. Without proper shielding, this section will fail prematurely.
- Oil Contamination: If you have a leaking valve cover gasket, oil can drip onto the heater hoses. Diesel oil is highly corrosive to standard rubber, causing it to soften and swell until it bursts.
- Hidden Leaks: Dampness at the firewall or a sweet, maple-syrup odor inside the cabin usually indicates a failure at the hose-to-heater-core connection or a pinhole leak in the return line.
If your cabin heat is inconsistent or the temperature gauge is fluctuating wildly, you likely have air trapped in the system. This is often caused by a small leak in the heater hose sucking air into the system during the cooling phase, even if no visible coolant is dripping.
Step-by-Step Heater Hose Replacement and Professional Tips
Replacing the heater hoses on a 6.7 Cummins is a manageable task, but it requires precision to avoid damaging the fragile plastic fittings or the heater core stubs. Before beginning, ensure the engine is completely cold. Pressurized coolant can cause severe burns; always relieve the system pressure by slowly opening the radiator cap before disconnecting any lines. It is advisable to consult a official guide for your specific VIN to ensure the replacement parts match the factory geometry exactly.
📋
Step-by-Step Guide
Drain approximately 1-2 gallons of coolant from the radiator petcock. This lowers the fluid level below the heater hose connection points, preventing a massive mess when the lines are pulled.
Use a curved pick tool to gently slide under the edge of the old hose at the connection point. Rotate the pick around the circumference to break the “bond” of the old rubber before pulling. This prevents snapping plastic stubs.
Lubricate the inner diameter of the new hose with a thin film of clean coolant. Slide the hose onto the fitting and secure it with high-quality T-bolt clamps. Ensure the hose is routed exactly as the diagram specifies to avoid rubbing against the serpentine belt or turbo downpipe.
One of my top expert tips for 6.7 Cummins owners is to swap out the factory constant-tension “spring” clamps for professional stainless steel T-bolt clamps. While spring clamps are designed for speed on the assembly line, T-bolt clamps provide more uniform pressure and are much less likely to vibrate loose or cut into the hose material over time. Always verify that there is at least an inch of clearance between the hose and any moving parts or extreme heat sources.
Bleeding the Cooling System and Post-Repair Maintenance
The most common mistake made after replacing heater hoses is failing to properly “burp” or bleed the system. The 6.7 Cummins is notoriously susceptible to air-locking, particularly in the heater core, which sits at a high point in the chassis. Trapped air pockets can cause localized hot spots in the cylinder head, potentially leading to warped heads or blown head gaskets—a multi-thousand dollar repair that can be avoided with 15 minutes of patience.
To properly bleed the system:
- Locate the Bleeder Screw: Most 6.7 models have an air vent or bleeder screw near the thermostat housing. Open this slightly while filling the radiator to allow air to escape.
- The “Nose-Up” Technique: Park the truck on a slight incline or use ramps to elevate the front. This encourages air bubbles to travel toward the radiator cap rather than staying trapped in the heater core.
- Coolant Choice: Use only OAT (Organic Additive Technology) coolant that meets MS-12106 specifications for newer Ram trucks. Mixing different coolant types can cause “gelation,” which will clog your new hoses and the heater core.
- Pressure Test: Once the system is full and the engine has reached operating temperature, perform a final visual inspection. A professional cooling system pressure test is the most reliable way to confirm that your new connections are airtight.
Long-Term Reliability
Inspecting your heater hoses every 30,000 miles ensures you catch “spongy” rubber before a catastrophic rupture occurs.
Optimized Heating
Proper routing and air-bleeding ensure your cabin reaches maximum temperature even in sub-zero winter conditions.
Understanding the specific supply and return routing of the 6.7 Cummins heater hose system is vital for accurate diagnostics and long-term durability. By replacing aged rubber components with high-quality hoses and ensuring the system is free of air pockets, you protect the engine from the leading cause of roadside diesel emergencies: cooling system failure. Perform a visual inspection of your heater hoses today; if you notice any bulging, cracking, or ‘spongy’ textures, replace them immediately with OEM-quality components to protect your investment and ensure your truck remains reliable for years to come.
Frequently Asked Questions
Where can I find a specific heater hose diagram for my Ram year?
Detailed diagrams are best sourced from official Mopar parts catalogs or a factory service manual (FSM). Most trusted online diesel forums and OEM parts retailers provide exploded views based on your specific VIN, which is crucial as routing changed slightly between the 2007-2012 and 2013-present models.
What size are the heater hoses on a 6.7 Cummins?
The 6.7 Cummins typically utilizes 5/8-inch and 3/4-inch diameter heater hoses. However, it is highly recommended to use pre-molded hoses specifically designed for the Ram chassis rather than universal bulk hoses, as the tight bends and varying diameters at connection points require a precise, expert fit.
How do I replace the heater hoses on my 6.7 Cummins?
Replacement involves draining the coolant, disconnecting the quick-connect or clamped fittings at the engine and firewall, and installing new pre-molded lines. You must be careful with the plastic connectors on the firewall. Once installed, the system must be refilled with the correct OAT or HOAT coolant and bled of all air.
Why is my heater not working despite no visible leaks?
If your hoses are intact but there is no heat, you may have an air pocket trapped in the heater core or a clogged core. Alternatively, the blend door actuator inside the dash may have failed. Always check the hose temperatures; both the supply and return hoses should be hot to the touch.
What is the correct way to bleed the cooling system after hose replacement?
To bleed a 6.7 Cummins, fill the radiator, then loosen the vent plug located on top of the thermostat housing. Continue filling until a steady stream of coolant (without bubbles) exits the vent. Close the vent, run the engine with the heater on high, and top off the overflow tank as the engine reaches operating temperature.

![6.7 Cummins Exhaust Manifold Upgrade [2026]](https://truckguider.com/wp-content/uploads/2026/03/6-7-cummins-exhaust-manifold-upgrade-featured.webp)