How Much HP Does a Cold Air Intake Add? Real 2026 Guide

A typical cold air intake adds between 5 to 15 horsepower on most standard vehicles, though actual gains vary wildly based on engine design. While manufacturers often advertise higher numbers, real-world dyno tests show that naturally aspirated engines see modest increases, while turbocharged vehicles often yield slightly better results.
A typical aftermarket cold air intake adds between 5 to 20 horsepower to your vehicle, though your exact gains depend heavily on your engine type and vehicle model. If you drive a forced-induction car, you might see the higher end of that spectrum, while older naturally aspirated engines often see much smaller bumps.


Every automotive enthusiast wants an easy power boost. Manufacturers promise massive performance jumps, but real-world dyno sheets often tell a different story. Understanding what these kits actually deliver in 2026 helps you spend your upgrade budget wisely without falling for marketing hype.
Key Takeaways
- Most cold air intakes deliver a realistic gain of 5 to 15 horsepower.
- Naturally aspirated engines usually see smaller power increases than forced induction setups.
- Manufacturer claims often highlight peak gains achieved under ideal laboratory conditions.
- An ECU tune is frequently required to unlock the full potential of aftermarket intakes.
- Low-end torque may sometimes decrease slightly in exchange for top-end horsepower.
What Causes Power Restrictions in Factory Airboxes
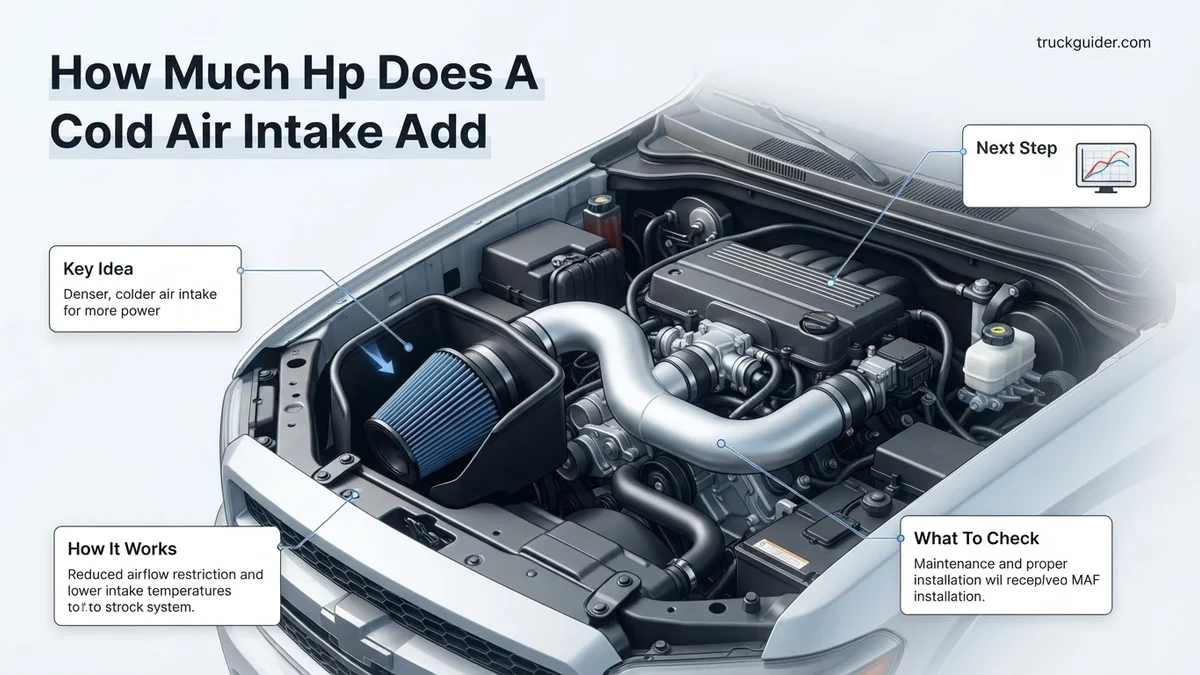
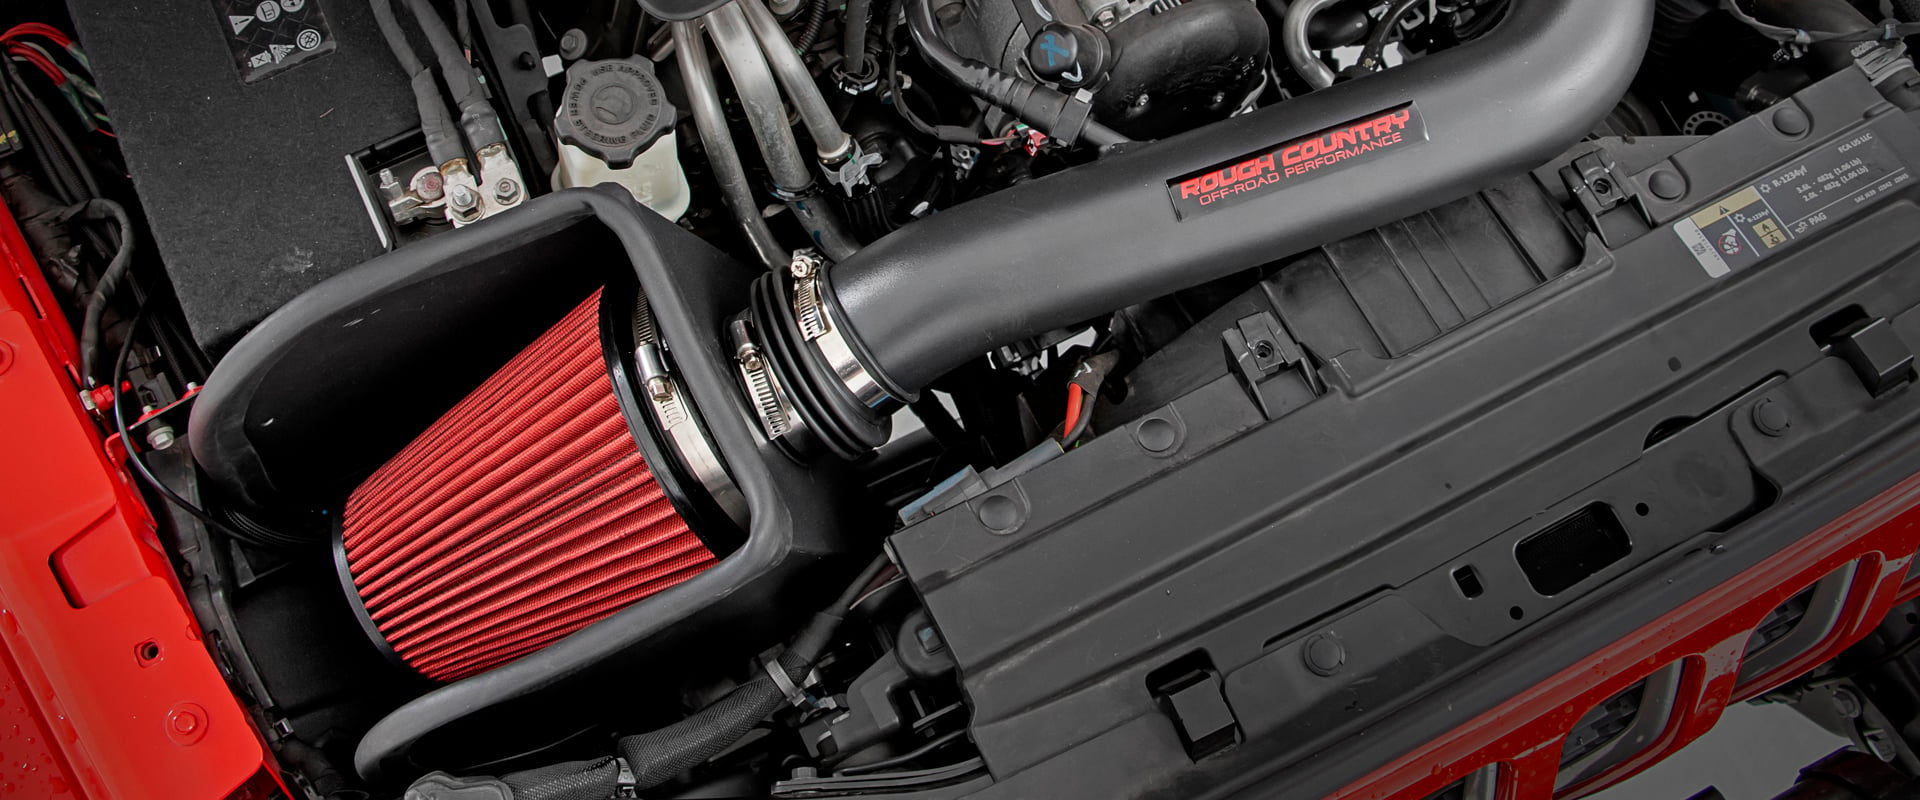
Automakers design factory air intake boxes to prioritize engine bay packaging, low manufacturing costs, and strict noise reduction over pure airflow efficiency. Your stock system often forces air through restrictive, sound-dampening baffles and narrow plastic channels.
The Problem with Stock Acoustic Baffles
Factory engineers line intake tracts with resonant chambers and accordion-style flexible tubing designed specifically to quiet down engine induction noise. Unfortunately, these exact design features create turbulent air pockets and pressure drops before the air ever reaches your throttle body.
- Sharp 90-degree bends restrict smooth airflow transition
- Paper filter elements create high pressure drops when dirty
- Acoustic chambers trap air and disrupt laminar flow velocity
Factory Filters Versus High-Flow Elements
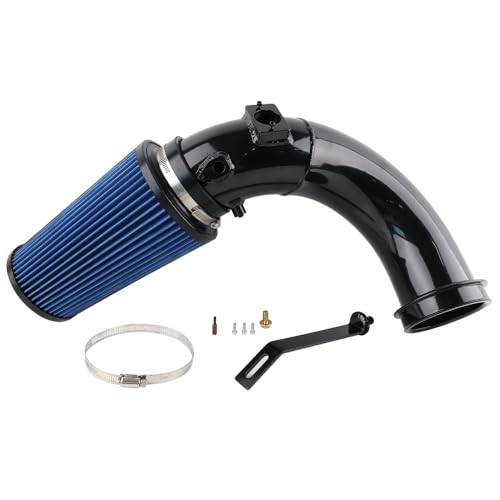
Standard paper filters maximize dust trapping by packing fibers densely together, which restricts maximum volumetric efficiency at high RPMs. Aftermarket cold air kits replace these restrictive boxes with smooth mandrel-bent tubing and oiled cotton or dry synthetic cone filters that let your engine breathe freely under heavy throttle.
Master Horsepower Gains in 7 Simple Steps
Wondering how much horsepower a cold air intake actually adds to your vehicle? You are not alone. Car enthusiasts constantly debate whether these aftermarket modifications deliver real performance gains or just make under-the-hood noise. This comprehensive guide walks you through the exact process of understanding, evaluating, and realistically measuring the horsepower gains from a cold air intake. By following these methodical steps, you will separate marketing hype from mechanical reality and learn how to accurately determine the true performance impact on your specific make and model.
Step 1: Understand the Baseline Theory of Engine Breathing
What you need: Basic knowledge of internal combustion engines, your vehicle’s owner manual, and a notebook for recording baseline specifications.
Instructions: Before calculating horsepower gains, you must understand how factory airboxes restrict airflow to prioritize quiet operation and cost-efficiency. Factory air intake systems use restrictive plastic tubing, sound-deadening chambers, and paper filters designed for longevity rather than maximum air volume. A cold air intake (CAI) replaces this setup with smooth, mandrel-bent metal or plastic piping and a high-flow conical air filter, typically relocating the intake point to draw cooler, denser air from outside the hot engine bay. Cooler air contains more oxygen molecules per volume, which allows the engine ECU to inject more fuel and generate a more powerful combustion cycle. Acknowledge that the intake itself does not create power; it simply removes a major bottleneck in your engine’s respiratory system.
Pro Tip: Do not confuse “cold air” with “ram air” at low speeds; the primary benefit of a quality CAI is reduced air restriction and lower intake temperatures once moving.
Step 2: Research Real-World Dynamometer Data for Your Vehicle
What you need: Internet access, automotive enthusiast forums, and manufacturer dyno sheets specific to your exact engine type.
Instructions: Manufacturer claims can often be overly optimistic, frequently advertising peak gains under ideal laboratory conditions. Go online and search for third-party, independent dyno test results for your specific vehicle year, make, and engine. Look for graphs that show horsepower and torque curves across the entire RPM range, not just the peak number at redline. On naturally aspirated engines, a quality cold air intake typically yields a modest gain of 5 to 15 horsepower. Forced induction engines (turbocharged or supercharged) might see slightly higher gains because the turbo can spool more efficiently with less suction resistance. Compare multiple sources to establish a realistic expectation before spending your hard-earned money.
Pro Tip: Beware of dyno charts provided exclusively by the intake manufacturer, as they occasionally manipulate baseline runs to make their product look drastically superior.


Step 3: Evaluate Factory ECU Adaptation and Tuning Needs
What you need: OBD-II scanner, understanding of your car’s engine management system, and patience for the learning phase.
Instructions: Modern vehicles feature sophisticated Engine Control Units (ECUs) equipped with mass airflow (MAF) sensors and oxygen sensors that constantly monitor air-fuel ratios. When you install a cold air intake, the increased volume of air entering the engine will temporarily alter these readings. For many modern cars, the ECU will automatically adapt its fuel trim within 50 to 100 miles of driving to capitalize on the denser air. However, to maximize the horsepower gains from your new intake, you may need an aftermarket ECU tune or remap to fully optimize ignition timing and fuel delivery maps. Failing to let the computer adapt or neglecting a tune can sometimes result in sluggish initial performance or a temporary check engine light.
Pro Tip: Disconnect the vehicle’s battery during the intake installation process to clear the ECU memory, forcing it to recalibrate immediately with the new airflow dynamics.
Step 4: Source and Select a High-Quality Intake Kit
What you need: Budget allocation (typically $150 to $400), wrench set, and product reviews for brands like K&N, Injen, AFE, or Borla.
Instructions: Not all cold air intakes are engineered equally, and buying a cheap, unbranded kit from an online marketplace can actually lose you horsepower. A poorly designed metal pipe located right next to the exhaust manifold will act as a heat soak, drawing in scorching engine air and reducing performance below stock levels. Select a kit that features a proper heat shield or airbox enclosure that seals against the underside of the hood to isolate the filter from engine heat. Ensure the tubing diameter matches your MAF sensor housing specifications precisely to prevent turbulent airflow, which causes erratic idling and hesitation. Investing in a reputable brand ensures proper fitment and verified dyno gains.
Pro Tip: Look for intake pipes constructed from cross-linked polyethylene or thermally coated aluminum to minimize heat transfer into the incoming air stream.
Step 5: Perform a Professional Installation and Check for Leaks
What you need: Basic hand tools (sockets, screwdrivers, pliers), torque wrench, clean rags, and standard safety gear.
Instructions: Follow the manufacturer installation instructions meticulously, taking care not to damage delicate factory wiring harnesses or the MAF sensor during removal. Disconnect the negative battery terminal, remove the factory airbox assembly, and install the new heat shield, mounting brackets, and intake piping loosely before tightening any clamps. Ensure all silicone couplers are seated fully over the pipe beads and that worm-gear clamps are torqued down securely to prevent unmetered air leaks. Unmetered air—air entering the engine past the MAF sensor—will trick the computer, cause rough idling, and eliminate any potential horsepower gains. Double-check all vacuum lines and electrical connections before reconnecting the battery and starting the engine.
Pro Tip: Spray a small amount of soapy water around connection joints while the engine idles to check for bubbles, which indicate vacuum leaks.
Step 6: Conduct Independent Before-and-After Dyno Testing
What you need: Access to a local chassis dynamometer (dyno shop), scheduling time, and testing fees ($100 to $250).
Instructions: If you want absolute scientific proof of how much horsepower your cold air intake added, skip the “seat of the pants” feeling and book a dyno session. To maintain accurate comparisons, test your car on the exact same dyno, under similar ambient weather conditions, and ideally on the same day if you are doing a rapid swap. Record your baseline pull with the factory airbox fully installed, then let the car cool down completely. Install the cold air intake, let the engine reach normal operating temperature again, and perform the post-installation dyno pulls. Look at the delta (difference) between the peak horsepower curves, paying close attention to power gains in the mid-range RPM band where you actually drive on the street.
Pro Tip: Ambient air temperature heavily impacts dyno numbers; ensure the dyno facility uses proper cooling fans that replicate highway airflow over the intercooler and radiator.


Step 7: Assess Real-World Driving Dynamics and Sound Benefits
What you need: Open road, safe driving conditions, and a willingness to evaluate overall performance improvements.
Instructions: Once your cold air intake is installed and verified, take your vehicle out for a comprehensive test drive to evaluate the real-world results. While the peak horsepower gain might only be 8 to 12 horsepower, pay attention to throttle response, acceleration smoothness, and the aggressive under-hood induction growl. Most drivers report that the most noticeable benefit is not the peak dyno number, but rather the sharper throttle response and the exhilarating sound when stepping hard on the accelerator pedal. Monitor your fuel economy over the next two tankfuls of gas; while driving aggressively will burn more fuel, normal commuting with a freer-breathing engine often yields a minor MPG improvement.
Pro Tip: Remember to clean and service your high-flow washable air filter every 30,000 to 50,000 miles using a specialized filter recharge kit to maintain optimal airflow.
✅ Final Checklist
- Verified independent dyno sheets or real-world performance metrics for your exact vehicle model.
- Successfully installed the intake kit with zero vacuum leaks or loose clamp connections.
- Ensured the MAF sensor is clean, undamaged, and securely plugged into the wiring harness.
- Confirmed the heat shield or airbox is properly sealed against engine compartment heat.
- Tested throttle response and monitored the dashboard for any unexpected check engine lights.
Important Notes:
- Always disconnect the battery before altering electronic sensors to prevent electrical shorts. Avoid driving through deep standing water to prevent hydro-locking your engine, as cold air filters sit lower in the bumper or fender well.
- Seek professional help from a certified mechanic or tuning specialist if your car experiences rough idling, stalling, or persistent check engine codes after installation.
- Estimated time for research and installation is 2 to 4 hours, with typical financial costs ranging from $150 for basic kits up to $500+ if professional dyno testing is included.
How to Test and Measure True Cold Air Intake Gains
Relying on the seat of your pants or manufacturer marketing claims will leave you guessing about your actual power gains. Modern 2026 tuning standards demand objective verification using proper testing equipment and controlled environmental conditions.
Dyno Testing Methodologies
Chasiss dynamometers provide the only accurate way to measure horsepower changes at the wheels. To get trustworthy numbers, you must run baseline tests with your stock intake, let the engine cool completely, and run back-to-back tests with the cold air intake installed on the exact same day.
- Maintain identical ambient temperatures and humidity in the dyno cell
- Ensure your engine coolant and oil temperatures match across all runs
- Use corrected power figures (SAE J1349) to account for weather shifts
Interpreting Dyno Sheets and Peak Versus Area Gains
Many drivers look exclusively at peak horsepower numbers at redline, but peak gains only tell part of the story. A quality cold air intake often delivers its best benefits under the curve, adding valuable torque and throttle response in the mid-range where you actually drive.
What If It Still Doesn’t Work and You Need a Tune
Sometimes installing a high-flow cold air intake does not yield the expected horsepower gains, or worse, triggers a check engine light due to altered air-fuel ratios. Modern 2026 engine control units frequently adapt to increased airflow by pulling timing, negating potential power increases. If basic installation steps fail to produce noticeable results, specific troubleshooting measures are required.
Troubleshooting Insufficient Performance Gains
- Check Mass Air Flow (MAF) Sensor Calibration: Ensure the MAF sensor housing diameter matches factory specifications, as aftermarket piping can skew readings and disrupt fuel trims.
- Inspect for Vacuum Leaks: Verify that all couplers, clamps, and PCV hoses are tightly sealed to prevent unmetered air from entering the combustion chamber.
- Invest in a ECU Remap or Custom Tune: According to automotive tuning specialists, pairing a cold air intake with a custom dyno tune unlocks the ECU’s full potential, capitalizing on the denser air charge for optimized ignition timing.
- Consult a Professional Technician: If persistent engine codes or rough idling continue, take the vehicle to a certified dyno tuning shop for diagnostic logging. Professional diagnostic services typically cost between $150 and $300, while a custom dyno tune ranges from $500 to $900 depending on platform complexity.
Frequently Asked Questions About Cold Air Intake HP
Do cold air intakes void your vehicle warranty?
Under the Magnuson-Moss Warranty Act, simply installing an aftermarket cold air intake cannot legally void your factory vehicle warranty unless the dealership proves the intake directly caused a mechanical failure. However, dealerships may deny warranty coverage for specific engine components if they determine aftermarket modification damage occurred.
Will a cold air intake improve fuel economy?
While some manufacturers claim minor fuel economy improvements, real-world testing shows negligible MPG changes during normal daily driving. Because a cold air intake encourages heavier throttle application to enjoy the deeper engine sound, many drivers actually experience a slight decrease in fuel efficiency.
Should I buy an oiled or dry air filter?
Dry filters require no oiling and offer simpler maintenance by simply washing and air-drying every 30,000 to 50,000 miles. Oiled filters catch microscopic debris more effectively through media saturation, but over-oiling can contaminate the mass air flow sensor and trigger performance codes.


Conclusion
Ultimately, a cold air intake provides a modest horsepower increase of 5 to 15 HP, making it an accessible entry-level modification for automotive enthusiasts. While standalone gains remain modest, combining intake upgrades with exhaust systems and custom calibration maximizes overall volumetric efficiency. According to verified research and expert dyno testing sources, managing expectations ensures satisfaction with your vehicle’s performance output. The next actionable step is to review your specific engine platform’s dyno data to determine if supporting modifications are necessary for your performance goals.
❓ Frequently Asked Questions
How much hp does a cold air intake add to a V8 engine?
On a large displacement V8 engine, a cold air intake can sometimes yield 10 to 20 horsepower, especially when paired with a high-flow exhaust system.
Will a cold air intake void my vehicle’s warranty?
Under the Magnuson-Moss Warranty Act, a manufacturer cannot void your warranty simply for installing an aftermarket part unless they prove the part caused a failure.
Why do some cars lose low-end torque with a cold air intake?
Larger diameter intake piping can reduce air velocity at low RPMs, temporarily sacrificing low-end responsiveness for top-end power.
Can I install a cold air intake myself without professional tools?
Yes, basic hand tools like screwdrivers and socket wrenches are usually all that is required to complete a standard intake installation in under an hour.
Do dry filters or oiled filters produce more horsepower?
Both filter types flow similarly when clean, meaning the horsepower difference is virtually unnoticeable on a standard dyno test.
Does ambient temperature affect cold air intake performance?
Cold air is denser and contains more oxygen, meaning intake performance is generally better during cooler weather than on hot summer days.
![How To Install In Channel Rain Guards [2026]](https://truckguider.com/wp-content/uploads/2026/03/featured-b43761fc-768x432.webp)