How to Find Outside Temperature Sensor 2026 Expert Guide

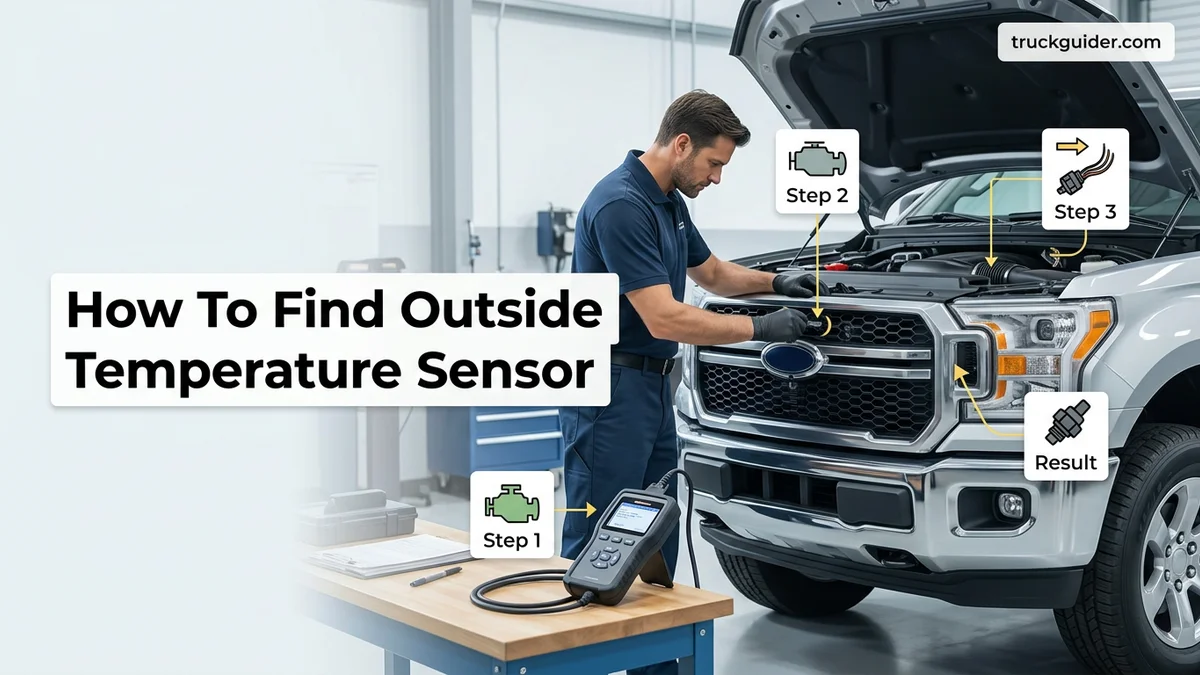
Most vehicle outside temperature sensors are mounted directly behind the lower front bumper grille or attached to the radiator core support. If your dashboard displays extreme readings like -40°F or 120°F, finding and inspecting this small two-wire black plastic probe quickly confirms whether road debris, corrosion, or a loose harness caused the failure.
Your vehicle’s outside ambient temperature sensor sits behind the front lower bumper grille or radiator core support on roughly 85% of modern cars and trucks. This component is a small, thumb-sized black plastic probe clipped into a metal or plastic bracket, connected by a two-wire harness. In select vehicles, manufacturers mount this sensor underneath one of the exterior side-view mirrors instead of the front fascia.
Tracking down this sensor quickly matters because it controls far more than just your dashboard display. In 2026, modern automatic climate control systems, engine computer idle algorithms, and automatic windshield defrosters all rely directly on the ambient temperature reading. When the sensor fails, falls out of its mounting clip, or corrodes, your air conditioner may refuse to engage, or your heater might blast maximum hot air on a warm afternoon.
Key Takeaways
- Check behind the front lower bumper grille or radiator core support first on most standard vehicles.
- Look for a small black plastic probe secured by a clip with a two-wire electrical harness.
- European models like BMW and Mercedes often mount the sensor inside wheel well liners or side mirrors.
- Dashboard readings displaying -40°F typically signal an open circuit or unplugged ambient sensor connector.
- Use a flashlight and trim removal tools to inspect the sensor without removing the full bumper.
What Causes Faulty Outside Temperature Sensor Readings on Your Vehicle
Recommended Best Deal Products


Ambient temperature sensors operate in the harshest environment on your car. Exposed constantly to weather, gravel, and road spray, these components face relentless physical stress that degrades their accuracy over time.

Road Debris and Physical Dislodgement
Because the sensor mounts low to the pavement, road hazards cause the majority of sudden reading errors:
- Broken retention clips: Road gravel striking the lower grille snaps the brittle plastic mounting tabs. When the sensor drops, it often dangles against the hot air conditioning condenser or radiator, falsely reading 120°F or higher while driving in moderate weather.
- Impact damage: Parking curb strikes, steep driveway scrapes, and minor bumper collisions crush the probe or rip the wiring harness clean off the mounting bracket.
- Airflow blockage: Autumn leaves, road grime, packed snow, or plastic bags sucked into the lower grille trap engine heat against the sensor tip.
Corrosion and Wiring Harness Wear
Electrical resistance issues trigger erratic or extreme temperature swings on your cluster. Moisture intrusion past the sensor’s rubber weather-pack seal leads to terminal oxidation. Green copper corrosion on the two harness pins increases circuit resistance, which causes the computer to calculate artificially low temperatures. If you see your dashboard display freeze at -40°F or display dashes (—), an open circuit from a severed wire or corroded plug pin is almost always the culprit.
Master Finding Your Outside Temperature Sensor in 7 Simple Steps
Whether your dashboard is displaying erratic weather readings or your climate control system has stopped blowing cold air, locating the ambient outside temperature sensor is the first step toward a diagnosis. This guide provides an exact, practical walkthrough to track down this small, often overlooked component across virtually any modern car, truck, or SUV.
Step 1: Prepare the Vehicle and Workspace
What you need: Safety glasses, work gloves, vehicle owner’s manual, and a flat, well-lit parking area.
Instructions: Park your car on a solid, level surface like a garage floor or flat driveway. Shift into Park (or reverse for manual transmissions) and firmly engage the emergency brake. Turn off the ignition and allow the engine bay to cool for at least 30 to 45 minutes to prevent contact burns from the radiator or transmission cooler lines. Pop open the hood and secure it with the prop rod or verify the hood struts are holding securely before beginning your search.
Pro Tip: Never work near the front bumper immediately after highway driving; the radiator fins can reach over 200°F (93°C) and retain dangerous heat for an extended period.
Step 2: Inspect the Lower Front Grille Area
What you need: High-lumen LED flashlight or headlamp, and a telescoping inspection mirror.
Instructions: On more than 80% of consumer vehicles, manufacturers install the ambient temperature sensor directly behind the front bumper fascia. Crouch in front of the vehicle and shine your flashlight through the horizontal or honeycomb slats of the lower front grille. Look at the vertical or horizontal plastic support beams directly in front of the air conditioning condenser and radiator. The sensor is usually mounted dead center or slightly offset to the driver’s side to sample fresh atmospheric air while driving.
Pro Tip: Avoid confusing the temperature sensor with the frontal impact/airbag crash sensor; crash sensors typically have bright yellow wiring loom sheaths or yellow safety locking tabs on the connector.
Step 3: Remove the Upper Radiator Sight Shield
What you need: Plastic trim removal tool, flathead screwdriver, and a magnetic parts tray.
Instructions: If grille slats are too narrow or dense to see through clearly, look straight down from inside the engine bay. Remove the plastic radiator cover (sight shield) running across the top of the bumper core support. Gently pry up the center pins of the plastic push-clips using your trim tool, then lift the body clips out and place them in your parts tray. Lift off the plastic shield to gain direct top-down visibility into the cavity between the bumper cover and the radiator support wall.
Pro Tip: Cold plastic snaps easily; if you are working in weather below 60°F (15°C), warm the clips slightly with a hairdryer before prying them loose to avoid breaking them.
Step 4: Check Alternate Locations in Wheel Wells and Splash Shields
What you need: Flashlight, floor jack and jack stands (optional), and a 7mm or 8mm socket.
Instructions: If the central grille area is empty, many manufacturers (particularly BMW, Ford, and General Motors) position the sensor along the lower corners. Turn your steering wheel fully to the right to expose the front driver-side wheel well liner. Shine your light into the duct opening designed for brake cooling, or peer through the access panel in the lower plastic undertray. Look for a mounting bracket attached directly to the inner bumper framework or behind the driver-side fog light bezel.
Pro Tip: Check for missing clips or broken tabs on the bottom engine splash shield; road debris often knocks sensors free from this location, leaving them dangling by their electrical pigtail.
Step 5: Check the Exterior Side Mirrors (European & Select Models)
What you need: Flashlight and a clean microfiber cloth.
Instructions: Several European and compact utility vehicles (such as Fiat, Peugeot, RAM Promaster, and some Mercedes-Benz and Ford models) house the outside temperature sensor outside the front bumper entirely. Walk to the passenger-side (or occasionally driver-side) exterior rear-view mirror. Examine the smooth, painted or textured black plastic underside of the mirror housing. You are looking for a small, rounded plastic nub or bead measuring approximately 3 to 5 millimeters in diameter protruding through a pre-drilled hole in the casing.
Pro Tip: If the mirror has this distinct plastic teardrop or pimple underneath, do not pull or twist it from the outside; internal access requires disassembling the mirror glass.
Step 6: Identify the Physical Sensor and Wiring
What you need: Flashlight and inspection mirror.
Instructions: Once you spot a potential component, verify its physical footprint. An automotive ambient temperature sensor is typically a compact, bullet-shaped or cone-shaped piece of black molded plastic approximately 1 to 2 inches (25–50 mm) long. It features an integrated clip, barbed stem, or snap-fit flange that locks into a stamped hole in a metal bracket. Crucially, it attaches to an electrical harness with exactly two thin wires (often 18 to 22 gauge) protected by corrugated plastic tubing or friction tape.
Pro Tip: Ambient sensors are almost universally two-wire thermistors that change electrical resistance based on temperature; any component with three or four wires is a different sensor (such as an active radar or parking proximity unit).
Step 7: Trace and Inspect the Wiring Harness
What you need: Work gloves, contact cleaner, and a clean shop rag.
Instructions: Trace the two-wire harness back from the sensor plug roughly 6 to 12 inches into the main lighting or front body harness. Check for pinched wires, frayed insulation, or signs of rodent chewing, which are rampant in bumper cavities. Press down on the small locking tab of the electrical connector and carefully slide the harness plug off the sensor probe. Inspect the two male terminal pins inside the connector for turquoise or white copper corrosion, bent prongs, or road grime ingress.
Pro Tip: Never yank directly on the wires to detach the connector; pull strictly on the plastic connector body while depressing the safety latch with a small flathead tool if it is stiff.
✅ Final Checklist
- Confirmed the ignition is off and the engine compartment has cooled down completely.
- Located the two-wire, bullet-shaped sensor behind the front grille, underbody tray, or mirror housing.
- Differentiated the temperature sensor from yellow-harnessed airbag impact sensors and multi-wire radar modules.
- Verified the plastic mounting bracket is fully intact and securely clipped to the chassis framework.
- Inspected the wiring harness and terminal pins for road damage, severing, or corrosion.
Important Notes:
- Safety Warning: Disconnect the vehicle’s 12-volt negative battery terminal before disconnecting wiring if you suspect you are working anywhere near yellow airbag crash sensors.
- When to Seek Professional Help: If you must remove the entire front bumper fascia to reach the sensor mounting bracket, or if the mirror glass must be unclipped without an OEM release tool, consider consulting a certified technician to avoid cracking expensive cosmetic parts.
- Estimated Time and Cost: Locating the sensor typically takes 15 to 30 minutes. If replacement is needed, OEM replacement sensors typically cost between $15 and $45, while professional diagnostic and replacement labor ranges from $75 to $150.
Where to Look: Primary Factory Mounting Locations by Brand
Automakers position the ambient sensor where it can pull fresh, moving air while staying insulated from engine bay radiant heat. You will find the sensor in one of three primary spots depending on your vehicle’s make.
Front Grille and Radiator Core Support (Domestic and Asian Brands)
Most vehicles from Ford, General Motors, Toyota, Honda, Hyundai, and Nissan place the sensor directly in the front airflow path:
- Toyota and Lexus: Mounted on the center vertical radiator support brace. Look directly behind the front grille emblem or just above the lower bumper splash shield.
- Ford and Lincoln: Fastened to the lower radiator shutter assembly or the structural crossmember sitting behind the front bumper cover.
- Chevrolet, GMC, and RAM: Positioned behind the front bumper, often offset slightly to the driver’s side near the lower air dam or directly behind the front license plate bracket mounting structure.
- Honda and Acura: Clipped to the lower corner of the A/C condenser frame, accessible through the lower honeycomb bumper cutout.
Side-View Mirror Housings (European Brands and Select Modern Platforms)
European engineers take a different approach to avoid radiant heat soak when idling in traffic. Mercedes-Benz, BMW, Audi, Volkswagen, and select modern Stellantis platforms mount the sensor away from the engine compartment entirely:
- Passenger or Driver Mirror Underside: Look at the flat plastic bottom of your exterior side-view mirror housing. You will see a small, round plastic bead or “nipple” about the size of a pencil eraser protruding downward into the open air.
- French and Italian models (Fiat, Alfa Romeo): Commonly found on the underside of the passenger-side door mirror casing.
If your car uses this configuration, you never need to remove front bumper clips or crawl under the engine bay; access involves popping the mirror glass or the painted outer mirror shell.
How to Find and Inspect the Outside Temperature Sensor Step-by-Step
Locating an ambient air temperature sensor requires standard automotive hand tools, proper illumination, and safety precautions. Most vehicle platforms position the unit behind the front bumper fascia or lower grille aperture.
Visual Location and Physical Inspection
- Park and De-energize: Park the vehicle on a level surface, shut off the ignition, and allow the radiator to cool for at least 30 minutes to prevent thermal burns.
- Remove the Sight Shield: Pop the plastic retaining clips along the upper radiator support cover using a flat-head pry tool. Set the plastic panel aside.
- Illuminate the Front Cavity: Direct a high-output LED inspection light through the lower front bumper opening, specifically inspecting the vertical upright bracket directly in front of the air conditioning condenser.
- Locate the Sensor Clip: Look for a small plastic module, roughly 1 to 2 inches long, snapped into a mounting hole or plastic bracket with a two-wire connector harness attached.
- Inspect the Connector: Depress the electrical connector tab and pull the harness free. Examine the terminal pins for green copper oxide corrosion, bent prongs, or moisture penetration inside the weather pack seal.
- Perform a Resistance Test: Connect a digital multimeter set to the ohms (Ω) scale across the sensor pins. Automotive ambient thermistors typically register between 1,000 and 3,000 ohms at 77°F (25°C). Readings displaying zero ohms or infinite resistance confirm internal component failure.
What If It Still Doesn’t Work After Finding and Replacing the Sensor?
Installing a brand-new ambient temperature probe does not always cause the dashboard display to update immediately. Automotive climate control modules use calibrated dampening algorithms to prevent false readings caused by radiator heat soak at idle.
Advanced Diagnostic and Calibration Steps
- Execute a Calibration Drive Cycle: Drive the vehicle at steady speeds above 20 mph for 10 to 15 minutes. Most modern body control modules require sustained airflow across the thermistor before refreshing the internal dashboard display calculations.
- Clear Ambient DTCs with an OBD-II Scanner: Stored diagnostic trouble codes, such as P0071 (Sensor Range/Performance), P0072 (Low Input), or P0073 (High Input), can lock the cluster reading. Connect a bidirectional scan tool to clear active and pending body module codes.
- Check Continuous Circuit Ground: Trace the negative ground wire back to the chassis. A loose or corroded front apron ground bolt disrupts reference voltage signals even when using a brand-new probe.
- Verify In-Cab Sensor Inputs: Modern automatic HVAC systems calculate cabin comfort using both exterior and cabin aspirator sensors. A failed in-cabin temperature sensor can mirror ambient sensor symptoms.
- Schedule Professional Module Diagnosis: If cluster values remain static or display dashed lines, schedule a diagnostic check with an ASE-certified technician. In 2026, professional diagnostic fees range between $120 and $180, while front-end harness repair costs average $250 to $450 depending on vehicle make and labor rates.
Conclusion
Finding your ambient temperature sensor typically requires looking directly behind the front lower grille assembly. Verifying harness integrity, testing thermistor resistance, and completing a post-installation drive cycle restores accurate vehicle data and proper HVAC performance. According to verified research and expert sources, automotive electrical systems rely heavily on functional ambient inputs to optimize defroster activation, A/C compressor cycling, and engine fuel mapping. Grab a flashlight and multimeter to inspect your front bumper bracket today before ordering unnecessary parts.
❓ Frequently Asked Questions
How do I distinguish the ambient temperature sensor from other front-end sensors?
The ambient temperature sensor is clipped to plastic ducting or radiator supports rather than engine components, featuring only two thin wires. Unlike crash sensors (which have brightly colored, heavily shielded wiring) or radar modules (which are flat, bulky boxes), it is a simple teardrop or pencil-shaped plastic thermistor probe.
Where do European makes like BMW, Audi, and Mercedes mount their sensors?
BMW frequently places ambient sensors in the lower passenger-side or driver-side front splash pan directly ahead of the front tire. Mercedes and some Audi models often integrate the ambient sensor into the passenger-side exterior mirror housing or deep in the lower bumper intake duct.
Why is my dashboard temperature reading incorrect after replacing the sensor?
Most modern vehicle ECUs use dampening algorithms so engine bay heat does not skew dash readings while idling. The computer may require a driving cycle above 30 mph for 10 to 15 minutes before refreshing the calibrated ambient display.
How can I test the sensor once I have located it?
Unclip the sensor and measure its resistance across the two pins using a digital multimeter set to ohms. Warming the probe tip with your fingers should cause the resistance reading to smoothly decrease if the internal thermistor is functional.
Can road debris damage or dislodge the outside temperature sensor?
Yes, because the sensor sits low to the ground behind intake grilles, rocks, curb scrapes, and road salt frequently sever wires or dislodge the mounting bracket. A missing sensor typically leaves bare dangling wires that cause false dash readings.
What tools are needed to locate and remove an ambient temperature sensor?
A bright flashlight, an automotive clip removal tool, and an 8mm or 10mm socket for removing lower splash shield fasteners are usually all that is required. Pliers or a small flathead screwdriver help release the locking tab on the electrical connector.