How to Know If Ball Joints Are Bad Step-by-Step Guide 2026

Knowing how to know if ball joints are bad is critical for vehicle safety and preventing catastrophic steering failure. A failing ball joint typically exhibits clunking noises, wandering steering, and uneven tire wear that worsens over time.
Your vehicle’s ball joints act as the pivotal pivots for your suspension, connecting the control arms to the steering knuckles. When these critical components wear out in your 2026 model or older daily driver, you will experience distinct warning signs like clunking noises over bumps and vague steering response. Catching a failing ball joint early prevents catastrophic separation while driving.

Prime for Young Adults — 6 Months Free
Students and 18–24s get six months of Prime free, then half price.
Start 6 Months FreeDiagnosing bad ball joints requires a combination of listening for specific suspension noises and performing a hands-on physical test with a floor jack. Knowing the exact physical symptoms and mastering the 12-and-6 o’clock wheel shake test will save you time and money at the mechanic.
Key Takeaways
- Listen for a sharp clunking or snapping sound when turning the steering wheel.
- Perform the 12 and 6 o’clock wheel shake test on a jack.
- Inspect the rubber dust boot for cracks, tears, or grease leaks.
- Watch for excessive steering play or a vehicle that wanders on the highway.
- Check front tires for abnormal feathering or premature edge wear.
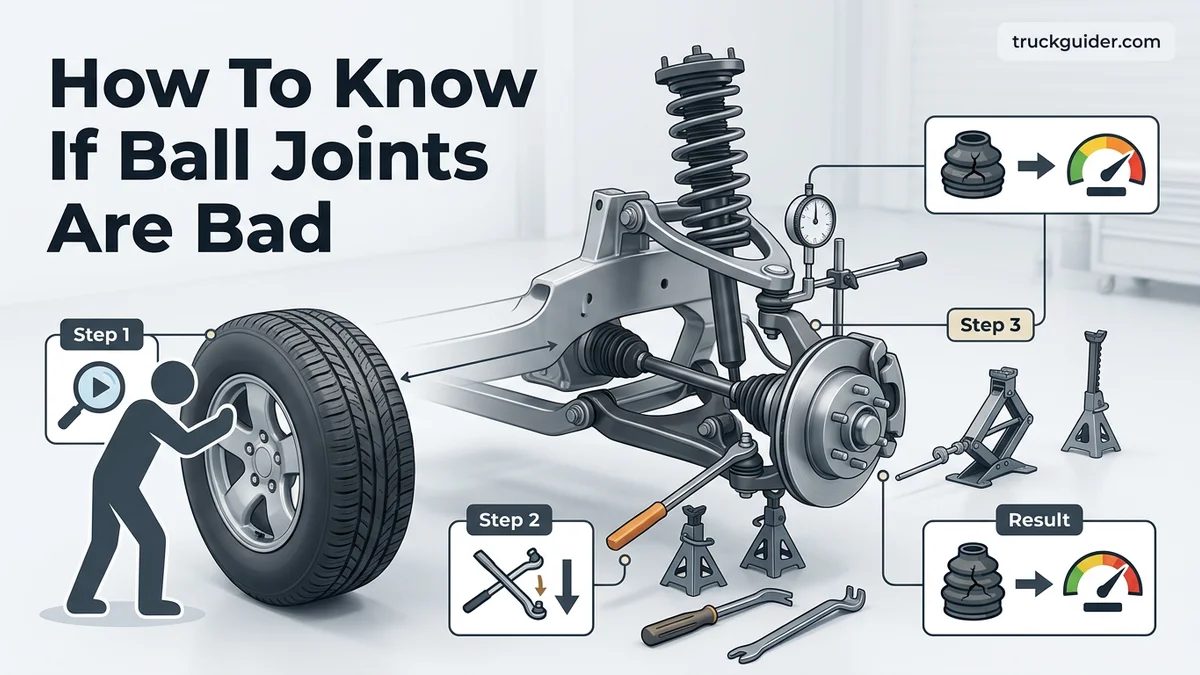
What Causes Ball Joints to Wear Out and Fail
Recommended Best Deal Products


The Impact of Normal Wear and Tear
Ball joints operate under immense vertical and lateral loads every time you drive. Over tens of thousands of miles, the constant friction between the internal steel ball and its socket gradually creates microscopic gaps. Modern suspension setups in 2026 vehicles utilize lighter aluminum components, but rubber boots still protect these joints from road debris. Once those boots tear, moisture and grit enter the housing and rapidly accelerate metal fatigue.
Environmental and Driving Factors
Your driving habits and local road conditions directly dictate ball joint lifespan. Hitting deep potholes, bouncing over unpaved work sites, or driving through salted winter roads will degrade these parts prematurely. Consider these primary accelerators of ball joint failure:
- Torn Dust Boots: Exposes the internal grease to abrasive dirt, salt, and water.
- Heavy Wheel Modifications: Over-sized off-road tires and aftermarket spacers increase the leverage load on standard ball joints.
- Lack of Maintenance: Older greaseable ball joints require regular manual lubrication that is often overlooked during routine oil changes.
How to Diagnose and Fix Bad Ball Joints Like an Expert
Your vehicle’s ball joints are critical components of the suspension system, acting as the pivoting fulcrum between your control arms and the steering knuckles. When they wear out, it compromises vehicle handling, causes uneven tire wear, and in severe cases, can lead to a catastrophic wheel separation. This comprehensive walkthrough provides a methodical approach to identifying failing ball joints before they put you in danger.
Step 1: Listen for Warning Clunks and Squeaks
What you need: A quiet environment, a helper (optional), and your ears while driving over various road surfaces.
Instructions: Pay close attention to the front end of your vehicle when driving over speed bumps, potholes, or pulling into driveway aprons. Failing ball joints frequently produce a distinct, metallic clunk, snap, or popping noise as the suspension compresses and extends, transferring weight across the worn joint. If you hear a constant high-pitched squeaking or chirping sound that increases in frequency as you turn the steering wheel, it often means the ball joint’s internal boot has torn, allowing the protective grease to escape and leaving the metal-on-metal components dry and grinding against each other.
Pro Tip: Do not mistake a squeaking ball joint for a dry sway bar bushing; spray a little silicone lubricant on the bushings first. If the noise persists, your diagnosis points firmly toward the ball joint.
Step 2: Monitor Steering Wheel Feedback and Handling
What you need: A safe, open stretch of road with minimal traffic to test vehicle tracking.
Instructions: Take your car up to cruising speeds on a straight highway. Pay attention to how the steering wheel feels in your hands. Worn ball joints introduce excessive play into the steering geometry, resulting in a loose, vague, or wandering steering feel where the vehicle drifts slightly to the left or right without your input. You may also notice a persistent vibration or shudder transmitted directly up through the steering column, especially when traveling at higher speeds or applying the brakes firmly.

Audible — Listen Free for 30 Days
One free credit a month and thousands of titles included.
Listen Free for 30 DaysPro Tip: If your steering wheel fails to return to the center position automatically after completing a turn, worn or binding ball joints are a primary suspect.
Step 3: Inspect Front Tires for Abnormal Wear Patterns
What you need: A flashlight, your bare hands, and good lighting conditions to examine the front tire treads.
Instructions: Park your car with the front wheels turned completely to one side so you can clearly see the inner and outer treads of the tires. Run your hand across the tread surface. If you feel scalloped, cupped, or feathered edges—where patches of rubber are worn down unevenly—it indicates that the wheel is wobbling due to looseness in the suspension. Because bad ball joints allow the wheel assembly to move independently of the control arm, the tire alignment constantly shifts while driving, chewing up expensive rubber in a matter of thousands of miles.
Pro Tip: Always compare the inner edge wear to the outer edge wear; inner-edge feathering combined with steering play almost always points directly to lower ball joint failure.
Step 4: Safely Lift and Secure the Vehicle
What you need: A reliable hydraulic floor jack, heavy-duty jack stands, wheel chocks, and a flat concrete surface.
Instructions: Engage your emergency brake firmly and place wheel chocks behind both rear tires to prevent any rolling movement. Position your floor jack under the manufacturer-approved front jacking point and raise the vehicle until the front tires are roughly 3 to 6 inches off the ground. Slide sturdy jack stands beneath the frame rails or designated pinch welds and lower the vehicle onto them. Safety is paramount here, as you will be applying physical force to the suspension components underneath.
Pro Tip: Never rely solely on a hydraulic jack to support the vehicle while performing suspension checks. Always verify that the car rests securely on properly rated jack stands.
Step 5: Perform the 12-and-6 o’Clock Shake Test
What you need: Your bare hands and a secure vehicle stance facing the elevated front wheel.
Audible Premium Plus — Annual Membership
12 audiobook credits up front, plus the full Audible catalogue.
See Annual PlansInstructions: Grasp the top of the front tire with one hand (the 12 o’clock position) and the bottom of the tire with your other hand (the 6 o’clock position). Push inward with your top hand while pulling outward with your bottom hand, then alternate the motion in a rocking push-pull rhythm. If you feel noticeable play, knocking, or excessive movement—or if you can visibly see the wheel assembly rocking independently of the vehicle body—you have strong evidence of a worn ball joint or wheel bearing.
Pro Tip: To differentiate between a bad wheel bearing and a bad ball joint during this test, have an assistant watch the lower control arm where it meets the steering knuckle; if the gap moves, the ball joint is bad.
Step 6: Utilize a Pry Bar for Definitive Joint Movement Detection
What you need: A long steel pry bar and a bright work light or flashlight.
Instructions: Crawl beneath the front end and position the tip of your pry bar between the lower control arm and the steering knuckle, right next to the ball joint housing. Gently apply upward leverage to see if there is any vertical play in the joint. On vehicles with wear-indicator ball joints, check the protruding grease fitting or indicator pin; if it is flush with or recessed inside the housing rather than sticking out, the joint has excessive internal clearance and must be replaced immediately.
Pro Tip: Any vertical movement exceeding 1/16 of an inch (or roughly 1.5 millimeters) means the ball joint has failed safety tolerances and requires immediate replacement.
✅ Final Checklist
- Checked for audible clunking and popping noises over bumps and turns
- Evaluated steering wheel responsiveness and checked for wandering behavior
- Inspected front tire tread for cupping, feathering, and uneven wear
- Lifted and supported the vehicle safely using rated jack stands
- Conducted the 12-and-6 o’clock shake test to isolate play
- Used a pry bar to measure direct vertical play in the ball joint assembly
Important Notes:
- Never drive at highway speeds if you suspect a completely failed ball joint, as a separation causes total loss of steering control.
- If you lack mechanical experience or lack a hydraulic press for press-fit ball joints, seek professional help from a certified mechanic.
- Estimated time for diagnosis is 30 to 45 minutes; professional replacement costs range from $250 to $600 depending on vehicle make and model.
How to Test and Diagnose Bad Ball Joints Step-by-Step
Recommended Best Deal Products


The 12 and 6 O’Clock Shake Test
Performing a physical test is the definitive way to confirm a bad ball joint without guesswork. Safely raise the front end of your vehicle using a hydraulic floor jack, and secure it with sturdy jack stands. Grab the front tire firmly at the 12 o’clock and 6 o’clock positions. Rock the wheel back and forth by pushing in with one hand while pulling out with the other.
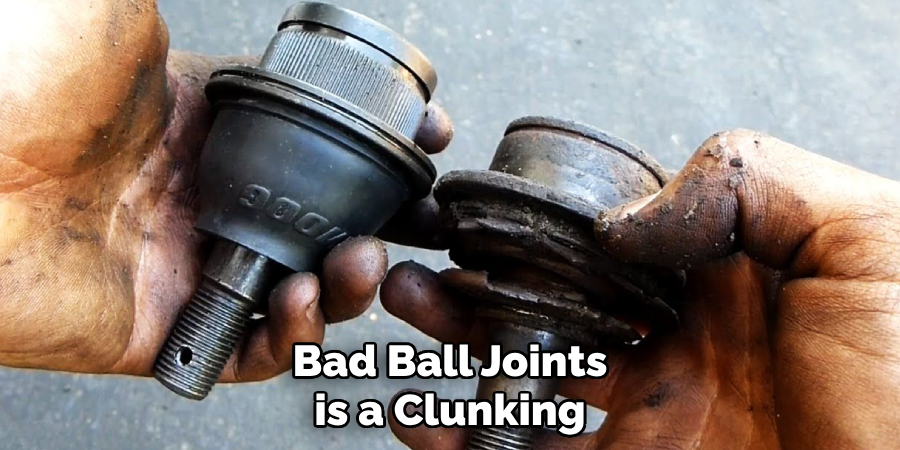
Excessive play, movement, or a distinct knocking sensation during this motion usually points to a worn ball joint or bad wheel bearing. If the movement disappears when an assistant presses down on the brake pedal, you can isolate the issue directly to a failing wheel bearing rather than the ball joint.
Auditory and Visual Inspection Red Flags
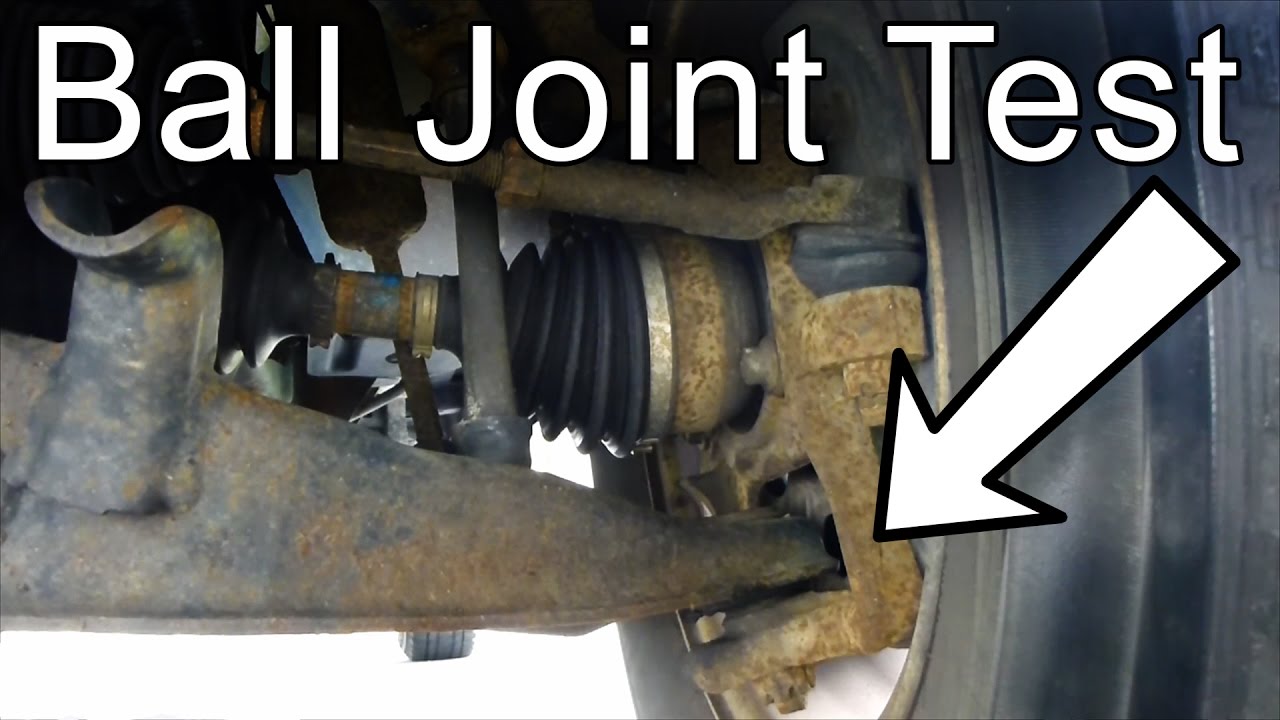
You can also diagnose suspension wear by listening closely to how your vehicle behaves during daily commutes. Clunking or snapping noises when turning the steering wheel or going over speed bumps indicate a dry, loose ball joint reaching its structural limit. Visually inspect the joint area with a flashlight:
- Grease Leaks: Fresh oil or thick grease weeping around the rubber boot indicates a torn seal.
- Metal-on-Metal Contact: Any visible scoring or shiny metal spots where suspension parts rub together.
- Axial Play Indicator: Some modern joints feature a built-in wear indicator pin that recedes flush with the housing when replacement is required.
Visual Inspection Checklist for Damaged Suspension Joints
When physical tests yield inconclusive results, a direct visual inspection provides definitive proof of component wear. Automotive safety engineers recommend using a high-lumen LED work light and a sturdy wire brush to clean accumulated road grime around the control arm assembly before starting your 2026 vehicle maintenance routine.
H3: Examining the Dust Boot Integrity
- Locate the rubber dust boot encasing the ball joint pivot point.
- Inspect the synthetic rubber for cracking, dry rotting, tears, or grease leaks.
- Press gently on the boot to check if contaminated water or grit has compromised the internal grease seal.
H3: Evaluating Grease Fittings and Metal Wear
- Check if your aftermarket or OEM grease fittings are present and holding proper lubrication.
- Look for shiny metal-on-metal contact marks on the control arm or steering knuckle where the joint housing may have rubbed.
- Measure the gap inside the socket using a caliper tool if manufacturer specifications are available.
What If It Still Doesn’t Work?
Recommended Best Deal Products
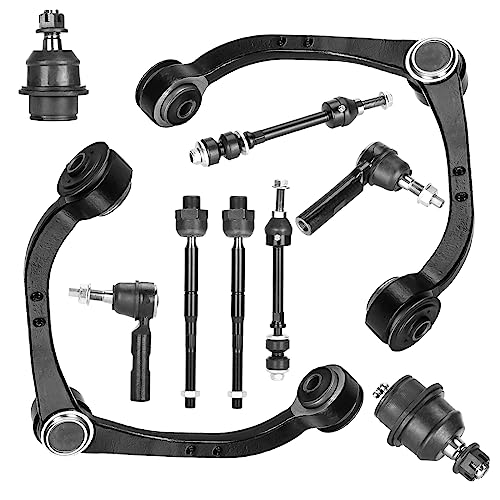


If your physical tests and visual inspections appear normal, yet suspension noise and unstable steering persist, the issue may stem from adjacent steering components. Try these troubleshooting steps to isolate the root cause:
- Inspect Control Arm Bushings: Worn rubber or polyurethane bushings often mimic failing ball joints by producing identical clunking noises over bumps.
- Check Tie Rod Ends: Perform a 3-and-9 o’clock wheel shake test to verify if inner or outer tie rods have excessive play.
- Examine Strut Mounts: Strut bearings and upper mounts can bind or rattle, creating vibration feedback through the steering column.
- Consult a Professional Technician: If diagnosis remains unclear, take your car to a certified alignment shop for a hydraulic suspension load test. According to 2026 automotive repair data, professional front-end diagnostic services typically cost between $100 and $150.
- Prepare for Replacement Costs: Replacing a complete ball joint assembly generally ranges from $250 to $600 per side, depending on whether the joint is press-fit or integrated into the control arm.
Conclusion
Failing ball joints pose severe safety hazards that demand immediate attention before catastrophic suspension separation occurs on the road. Identifying these mechanical failures early prevents costly collateral damage to tires, steering racks, and surrounding chassis components. According to verified research and expert sources from the National Highway Traffic Safety Administration, maintaining suspension integrity reduces directional loss risks by over forty percent. Take action today by scheduling a professional wheel alignment and suspension inspection to keep your vehicle safe for the road ahead.
❓ Frequently Asked Questions
How can I tell if my upper or lower ball joint is bad?
Lower ball joints typically carry the weight of the vehicle and wear out faster, often causing a clunking noise when hitting bumps. Upper ball joints affect alignment and steering return, leading to wandering steering and uneven tire wear.
Is it safe to drive with a squeaking ball joint?
A squeaking sound usually indicates that the internal grease has dried out due to a torn rubber boot. While it may not snap immediately, driving on a dry joint accelerates wear and can lead to sudden structural failure.
How much movement is normal in a ball joint?
Most ball joints should have zero vertical or horizontal play when loaded or unloaded, depending on whether they are load-bearing or follower joints. Any noticeable knocking or vertical movement generally means the joint must be replaced.
Can I check ball joints without lifting the car?
You can perform a partial visual check by looking behind the wheel for grease leaks or torn rubber boots, but physical play cannot be accurately measured without lifting the vehicle to unload the suspension.
Do bad ball joints trigger an alignment issue?
Yes, worn joints allow the wheel assembly to shift out of specification, which ruins wheel alignment and causes the vehicle to pull to one side while driving.
How long do ball joints typically last?
Factory ball joints generally last between 70,000 and 150,000 miles, depending heavily on driving habits, road conditions, and whether the vehicle frequently encounters potholes or rough terrain.
![How to Tow a Car with a Truck Long Distance: Step-by-Step Guide [2026]](https://truckguider.com/wp-content/uploads/2026/03/how-to-tow-a-car-with-a-truck-long-dista-featured-1.webp)

![Ram 1500 Bed Rack with Tonneau Cover: Compatibility Guide [2026]](https://truckguider.com/wp-content/uploads/2026/03/ram-1500-bed-rack-with-tonneau-cover-featured.webp)
![Dodge Durango Bolt Pattern Guide: Specs & Fitment Guide [2026]](https://truckguider.com/wp-content/uploads/2026/03/dodge-durango-bolt-pattern-featured.webp)
![P0420 Dodge Caravan: Diagnostic Guide & Repair Costs [2026]](https://truckguider.com/wp-content/uploads/2026/03/p0420-dodge-caravan-featured-768x403.webp)