2007 Chevy Silverado Serpentine Belt Diagram: Routing & Maintenance 2026

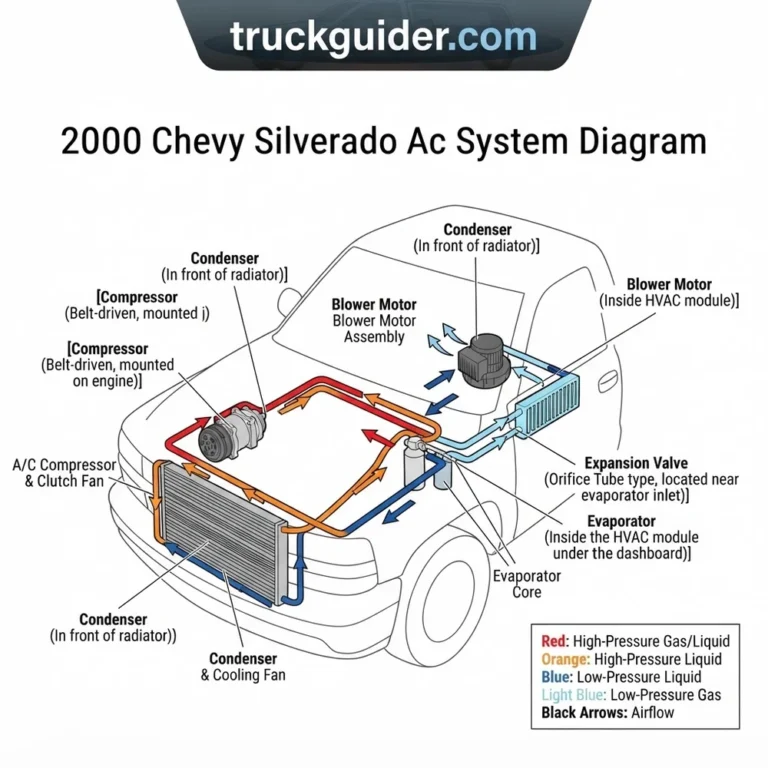
The 2007 Chevy Silverado serpentine belt routing path typically winds clockwise around the crankshaft, alternator, water pump, and power steering pump, ending at the belt tensioner. Ensure the grooved side contacts pulleys while the smooth side rests against the idler pulley to prevent misalignment and premature accessory bearing failure.
📌 Key Takeaways
- Standard V8 engines utilize a 6-rib belt, typically 94.5 to 96 inches depending on accessory configuration.
- The automatic belt tensioner features a 15mm or 3/8-inch square drive slot for retraction during installation.
- Always verify that the ribs are fully seated in all pulley grooves before starting the engine to prevent shredding.
- The idler pulley is a common failure point; check for excessive play or metallic noise when replacing the belt.
- Consult a certified technician if you encounter difficulty compressing the hydraulic tensioner or if the alignment remains off-center.
The serpentine belt system serves as the lifeblood of the 2007 Chevy Silverado, driving critical accessories including the alternator, power steering pump, and water pump. Because 2007 marked a pivotal transition year for Chevrolet, featuring both the legacy GMT800 “Classic” and the redesigned GMT900 chassis, identifying the correct belt routing path is essential to avoid mechanical failure. This guide provides the technical specifications, OEM-equivalent part data, and diagnostic procedures necessary for a professional-grade installation. Utilizing the correct 2007 Chevy Silverado serpentine belt diagram ensures optimal accessory load distribution, preventing premature wear on pulley bearings and maintaining the necessary deck engagement for long-term reliability across all Vortec engine variants.

Prime for Young Adults — 6 Months Free
Students and 18–24s get six months of Prime free, then half price.
Start 6 Months Free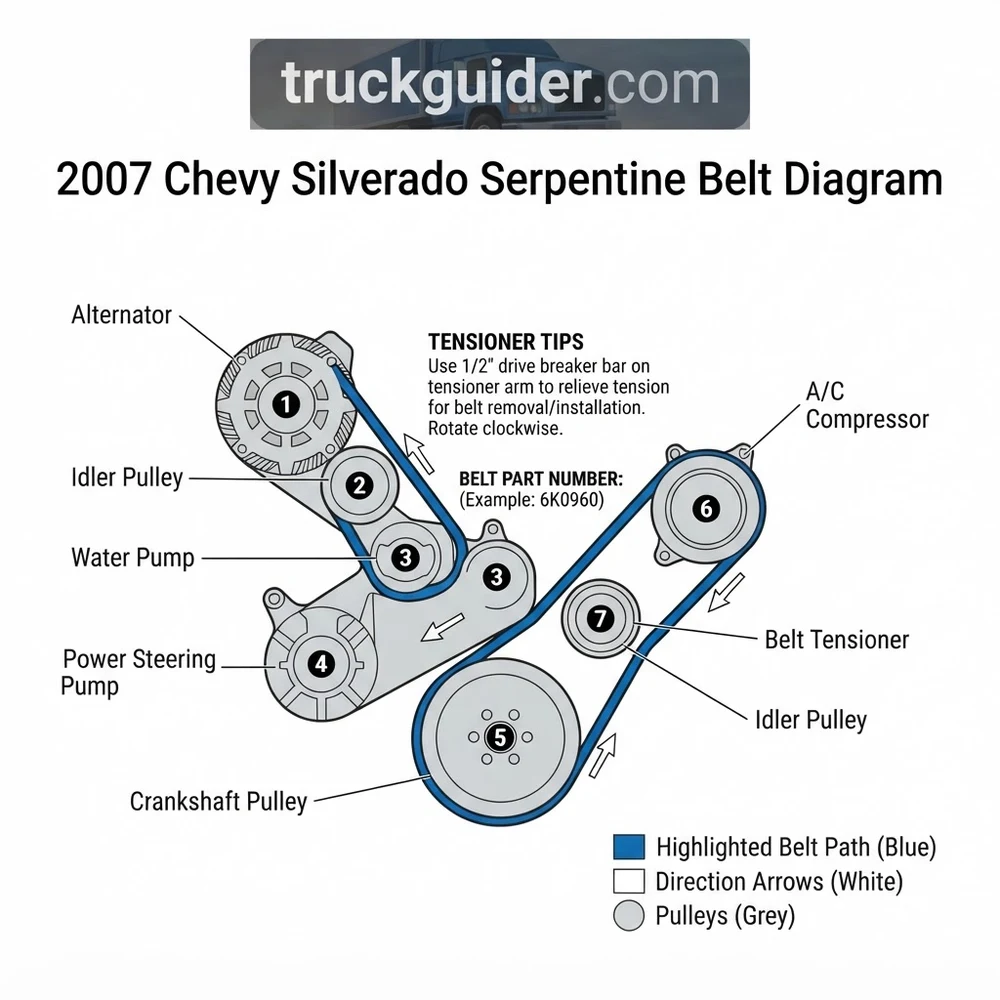
Distinguishing Between GMT800 and GMT900 Chassis Configurations
Recommended Best Deal Products


For the 2007 model year, General Motors manufactured two distinct Silverado platforms simultaneously. The GMT800 (marketed as the “Silverado Classic”) and the GMT900 (the redesigned full-size truck) utilize different accessory drive systems. Installing the wrong belt based on an incorrect engine orientation will lead to immediate tensioner failure or insufficient deck engagement on the ribbed pulleys. The GMT800 platform primarily utilized the proven Vortec 4.8L (LR4/LY2) and 5.3L (LM7/L59) configurations, while the GMT900 introduced updated V8 engines with refined front-end accessory drives (FEAD). Furthermore, the V6 4.3L (LU3) engines feature a significantly different routing path compared to the V8 counterparts. Understanding your specific vehicle identification number (VIN) digit—specifically the eighth character representing the engine code—is the first step in selecting the correct serpentine belt diagram. If your truck is equipped with the Z71 off-road package or heavy-duty towing options, pay close attention to whether your configuration includes a secondary cooling fan or air pump, as these drastically alter the required belt length and routing path around the idler pulley.
Identifying Engine Variations and Accessory Drive Layouts

The GMT800 “Classic” utilizes a single belt system with a standard tensioner geometry. In contrast, the GMT900 chassis often features a more compact accessory layout to accommodate the revised engine bay. Verify your engine code against the factory placard located in the glove box. A 2007 GMT800 Silverado with a 5.3L V8 typically requires a different routing path than a GMT900 equipped with the 5.3L LC9 or LY5 engine. When analyzing the pulley diagram, check for the presence of an air injection reaction (AIR) pump or a mechanical fan clutch. These components dictate the path of the belt as it navigates between the crankshaft pulley, the alternator, and the power steering pump. Improper identification of the vehicle chassis will result in a belt that is either too loose to maintain tension or too short to clear the idler pulley during installation.
2007 Chevy Silverado Serpentine Belt Diagram Part Numbers
Selection of the correct OEM belt or high-quality aftermarket equivalent depends on engine displacement, alternator output, and the presence of auxiliary cooling or high-output charging systems. The following table provides standard sizing and part reference data for common 2007 configurations. Always verify these numbers against your specific engine code and the belt length printed on your original factory component.
| Engine Displacement | Chassis Type | Standard Belt Size | Application Note |
|---|---|---|---|
| 4.3L V6 | GMT800 | 92.5″ (K060925) | Standard Accessory Drive |
| 4.8L / 5.3L V8 | GMT800 | 94.5″ (K060945) | Standard / No AIR Pump |
| 5.3L V8 | GMT900 | 95.5″ (K060955) | Revised Tensioner Path |
| 6.0L V8 | GMT900 | 98.0″ (K060980) | High Output / Heavy Duty |
Part numbers listed above are based on common industry standards. Always cross-reference the belt size with the manufacturer’s catalog, as mid-year running changes in the 2007 Silverado production run may necessitate slightly different lengths for specific towing packages.
How to Follow the 2007 Chevy Silverado Serpentine Belt Diagram Step by Step
Recommended Best Deal Products


Replacing the serpentine belt requires a methodical approach to ensure the belt seats correctly in every pulley groove. Misalignment, even by a single rib, leads to immediate belt fraying and potential accessory drive failure. Before beginning, ensure the engine has cooled to prevent thermal expansion of the pulleys and potential burns. You will require a 15mm or 16mm serpentine belt tool, or a long-handled socket wrench with a low-profile head, to provide the necessary leverage against the spring-loaded belt tensioner.
Execution Procedures for Precise Routing
- Clearance and Visibility: Remove the engine vanity cover if equipped. Locate the belt tensioner on the passenger side of the engine block. Refer to the 2007 Chevy Silverado serpentine belt diagram specific to your engine size to visualize the path around the idler pulley and alternator.
- Tensioner Release: Attach your serpentine belt tool to the tensioner bolt head. Rotate the tool clockwise (or counter-clockwise, depending on the specific engine orientation) to compress the tensioner spring. This creates slack in the system, allowing the old belt to be removed from the highest pulley, typically the alternator or idler pulley.
- Routing the New Belt: Following the diagram, drape the new belt over the crankshaft pulley at the bottom first, as this is often the most difficult point of access. Ensure the ribbed side faces the grooved pulleys and the smooth back side contacts the idler pulley.
- Final Seating: Carefully thread the belt around the remaining accessories—water pump, power steering pump, and air conditioning compressor. Leave the tensioner pulley for last.
- Verification: Re-engage the tensioner and slide the belt over the pulley. Inspect the entire path to ensure the belt is centered on every groove. If the belt shows any overhang, the deck engagement is incorrect, and you must restart the routing process.
Do not start the engine until you have performed a manual rotation of the crankshaft pulley. Ensure the belt does not “jump” a groove during the first revolution. Failing to verify alignment can result in the belt snapping and damaging surrounding electrical wiring or cooling fans.
2007 Chevy Silverado Serpentine Belt Tension and Component Health
The longevity of your serpentine belt is directly tied to the health of the idler pulley and the tensioner assembly. Even with a fresh belt, a worn bearing in a pulley can cause vibrations that lead to harmonic instability. When evaluating the system during a belt replacement, perform the following diagnostic checks:
- Tensioner Spring Rate: Manually compress the tensioner. It should move smoothly without binding or clicking. If the tensioner exhibits excessive play or “bottoms out” before the belt is tight, replace the entire assembly.
- Pulley Bearing Sound: Spin each idler pulley by hand while the belt is removed. A silent, smooth rotation is acceptable. Any grinding, clicking, or lateral “wobble” indicates a bearing failure that will destroy a new belt in short order.
- Pulley Alignment: Sight-check the pulleys to ensure they are parallel to one another. If one pulley is canted, the belt will track unevenly, resulting in rapid wear on the leading edge of the belt.
- Surface Integrity: Inspect the belt pulleys for any dried fluid, grease, or debris. The pulleys must be perfectly clean to maintain the friction coefficient required for proper torque transfer.
- Deflection Assessment: After installation, measure the belt deflection between the two longest spans. Using a belt tension gauge, ensure the tension falls within the manufacturer’s specified range—typically 0.5 inches of movement under moderate pressure.
Torque the belt tensioner mounting bolts to 37 lb-ft (50 Nm) if the assembly requires replacement. Always replace mounting hardware if corrosion or thread fatigue is observed.
2007 Chevy Silverado Serpentine Belt Diagram Questions Answered
Recommended Best Deal Products



Can I use an aftermarket belt with a different length?
Using a belt that deviates from the OEM specification is highly discouraged. A belt that is too long will bottom out the tensioner, preventing it from applying the necessary pressure to the belt. A belt that is too short puts excessive load on the accessory bearings, leading to premature failure of the alternator or water pump.

Audible — Listen Free for 30 Days
One free credit a month and thousands of titles included.
Listen Free for 30 DaysHow often should the belt be inspected?
For most 2007 Silverado applications, inspect the serpentine belt every 15,000 miles or annually. Look for cracks in the ribs, material separation, or “glazing”—a shiny, smooth appearance on the ribbed side that indicates the belt has lost its ability to grip the pulleys effectively.
What does “deck engagement” mean in the context of belt routing?
Deck engagement refers to the surface area contact between the belt and the pulley grooves. Proper engagement is vital to prevent slippage, especially on high-load components like the alternator. If the routing path is incorrect, the belt may only sit on a portion of the pulley grooves, leading to excessive heat generation and eventual snapping under load.
Are the 2007 Silverado V6 and V8 serpentine belts interchangeable?
No. The accessory drives on the 4.3L V6 and the various V8 engines are configured with different pulley diameters and accessory placements. Always match the belt to your specific VIN-derived engine code to ensure you are following the correct routing path defined in the factory technical manual.
Following the guidance in this 2007 Chevy Silverado serpentine belt diagram article will ensure your accessory drive system operates within factory tolerances. Whether you are dealing with the GMT800 classic or the GMT900 update, prioritizing component health and correct routing will prevent common roadside failures and maintain the longevity of your Silverado’s engine accessories.
Step-by-Step Guide to Understanding the 2007 Chevy Silverado Serpentine Belt Diagram
Identify – Locate the belt routing path decal inside the engine bay or consult the manual.
Locate – Find the 15mm bolt or square drive slot on the belt tensioner arm.
Reference – Position the new belt according to the pulley diagram to ensure correct orientation.
Connect/Route – Compress the tensioner, slide the belt over the final accessible pulley, and release.
Audible Premium Plus — Annual Membership
12 audiobook credits up front, plus the full Audible catalogue.
See Annual PlansVerify – Inspect all pulleys to ensure the belt ribs are perfectly centered in the grooves.
Troubleshoot – Start the engine and listen for squealing; if noise occurs, stop immediately and re-check alignment.