2007 Toyota Tundra 4.7 Serpentine Belt Diagram: Routed & Explained

Accessing the correct 2007 Toyota Tundra 4.7 serpentine belt diagram is essential for any owner looking to maintain engine performance. Whether your belt is squealing or showing signs of dry rot, following a precise routing path prevents catastrophic failure of your alternator, power steering, and air conditioning systems. This guide provides the technical insights and visual mapping required to complete the task safely.




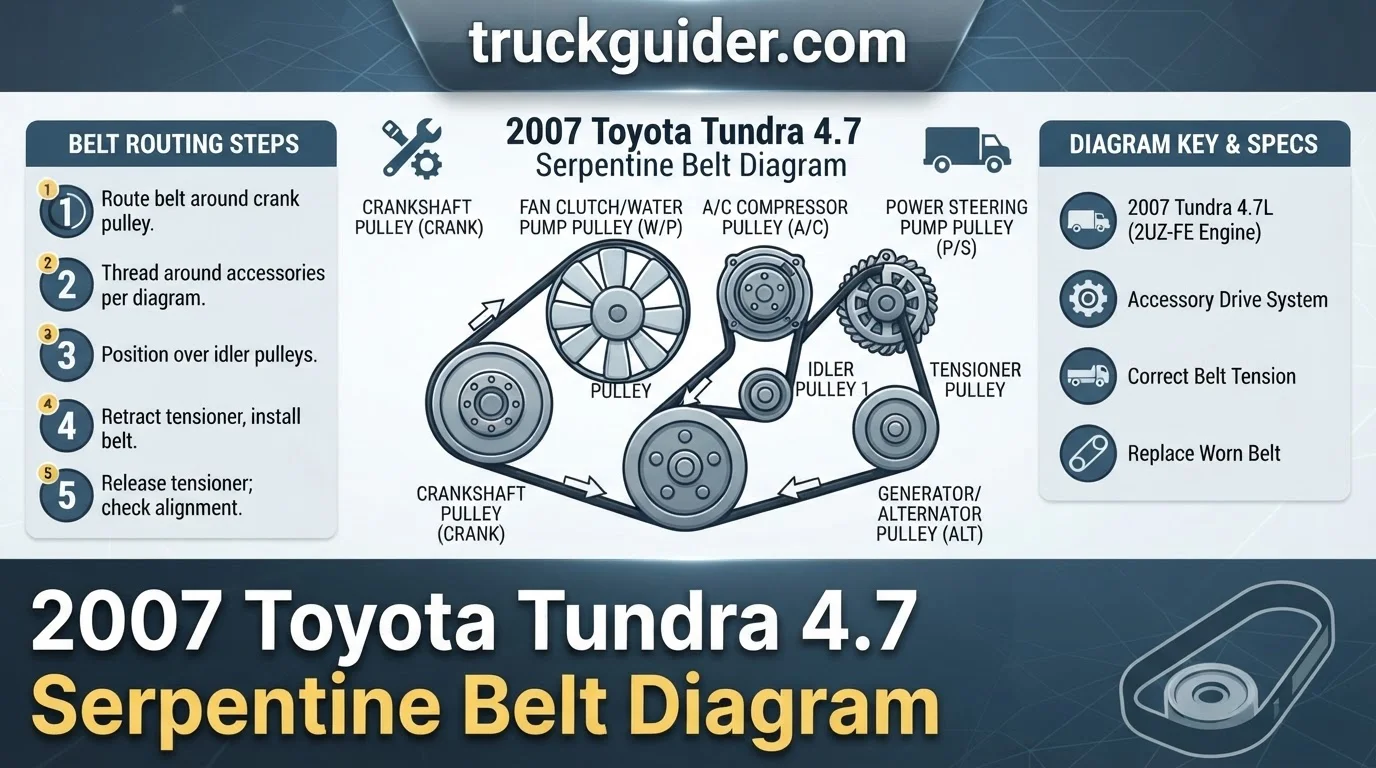
2007 Toyota Tundra 4.7 Serpentine Belt Diagram Reference Chart
How to Read This Chart
The chart above outlines the interaction points for your serpentine belt. The “Ribbed Side” indicates where the belt’s internal grooves must engage with the pulley’s ridges. The “Flat Side” indicates where the smooth back of the belt contacts a pulley, typically a tensioner or idler. Verify these against the physical layout on your 2007 Tundra 4.7 engine bay. Always check the under-hood sticker or your specific service manual for exact manufacturer routing if you have modified accessories.
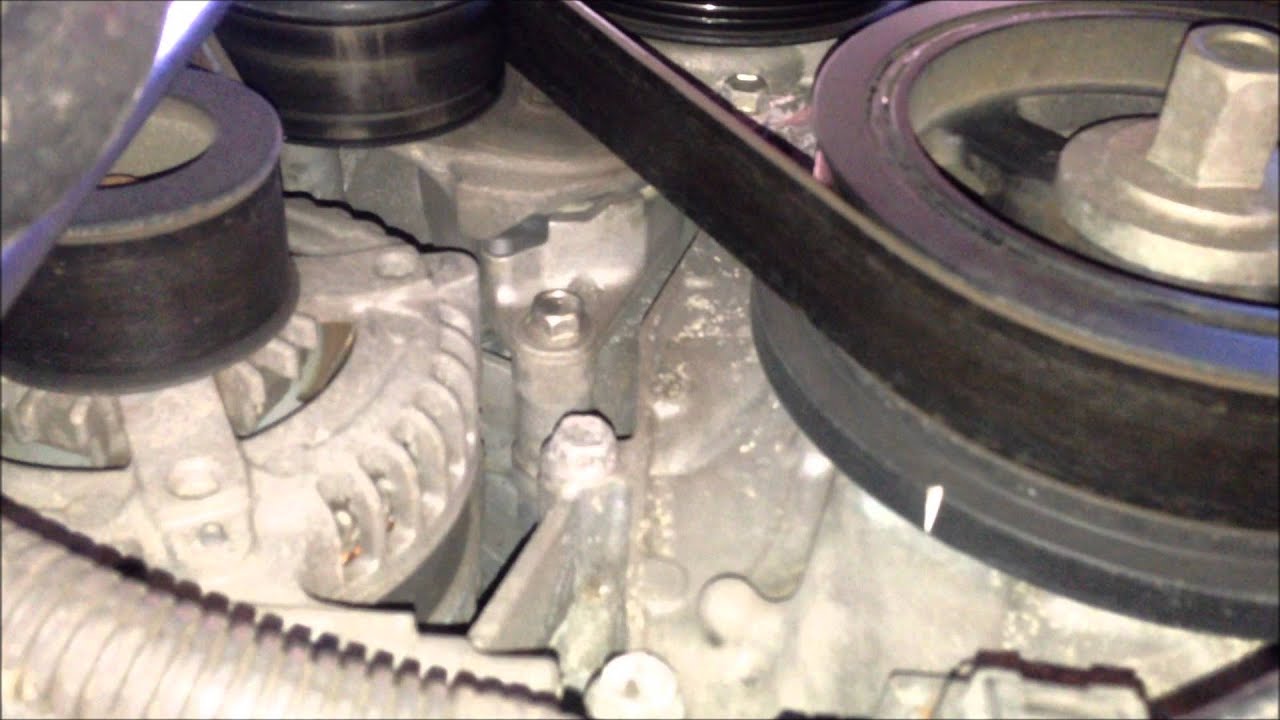
Detailed Facts on 2007 Toyota Tundra 4.7 Serpentine Belt Diagram Routing
The 4.7L V8 (2UZ-FE engine) in the 2007 Tundra uses a long, singular belt to drive all major engine accessories. Because the belt path is complex, even a minor misalignment during installation can cause the belt to throw or shred prematurely. Ensuring the belt sits deep within every groove is the most critical step in this maintenance guide.

Most common issues arise from the tensioner pulley. If you notice a high-pitched squealing sound, it is often a sign that the tensioner is losing its spring pressure or that the belt has stretched beyond its operating limits. Always replace the belt and inspect the tensioner pulleys for play whenever you observe these symptoms.
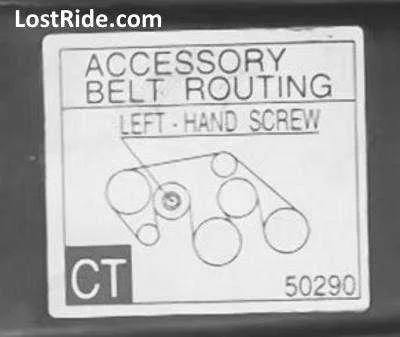
How to Read the 2007 Toyota Tundra 4.7 Serpentine Belt Diagram Step by Step
Disconnect the negative battery terminal to prevent accidental ignition. Use a serpentine belt tool or a long-handled socket wrench on the tensioner bolt. Rotate the tensioner clockwise to release the pressure, then slide the old belt off the pulleys.
Refer to your vehicle’s specific diagram. Start by threading the belt around the bottom crankshaft pulley and up toward the alternator and A/C compressor. Leave the tensioner for the final step, as it requires the most clearance.


Rotate the tensioner again to loop the belt over the final smooth pulley. Slowly release the tensioner until it sits firmly against the belt. Double-check that all ribs are seated correctly in every pulley groove before starting the engine.
Insights on 2007 Toyota Tundra 4.7 Serpentine Belt Diagram Common Problems
One common issue encountered by owners is the “misaligned loop.” If the belt is not perfectly centered in the pulleys, it will chirp during cold starts. Over time, this leads to edge fraying or the belt snapping entirely while driving, which causes an immediate loss of power steering and battery charging capability.
Another insight involves the condition of the idler pulleys. As these age, the internal bearings can seize. When installing a new belt, spin each idler pulley by hand. If you hear a grinding noise or feel resistance, the pulley should be replaced simultaneously to avoid wearing out your brand-new serpentine belt.
The 2007 Toyota Tundra 4.7 belt system is designed to be self-tensioning. However, environmental factors like road debris and mud can cause the tensioner to stick, which is why an annual inspection of the belt path is recommended.
What If It Still Doesn’t Work?
If the belt continues to slip or squeal after installation, there are three primary areas to investigate:



- Check for Oil Contamination: Even a small oil leak from the valve covers can drip onto the belt, causing it to slip despite having correct tension.
- Verify Pulley Alignment: A bent bracket can misalign a pulley, forcing the belt to run at an angle.
- Replace the Tensioner: If the tensioner spring is weak, it cannot provide the necessary force to keep the belt tight under load.
If you have checked these items and the issue persists, contact a professional mechanic. The estimated cost for a diagnostic check typically ranges from $100 to $150, which can save you from replacing expensive components unnecessarily.
Summary of Maintenance Insights
Replacing the serpentine belt is a manageable task for most Tundra owners when armed with the correct 2007 Toyota Tundra 4.7 serpentine belt diagram. By understanding how the ribbed and flat sides interact with your engine accessories, you can restore silent operation and reliability to your rig. Always prioritize safety, use the correct tools, and confirm your work with a quick test drive.
Key Takeaways
-
✓
Correct routing path is critical to avoid accessory drive failure. -
✓
Always verify the tensioner pulley condition before installing a new belt. -
✓
Use the 2026 maintenance standards to inspect belt ribs for cracking or glazing. -
✓
Correct installation prevents premature wear on water pump bearings. -
✓
Properly seated ribs are vital to prevent belt slippage under load.
❓ Frequently Asked Questions
1
What is the 2007 Toyota Tundra 4.7 serpentine belt diagram?
The diagram is a technical schematic showing how the single drive belt snakes through the various pulleys of the 2UZ-FE engine. It provides the specific routing path across the alternator, air conditioning compressor, and power steering pump to ensure every accessory operates correctly.
2
How does the serpentine belt tensioner work?
The tensioner features a spring-loaded arm with a pulley designed to maintain constant pressure on the belt. This prevents slippage during engine operation. In this specific 4.7L model, rotating the tensioner bolt clockwise retracts the arm, creating the slack needed to remove or install the belt.
3
Why is this belt replacement information important?
Because the 4.7L engine utilizes a single serpentine belt to drive multiple critical components, incorrect installation can lead to immediate engine overheating or loss of power steering. Accurate info ensures you complete the job safely and restore full mechanical functionality to your truck.
4
What are the symptoms of a failing belt?
Common symptoms include high-pitched squealing upon startup or acceleration, visible cracking or fraying along the belt ribs, and potential charging system warnings. If you notice these insights, the belt has lost its grip and requires immediate inspection and potential replacement.



5
How can I get started with this replacement?
Start by gathering your 14mm wrench and a flashlight. Locate the tensioner pulley, rotate it to release belt tension, and remove the old belt. Use our provided diagram to route the new belt correctly, ensuring it seats firmly in all pulley grooves before releasing the tensioner.
6
Where can I find the serpentine belt diagram for my 2007 Tundra 4.7?
The diagram is often on a sticker under the hood, in your owner’s manual, or within this guide’s main reference section.
![Dodge Key Fob Battery Replacement: Easy DIY Guide [2026]](https://truckguider.com/wp-content/uploads/2026/03/dodge-key-fob-battery-replacement-featured.webp)
![Ram Tradesman Vs Big Horn [2026]](https://truckguider.com/wp-content/uploads/2026/03/featured-a1247c2c-768x256.webp)