2017 Toyota Tacoma Fuse Box Diagram: Circuits Mapped Out by Trim

The 2017 Toyota Tacoma features two primary fuse boxes: an engine compartment block located near the battery and a cabin panel located under the driver’s side dashboard. This article provides the specific layouts, amperage ratings, and circuit functions for both locations.
You will find the comprehensive master reference chart, identification of trim-specific variations, 3rd Gen electrical protocols, panel location guidance, and essential safety procedures for testing and replacing your vehicle’s fuses.

Prime for Young Adults — 6 Months Free
Students and 18–24s get six months of Prime free, then half price.
Start 6 Months Free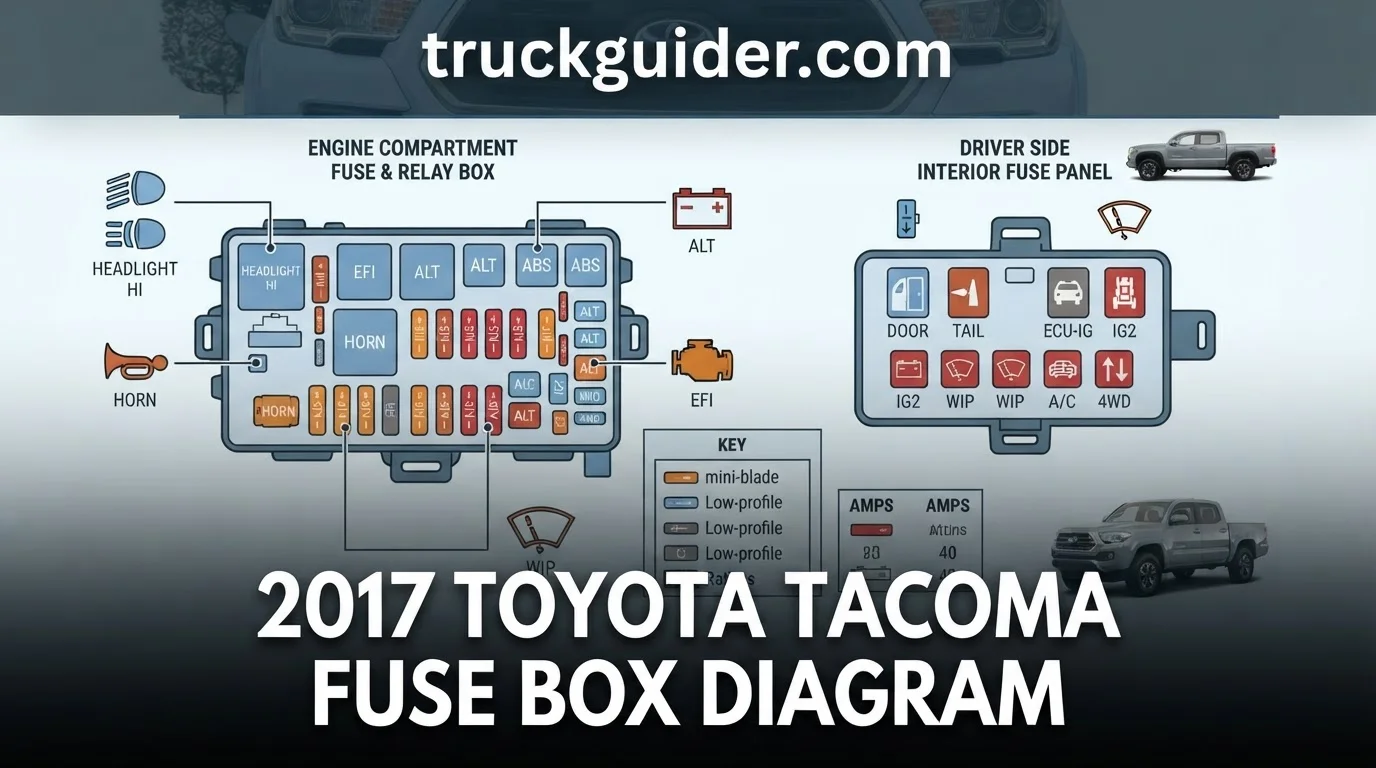
2017 Toyota Tacoma Fuse Box Diagram Main Reference Chart
Recommended Best Deal Products


How to Read the Diagram
The chart above outlines essential electrical circuits for the 2017 Tacoma. “Location” specifies whether the component is controlled by the fuse box in the engine bay (exterior) or the panel located inside the cabin. Always cross-reference these values with the legend printed on the underside of your specific fuse box cover.
The “Amperage” column represents the maximum load capacity for that circuit, measured in Amperes (A). Circuits with higher ratings, such as the 30A headlights, handle high-draw components, while lower ratings like 7.5A are reserved for control modules. If you are uncertain about a specific slot, consult the owner’s manual corresponding to your specific trim level, as optional equipment like fog lights or towing packages can alter the standard layout.
Understanding Fuse Amperage and Color Coding
Toyota utilizes a standardized color-coding system for automotive fuses to ensure quick identification. Each color corresponds to a specific amperage rating, allowing you to visually inspect a panel without needing to read the tiny numerical stamp on the top of every individual fuse.
For example, a 10A fuse—often used for the horn or turn signals—is typically red, while a 20A fuse used for larger loads like the fuel pump is yellow. A 30A fuse, commonly used for high-draw items like headlights or power windows, is usually green.
Never replace a blown fuse with one of a higher amperage rating. This action bypasses the circuit’s safety threshold and risks melting wires or starting an electrical fire. If a fuse repeatedly blows, it indicates a short circuit or an overloaded accessory that requires professional inspection rather than a simple fuse swap.
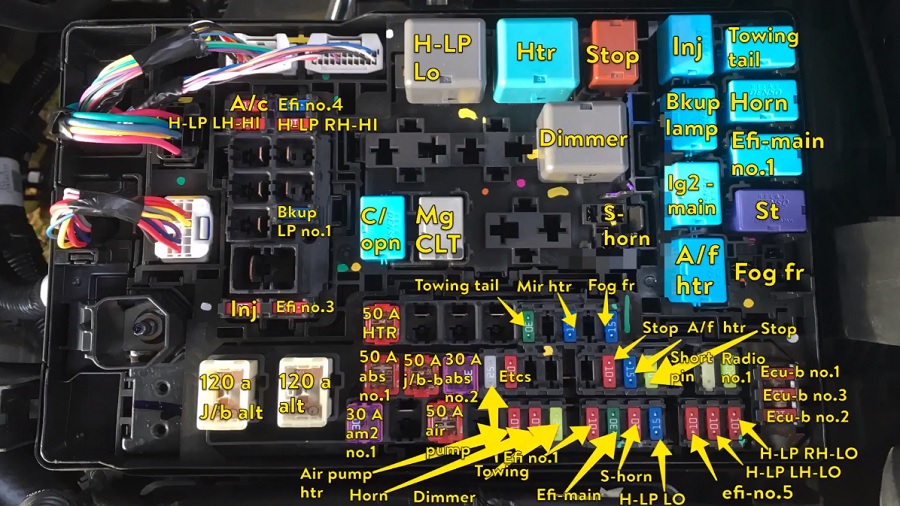
The 2017 Toyota Tacoma features at least two primary fuse box locations to distribute electrical loads efficiently. The exterior box is found under the hood, typically on the driver’s side, and manages heavy-duty systems like the engine management, cooling fans, and external lighting.
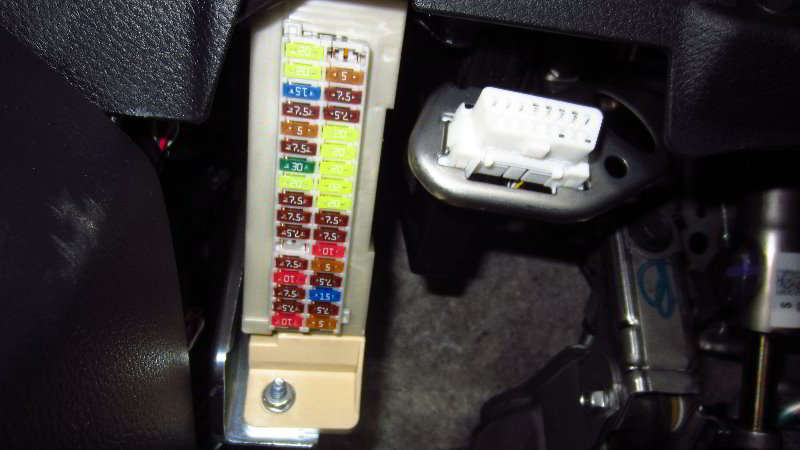
The interior fuse panel is located within the cabin, usually tucked behind a panel near the driver’s side kick plate or steering column. This box controls low-voltage cabin electronics, such as the radio, interior lighting, power windows, and the OBD-II diagnostics port.
To verify the exact layout for your specific vehicle, always open the interior or engine bay fuse box covers. The underside of these plastic covers contains an embossed diagram and legend that maps out the specific location and amperage for every slot in that specific box.

Audible — Listen Free for 30 Days
One free credit a month and thousands of titles included.
Listen Free for 30 DaysHow Trim Levels Impact the 2017 Tacoma Fuse Layout
Not all 2017 Toyota Tacomas utilize the same electrical architecture. Your specific fuse configuration is dictated by the factory-installed trim level and the specific option packages selected at the time of manufacturing. A vehicle’s electrical loadout changes significantly based on the hardware it is required to power.
For example, a base-model SR trim has a simplified wiring harness with fewer relay slots and fuse positions. In contrast, a Limited trim comes equipped with premium features such as advanced JBL audio systems, power-adjustable heated seats, and proximity sensors. These extra components require dedicated circuits and power distribution blocks absent in lower-tier models.
The towing package also serves as a major differentiator. Tacomas equipped with the factory tow package include heavy-duty circuits for trailer light controllers and enhanced cooling fan relays. If your truck lacks these factory options, those specific fuse positions will often be empty, or the internal wiring to those slots will be missing entirely.
Even within the same trim level, mid-year production changes can lead to variations. Toyota occasionally updates circuit board layouts during a production cycle to improve reliability or accommodate running changes in accessory components, meaning two trucks with the same build date might still have minor, non-documented differences.
Verifying Your Tacoma Configuration via VIN
Because of these discrepancies, generic diagrams found online are not always perfectly accurate for your specific vehicle. The only way to verify your exact fuse box configuration is to reference your specific Vehicle Identification Number (VIN). A VIN-specific lookup pulls the “as-built” data directly from Toyota’s manufacturing database.
You can use your VIN to access the official Toyota electronic parts catalog or consult with a dealership service department. This ensures that the diagram you are looking at matches the exact wiring harness, relay count, and fuse amperage requirements of your specific Tacoma build.
Why Your Fuse Box Might Differ From Online Diagrams
Online diagrams often represent the “maximum” or “fully loaded” version of a vehicle’s electrical system. This approach creates confusion for owners of lower-trim models, who may find empty sockets in their fuse boxes where the diagram indicates a fuse should be present. Do not assume your vehicle has a missing fuse simply because a slot is empty.
Always cross-reference the diagram against your owner’s manual, which provides the baseline layout for your trim. If you have installed aftermarket accessories like high-output LED light bars or winches, your fuse box may also be modified from its factory state. In these cases, aftermarket relay blocks or inline fuses may have been added, which will never appear on any factory-supplied diagram.
Audible Premium Plus — Annual Membership
12 audiobook credits up front, plus the full Audible catalogue.
See Annual PlansDistinguishing 3rd Gen Tacoma Electrical Systems
Recommended Best Deal Products


The 2017 Toyota Tacoma marks a pivotal point in the truck’s electrical evolution. As part of the 3rd Generation (2016–2023), the vehicle utilizes a completely modernized architecture compared to the 2nd Generation (2005–2015). These electrical systems are not interchangeable, making it critical to identify your specific generation before sourcing replacement fuses or relays.
The engine compartment fuse block in the 2017 model is distinct from the cabin-side junction blocks located beneath the dashboard. These two primary power centers serve different functions; the engine compartment block handles high-amperage current for the starter, cooling fans, and engine management, while the interior block manages low-voltage cabin accessories and interior lighting.
Why 2nd Gen Fuse Diagrams Do Not Apply
The transition from the 2nd to the 3rd Generation involved a significant restructuring of the vehicle’s Body Control Module (BCM) and Controller Area Network (CAN-bus) architecture. A 2015 Tacoma fuse diagram will feature different circuit mappings, amperage ratings, and physical pin configurations that do not align with the 2017 layout. Attempting to use older documentation will result in incorrect circuit identification.
Physical differences in the housing itself provide the most immediate visual verification of your model year. The 2017 fuse box features a more compact, integrated lid design compared to the flatter, wider housings found on 2nd Gen trucks. The layout of the relays and fuse slots within the 2017 box is tighter and organized to accommodate the increased number of electronic sensors and safety systems found in the newer platform.
You can identify the 2017 housing by its specific clip-on lid mechanism, which is designed to provide an airtight seal against moisture in the engine bay. The internal architecture utilizes smaller fuse form factors than the older blade-style designs, reflecting a shift toward higher component density. If the lid diagram on your vehicle does not match the 2017 schema, you are likely looking at an older 2nd Gen reference that lacks the modern powertrain requirements of your truck.
Never cross-reference a 2015 or earlier diagram for a 2017 Tacoma. Using incompatible wiring guides can lead to permanent damage to your vehicle’s ECU or unintended activation of safety systems. Always verify the part number imprinted on the inside of your specific fuse box cover before replacing hardware.
Furthermore, the 2017 model introduces standardized relay positions that differ in orientation from previous iterations. The mounting points for the engine compartment block are incompatible with older chassis, reinforcing the necessity of using generation-specific documentation. Always prioritize the map located on the underside of your own fuse box lid for the most accurate, trim-specific information regarding your 2017 configuration.
Locating and Inspecting Your 2017 Tacoma Fuse Panel
The 2017 Toyota Tacoma features two distinct electrical distribution centers responsible for managing power across your vehicle. Accessing these panels is a fundamental step when diagnosing blown fuses, erratic electronics, or failed accessories. Both the interior and engine-bay panels are engineered for tool-free, manual entry to ensure you can perform field-level repairs quickly.
Before beginning any physical inspection, ensure the ignition is switched to the OFF position. This prevents potential short-circuiting or accidental grounding of live contacts when manipulating the fuses. Always consult your owner’s manual or the printed underside of the panel covers to confirm specific circuit assignments before pulling any component.
Accessing the Driver Side Interior Junction Block
The interior junction block is tucked away within the dashboard architecture on the driver’s side. This panel is specifically dedicated to interior comfort and convenience systems, such as the power windows, infotainment unit, interior lighting, and the 12-volt accessory power outlets located in the center console.
To reach this panel, locate the access cover positioned to the lower left of the steering column. This panel is typically integrated into the lower dash trim. Use the molded finger-hold or the latch tab to pull the cover toward you. The panel should snap open to reveal the fuses mounted in rows behind the trim.
Once the cover is removed, you will see a clear layout of the fuses. Many of these are mini or low-profile ATM fuses. If you are struggling to grip a specific fuse with your fingers, remember that a dedicated white plastic fuse puller tool is provided by Toyota. It is generally clipped inside the lid of the under-hood fuse block.
Under-Hood Fuse Block Removal Steps
The secondary, higher-amperage fuse block is situated inside the engine compartment. This unit protects vital drivetrain components, the engine control module, cooling fans, and high-load exterior lighting. You can find this black plastic box mounted on the driver’s side inner fender, near the windshield washer fluid reservoir.
To open this block, look for the locking tabs along the sides of the cover. Press inward on these tabs simultaneously while lifting the cover straight up. Do not force the cover if it resists, as the plastic tabs are pressure-sensitive. Once the cover is off, place it in a secure location where it will not be knocked into the engine bay.
Inside the cover, you will find the integrated fuse puller tool. This specialized plastic clip is designed to fit onto the head of the fuses, allowing you to extract them safely without damaging the delicate metal filaments or the surrounding housing. Use the diagram printed on the underside of this cover to identify the specific amperage and function of each circuit.
When inspecting a fuse, hold it up to a light source to check the thin metal bridge inside. If the bridge is broken or if you notice a black smudge inside the plastic housing, the fuse is blown and must be replaced. Always replace a fuse with one of the exact same amperage rating to prevent permanent wiring damage or potential fire hazards.
Professional Tips for Safe 2017 Tacoma Fuse Maintenance
Recommended Best Deal Products


Performing your own electrical repairs on a 2017 Toyota Tacoma requires strict adherence to safety protocols. A fuse is a sacrificial component designed to protect your vehicle’s sensitive wiring and electronic control units from catastrophic failure or fire.
Always disconnect the negative battery terminal before performing major electrical work. When inspecting the fuse box, use the manufacturer-provided fuse puller tool located in the engine bay fuse block cover to avoid damaging the delicate plastic housing or neighboring components.
Common Pitfalls in Electrical Troubleshooting
The most dangerous mistake a vehicle owner can make is replacing a blown fuse with one of a higher amperage rating. Fuses are calibrated precisely to the wire gauge and circuit load of your specific Tacoma trim.
If you replace a 10A fuse with a 20A fuse in a circuit designed for lower capacity, you effectively bypass the safety limit. This forces the wiring harness to carry more current than it can handle, which often results in insulation melting, permanent wiring damage, or a vehicle fire.
Another frequent error involves the improper installation of “Add-a-Fuse” kits. While these are popular for aftermarket dash cams or lighting, poor crimping or choosing the wrong constant-power source can lead to erratic voltage spikes that damage the Tacoma’s complex electrical sensors.
It is vital to understand that a blown fuse is rarely the primary problem. It is a symptom of an underlying issue, such as a short circuit or a failing component drawing excessive current. Replacing a fuse without resolving the root cause will almost certainly lead to the new fuse blowing again immediately.
Always inspect the wiring surrounding an accessory before assuming the fuse simply “wore out.” If you find charred plastic, frayed insulation, or a strong acrid smell around the fuse panel, do not replace the fuse; stop and perform a deeper investigation into that specific circuit.
When to Seek Professional Diagnostic Help
Not every electrical gremlin can be solved with a simple fuse swap. If you find that a fuse blows repeatedly upon replacement, you are likely dealing with a “dead short” somewhere in the vehicle’s body harness.
Tracing a short circuit requires a professional-grade multimeter, specialized wiring schematics, and the experience to safely probe high-voltage circuits. Attempting to bypass these issues with higher-rated fuses or jumper wires can lead to irreversible damage to the Tacoma’s ECU (Engine Control Unit).
Seek professional diagnostic help if you notice intermittent electrical power, flickering interior lights, or unresponsive electronic modules that persist even after a visual inspection of the fuse box shows no blown fuses. These symptoms often point to loose grounds, corroded connectors, or failing relays.
Modern Toyota electrical systems are interconnected. An issue in the trailer lighting circuit, for example, can sometimes trigger fault codes in the chassis management system. If you are uncertain about the function of a specific relay or fuse, refer back to the Toyota service manual rather than experimenting with the configuration.
✨ Key Benefits
System Longevity
Adhering to factory amperage ratings preserves the integrity of your Tacoma’s expensive wire harnesses and prevents premature component failure.
Hazard Prevention
Identifying root causes of electrical shorts early stops minor issues from escalating into dangerous engine bay fires or complete power loss.
Key Takeaways
-
✓
Locate the engine bay and interior cabin fuse panels quickly using clear visual indicators. -
✓
Understand how variations in Tacoma trim levels alter specific accessory fuse configurations. -
✓
Gain insights into 3rd Generation electrical architecture for accurate troubleshooting. -
✓
Follow a step-by-step approach to inspecting and replacing damaged electrical fuses. -
✓
Apply expert safety protocols to prevent short circuits during your electrical repair process.
❓ Frequently Asked Questions
1
What is a 2017 Toyota Tacoma fuse box diagram?
A fuse box diagram is a technical map that displays the exact position and purpose of every fuse and relay in your truck. It provides critical information regarding which circuit controls specific features, such as your headlights, fuel pump, or infotainment system, allowing for precise diagnostics.
2
How does the fuse panel layout work?
The layout functions as the central nervous system for your vehicle’s electricity. Each fuse acts as a protective gatekeeper for a specific component. When electrical current exceeds the rated limit, the fuse link melts, breaking the circuit to protect your wiring harness and electronic components from potential fire or damage.
3
Why is this diagram information important?
Having access to accurate diagram details is vital for quick repairs. If a feature like your power outlet or radio stops working, the diagram provides the facts needed to identify the blown fuse immediately, saving you time and the cost of professional diagnostic services for minor electrical faults.
4
What are the benefits of DIY fuse maintenance?
Performing your own fuse inspection offers insights into your truck’s electrical health. It allows you to resolve simple power failures instantly and helps you identify recurring electrical shorts before they become complex mechanical issues, ultimately keeping your Tacoma running reliably throughout the 2026 driving season.
5
How can I get started with electrical troubleshooting?
Start by identifying the failed component and locating the corresponding fuse box. Use a test light or multimeter to check for power at the fuse terminals. Once the faulty fuse is identified, replace it with a new one of the exact same color and amperage rating to restore system operation.
6
How do I know which fuse is blown?
Look for a broken metal filament visible through the clear plastic housing of the blade fuse.