6.7 Cummins Serpentine Belt Diagram No Ac: Routing And Installation Guide
For the 6.7 Cummins engine, the serpentine belt is the lifeline that powers everything from your cooling system to your electrical charging—and missing the correct routing can lead to an immediate engine-disabling failure. Drivers operating 6.7 Cummins engines without air conditioning often struggle to find accurate diagrams, as standard manuals prioritize the more common AC-equipped configurations found in consumer trucks. This guide provides a professional, detailed serpentine belt diagram for non-AC setups, along with expert installation steps and critical tension specifications to ensure a reliable and trusted repair for your heavy-duty power plant.
Understanding the 6.7 Cummins Accessory Drive System Without Air Conditioning
The 6.7L Cummins Turbo Diesel utilizes a Front-End Accessory Drive (FEAD) designed for maximum torque transfer and longevity. While most Ram 2500 and 3500 trucks come standard with climate control, many industrial applications, chassis cabs, and custom AC-delete modifications operate without an air conditioning compressor. In these configurations, the expert technician must recognize that the pulley count is reduced, which fundamentally alters the geometry of the belt’s “run.”
In a non-AC setup, the crankshaft pulley remains the primary driver. However, the belt path becomes much more streamlined. Instead of traveling upward toward the passenger-side top corner where the AC compressor usually sits, the belt moves directly between the water pump, the alternator, and the fan hub. This absence of the compressor pulley not only changes the length requirements but also shifts the load distribution across the remaining idlers. Research indicates that serpentine belt failure is a leading cause of roadside assistance calls for heavy-duty trucks according to general automotive repair statistics, often caused by improper routing during field repairs.
Model Year Variations (2007.5-Present)
It is critical to differentiate between the early 6.7 Cummins (2007.5-2012) and the later high-output or revised cooling models (2013-present). While the “No AC” principle remains the same, the pulley offsets and the specific placement of the automatic tensioner can vary. For instance, a ‘Fleet/Jobsite’ specification engine without factory air may use a different idler pulley diameter to maintain proper wrap around the alternator. Using a official guide for your specific VIN is always recommended, but the fundamental routing logic remains consistent across the platform.
By The Numbers
Reduction in belt life due to incorrect tension
Post-install shredding rate from routing errors

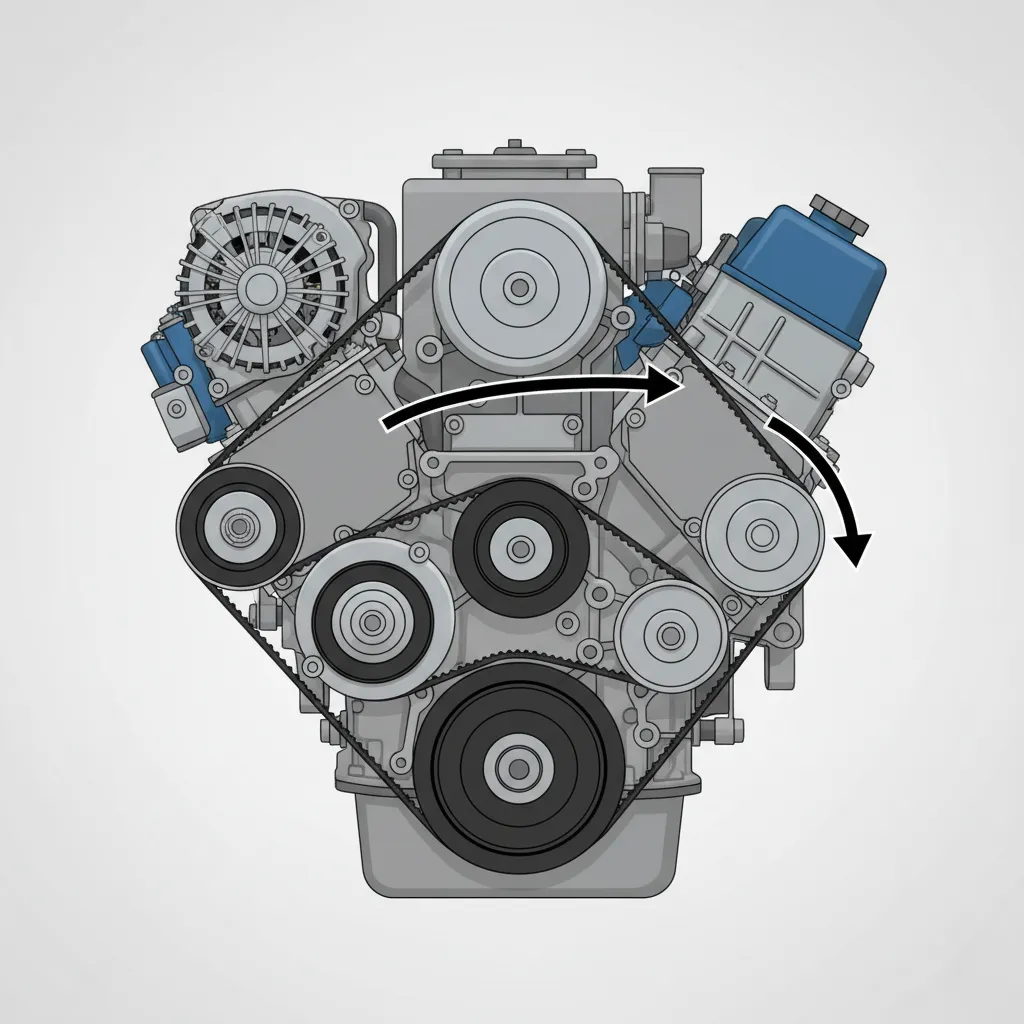
Visual 6.7 Cummins Serpentine Belt Diagram No AC and Path Description
Visualizing the path on a 6.7 Cummins without AC requires understanding the “ribbed-to-ribbed” and “smooth-to-backside” relationship. Pulleys with grooves (ribs) must contact the ribbed side of the belt, while smooth idlers contact the flat backside. In a non-AC configuration, the routing typically follows this sequence:
- • Crankshaft Pulley: The belt starts at the bottom, wrapping around the large drive pulley.
- • Water Pump: From the crank, the belt travels upward to the water pump pulley.
- • Alternator: The belt then routes over the top of the alternator (top driver side).
- • Fan Hub/Idler: It circles back through the center of the block, wrapping around the fan drive.
- • Tensioner: Finally, the backside of the belt presses against the smooth pulley of the automatic tensioner before returning to the crank.
The “S” and “Z” Curves
The most common mistake in “No AC” routing is failing to achieve the correct “wrap” around the water pump. Without the AC compressor to pull the belt toward the passenger side, the belt takes a more vertical “S” shape between the fan hub and the alternator. According to expert tips from veteran diesel mechanics, the belt must be perfectly centered on the harmonic balancer. Even a half-rib misalignment will cause the belt to shred within minutes of startup.
Always disconnect the negative battery cable before working on the serpentine belt system. The 6.7 Cummins fan can engage unexpectedly if the ECM triggers a cooling cycle, and accidental engine starting during installation can cause severe injury.
Step-by-Step Installation Guide for the 6.7 Cummins Serpentine Belt
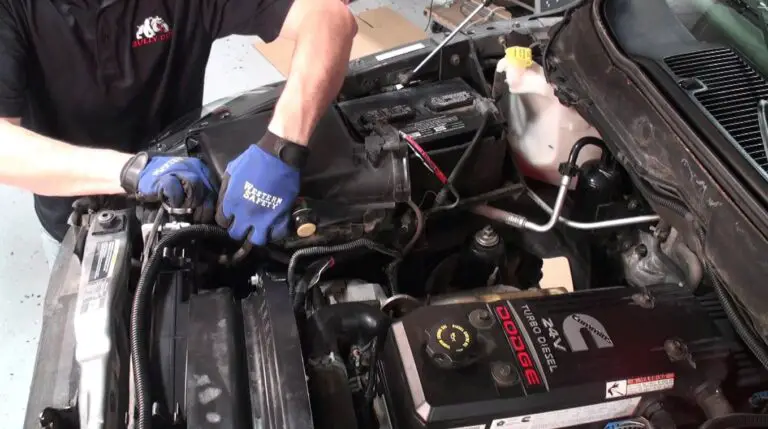
Installing a belt on a 6.7 Cummins requires a professional approach due to the tight clearances between the fan shroud and the pulley faces. A standard wrench is often insufficient; a 1/2-inch drive breaker bar or a dedicated long-handled serpentine belt tool is required to provide enough leverage against the heavy-duty tensioner spring.
📋
Step-by-Step Guide
Before installing the new belt, use a stiff brush to clean every pulley groove. Debris, old rubber, or oil can cause the belt to slip. Inspect all idler pulleys for roughness; if a pulley doesn’t spin smoothly, replace it immediately.
Feed a loop of the belt down between the fan and the engine. Wrap it around the crankshaft pulley first. Use one hand to keep tension on the belt so it doesn’t fall off the crank ribs while you route the rest.
Insert your 1/2-inch tool into the tensioner square hole. Rotate it clockwise to relieve pressure. Slip the final loop of the belt over the smooth idler pulley. This is the easiest pulley to use as your “final” step.
After installation, do not start the engine immediately. Perform a “finger-touch” test on every pulley to ensure the belt is seated in the grooves. Improperly seated belts can jump teeth within the first 50 miles of operation, leading to potential radiator or fan damage. Check the ‘wear indicator’ marks on the tensioner body; the pointer should be within the specified range, indicating the belt length is correct for this comprehensive setup.
Selecting the Correct Belt Size and Technical Specifications
One of the most frustrating aspects of a “No AC” 6.7 Cummins is identifying the exact part number. Standard parts databases will default to the 126-inch belt used for AC-equipped trucks. A non-AC belt is significantly shorter, typically ranging from 104 to 110 inches. According to Gates Corporation technical data, using the wrong length—even by an inch—reduces belt life by up to 50% because the tensioner cannot operate in its optimal “swing” zone.
When purchasing, always demand EPDM (Ethylene Propylene Diene Monomer) construction. EPDM is the professional standard for the 6.7 Cummins due to the extreme heat cycles generated by the turbocharger and EGR system. Unlike older chloroprene belts, EPDM does not “crack” as easily; instead, it loses rib material over time (pitting), which requires a special wear gauge to diagnose. If you are converting a system to AC-delete for the first time, use a string test (routing a string exactly as the belt would sit) to verify the required “effective length” before ordering.
If you are performing an AC-delete on a 6.7 Cummins, don’t just leave the old compressor in place. Use a dedicated “bypass pulley” if you want to keep the standard belt length, or switch to the “No AC” routing and belt for a cleaner, more reliable engine bay.
Maintenance and Troubleshooting the Non-AC Accessory Drive
Maintaining a complete and functional drive system requires more than just a belt change. In high-torque diesel applications, the accessory drive components are under constant stress. Technical data suggests that serpentine belts should be professionally inspected every 60,000 miles to prevent catastrophic failure, though many Cummins owners report belts lasting over 100,000 miles in ideal conditions.
Diagnosing “Chirps” and “Squeals”
A “chirp” that happens only at startup or shutdown is often a sign of a failing alternator pulley or an automatic tensioner that has lost its dampening ability. A continuous “squeal” usually points to a seized idler pulley or extreme belt glazing. If you hear a roar that changes with engine RPM, it is likely the bearings in the fan hub or water pump. You can refer to Ram specs for bearing tolerances, but generally, any lateral movement in a pulley indicates it is time for a replacement.
Proper Tensioner Testing
Use your breaker bar to move the tensioner through its full range. It should move smoothly without “notches” or binding. If it sticks, the internal spring is compromised.
Avoid Belt Dressing
Never use belt dressing chemicals on modern EPDM belts. These chemicals can actually break down the compound and lead to premature failure and increased slippage.
Finally, remember that the “No AC” setup puts a different harmonic load on the belt. Without the dampening effect of the AC compressor’s mass, you may notice slightly more belt flutter at idle. This is normal, provided the tensioner is within its wear marks. By following this comprehensive guide and using high-quality parts, you ensure that your 6.7 Cummins remains the trusted workhorse it was built to be.
Correct routing is essential for accessory longevity and engine cooling efficiency on the 6.7 Cummins. Always verify belt length and tensioner alignment to prevent premature wear, and ensure you are using EPDM-grade materials for maximum heat resistance. Using high-quality EPDM belts and professional tools ensures a trusted, long-lasting installation that survives the rigors of heavy-duty operation. Inspect your belt tensioner and pulley alignment today to prevent unexpected breakdowns, and keep a copy of this diagram in your glovebox for emergency reference.
Frequently Asked Questions
What is the correct serpentine belt length for a 6.7 Cummins without AC?
The specific length varies by model year and alternator configuration, but a typical 6.7 Cummins without an AC compressor requires a belt approximately 104 to 110 inches in length. For precise fitment, professional technicians recommend cross-referencing your VIN with OEM part numbers to account for idler pulley variations found in different production years.
Can I use an AC-delete pulley instead of a shorter belt?
Yes, installing an AC-delete idler pulley in the position of the compressor allows you to use the standard-length serpentine belt and the original routing diagram. However, many expert mechanics prefer the simplicity of a shorter belt bypass, as it removes one more potential bearing failure point from the accessory drive system.
How do I know if my serpentine belt tensioner is failing?
A reliable sign of tensioner failure is excessive belt flutter or ‘slap’ while the engine is idling. You should also check for visible alignment issues where the belt is not perfectly centered on the pulleys. If the tensioner’s internal spring is weak or the pivot arm is seized, it will fail to maintain the 50% tension required for optimal belt life.
What tools are required to change the belt on a 6.7 Cummins?
You will primarily need a 1/2-inch drive breaker bar or a dedicated serpentine belt tool. The 6.7 Cummins tensioner features a 1/2-inch square drive opening. Inserting the tool and rotating it clockwise will compress the spring, allowing you to slip the belt off the uppermost pulley—usually the alternator—safely and efficiently.
Why does my new belt squeal even though the routing is correct?
Persistent squealing post-installation is often caused by pulley misalignment or contaminated grooves. Even a tiny amount of oil or old rubber buildup can cause slippage. Ensure all pulleys are cleaned with a wire brush or brake cleaner. If the noise continues, use a straight-edge tool to check that the idler pulleys and alternator are perfectly in plane with the crankshaft.