Ford SYNC Update Download Step-by-Step USB Guide 2026

Outdated infotainment software causes system lag, Bluetooth drops, and unresponsive navigation controls in Ford vehicles. To resolve these performance glitches, you must perform an official Ford SYNC update download using your vehicle’s VIN and transfer the unzipped files onto an exFAT-formatted USB drive. Running this installation refreshes your infotainment system with critical bug fixes and improved mobile device compatibility.
Official Ford SYNC updates are distributed directly through the official Ford Owner Support portal, and retrieving them requires only your 17-character Vehicle Identification Number (VIN). Downloading the official software package to a prepared USB drive remains the most dependable method to refresh your console, bypassing spotty Wi-Fi connections and failed over-the-air (OTA) background transfers.

Prime for Young Adults — 6 Months Free
Students and 18–24s get six months of Prime free, then half price.
Start 6 Months FreeCompleting this process yourself in 2026 solves persistent touchscreen lag, recurring Apple CarPlay and Android Auto disconnects, and unpatched navigation errors. Performing a manual USB flash gives you absolute control over the update process, ensuring your hardware receives the precise build intended for your vehicle configuration without scheduling a costly trip to the dealership.
Key Takeaways
- Enter your 17-digit VIN on Ford’s official support portal to download the exact SYNC software version.
- Use a clean USB drive with at least 32GB of space formatted to exFAT or FAT32.
- Unzip all downloaded files and place the SyncMyRide folder directly into the USB root directory.
- Keep your engine running during installation to prevent battery-saver mode from interrupting the USB update.
- SYNC 3 and SYNC 4 vehicles can alternatively update over a stable home Wi-Fi network.
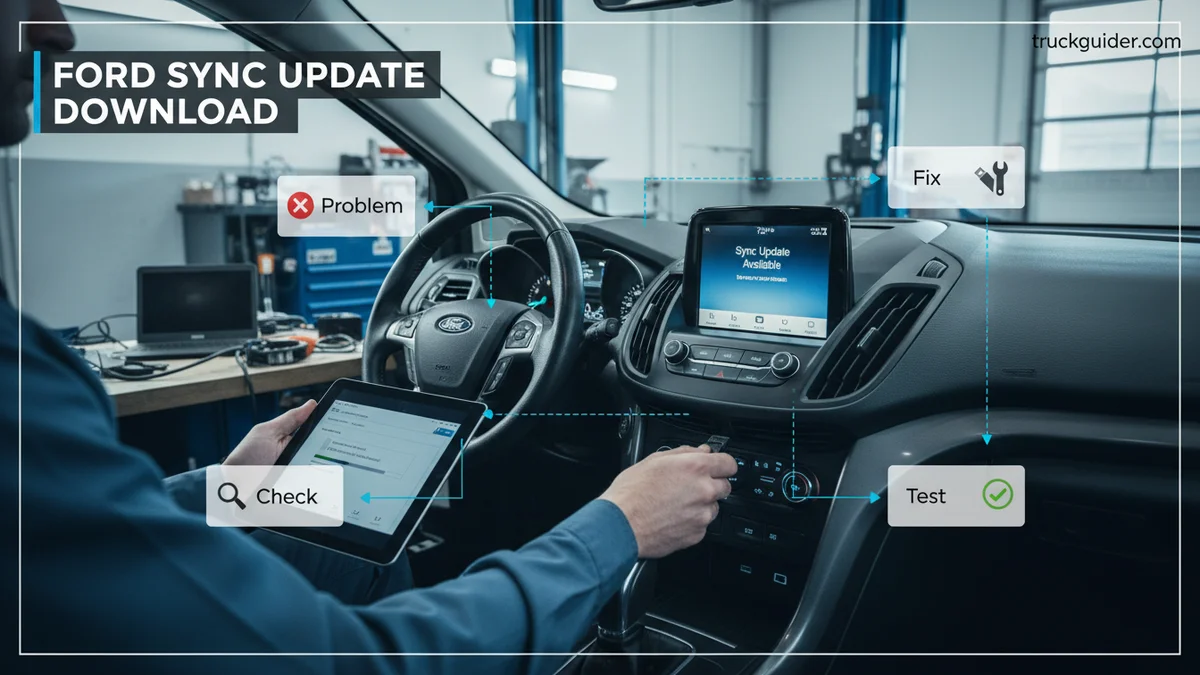
Why Infotainment Glitches Occur and What Causes SYNC Update Failures
Recommended Best Deal Products

Most SYNC performance issues stem from software fragmentation or incomplete OTA transmissions. When your vehicle attempts an automated update over home Wi-Fi or cellular networks, temporary signal drops can silently corrupt installer packets. Once a corrupted packet loads into system memory, your infotainment unit may reboot unexpectedly, drop paired devices, or freeze on startup logos.
The Anatomy of Manual Installation Errors
When USB updates fail, the root cause is rarely the vehicle hardware itself. Specific operational missteps during the download and extraction stages trigger error codes like MEM_ERR01 (insufficient working memory) or LST_ERR05 (missing installation directory):
- Direct Extraction: Extracting zipped files directly from the web browser to the USB drive often skips critical system files or creates nested folders the car cannot read.
- Improper Unmounting: Pulling the flash drive out of your computer before write caches finish flushing will damage the package index.
- Background File Contamination: Hidden operating system files (such as
.DS_Storeon macOS) can interfere with SYNC’s automated scripts. - Power Cycle Interruption: Turning off the engine or opening the vehicle door while the flash drive writes data halts the core update script mid-cycle.
How to Update Ford SYNC Like a Pro: A Practical Walkthrough
Keeping your Ford SYNC infotainment system up to date ensures you get the latest navigation improvements, app compatibilities, Bluetooth stability fixes, and user interface refinements. While over-the-air updates exist on select newer models, downloading your update directly from Ford to a USB flash drive remains the most dependable method to prevent corrupted firmware installations. Following this systematic walkthrough ensures your vehicle receives a seamless installation without risking electrical hiccups or bricked head units.
Step 1: Locate and Record Your 17-Character VIN
What you need: Your vehicle’s 17-digit Vehicle Identification Number (VIN), accessible via your vehicle registration, insurance card, or base of the driver’s side windshield.
Instructions: Locate your vehicle’s unique VIN. The easiest spot without digging through paperwork is standing outside the driver’s side door and looking at the lower-left corner of the dashboard through the windshield. Alternatively, open the driver’s door and read the safety certification label attached to the door latch post. Write down all 17 characters precisely or copy it directly from your FordPass mobile application. This identifier ensures you download the exact firmware tailored to your specific hardware generation (SYNC 1, 2/MyFord Touch, 3, or 4).
Pro Tip: Never guess characters like “O” versus “0” or “I” versus “1”—Ford VINs never use the letters I, O, or Q to prevent confusion with numbers.
Step 2: Prepare and Format a Dedicated USB Drive
What you need: A high-quality USB 2.0 or 3.0 flash drive with at least 32GB storage capacity, and a desktop or laptop computer running Windows or macOS.
Instructions: Insert your USB flash drive into your computer. Because the Ford SYNC system requires an exact file system structure, you must format the drive prior to loading the software. On a Windows PC, open File Explorer, right-click the USB drive, and select “Format.” Choose exFAT as the file system (or FAT32 if updating legacy SYNC 1 or 2 systems), set Allocation Unit Size to default, and ensure “Quick Format” is selected before clicking Start. On macOS, use Disk Utility to erase the drive using the “ExFAT” format with an “MBR” (Master Boot Record) partition map.

Audible — Listen Free for 30 Days
One free credit a month and thousands of titles included.
Listen Free for 30 DaysPro Tip: Avoid multi-partition flash drives, external spinning hard drives, or microSD cards inside USB adapters, as SYNC’s media hub frequently fails to mount these devices correctly.
Step 3: Access the Official Ford Portal and Download Firmware
What you need: An active internet connection and a standard web browser (Google Chrome, Mozilla Firefox, or Microsoft Edge).
Instructions: Navigate to the official Ford Support website (specifically the “SYNC & Navigation Updates” landing page) in your region. Enter your 17-character VIN into the verification field and click “Search for Updates.” If an update is available, the system presents options for either Wi-Fi or USB installation. Select the “USB Drive” option, agree to the software license terms, and click the download button. The browser will begin downloading a large compressed archive (ranging from 1.5GB to over 8GB depending on your system edition).
Pro Tip: Temporarily disable aggressive third-party browser download managers or pop-up blockers, which can truncate large compressed files before they finish downloading.
Step 4: Unzip and Stage Installation Files on the USB
What you need: Built-in archiving utilities (Windows File Explorer / macOS Archive Utility) or third-party extraction tools like 7-Zip.
Instructions: Locate the downloaded ZIP file in your “Downloads” directory. Right-click the file and extract its contents directly into the root directory of your freshly formatted USB drive. Once complete, inspect the USB flash drive. For SYNC 3 systems, the root of the USB drive must strictly contain: one folder titled SyncMyRide, an index file titled autoinstall.lst, and occasionally a small file named DONTINDX.MSA. Ensure the files are not buried inside a secondary parent folder created during decompression, as SYNC will fail to locate the installation sequence.
Pro Tip: Safely eject the USB drive using your operating system’s software command before unplugging it; pulling it out prematurely can corrupt the extracted archives.
Step 5: Prep the Vehicle and Power Systems
What you need: Your Ford vehicle parked in a well-ventilated outdoor area with at least a quarter tank of fuel.
Audible Premium Plus — Annual Membership
12 audiobook credits up front, plus the full Audible catalogue.
See Annual PlansInstructions: Start your vehicle’s engine and leave it idling in Park. Do not perform this update in an enclosed garage due to carbon monoxide risks. Updates can take anywhere from 25 to 60 minutes, and the SYNC system must maintain constant electrical voltage. If your vehicle has an “Automatic Engine Shutdown” feature (found under Vehicle Settings in your instrument cluster screen), disable it so the engine does not turn off midway through the installation. Unplug all other devices, such as phone charging cables, dash cams, and media drives, from all USB ports.
Pro Tip: If you do not wish to idle your car in place, plug the USB in right as you depart on an uninterrupted highway trip of 45 minutes or longer.
Step 6: Initiate the Installation in the Vehicle
What you need: The prepared USB drive inserted into your vehicle’s primary media hub port.
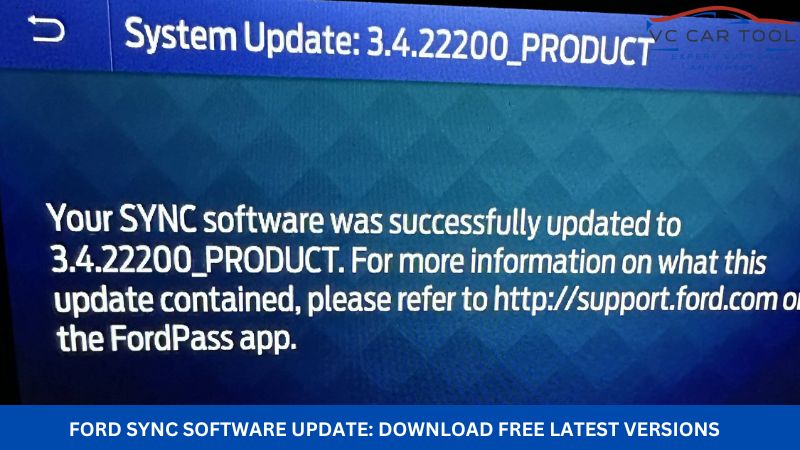
Instructions: Insert your prepared USB drive into the vehicle’s illuminated front USB port. Within 30 to 90 seconds, a banner at the top of the SYNC screen will display: “Updating System Software…” Leave the drive plugged in continuously. During this process, the screen may reboot, go completely dark for several minutes, or display intermittent progress bars. Do not press any dashboard buttons, do not switch audio sources, and under no circumstances turn off the vehicle’s ignition until you see a persistent pop-up window reading: “Installation Complete. You may now remove your USB device.”
Pro Tip: Do not pull the drive out if the system quickly reboots once; SYNC updates often run in multiple phases and require an internal restart before completing.
Step 7: Confirm Installation and Report Back to Ford
What you need: Your vehicle’s touchscreen and your computer with internet access.
Instructions: Safely remove the USB drive from the vehicle’s port. On your touchscreen, navigate to Settings > General > About SYNC to confirm your new software build number matches the version downloaded. Take your USB drive back to your computer. During the final phase of the update, SYNC generates an XML log file (e.g., Sync_XXXXX_VIN.xml) inside the SyncMyRide folder. Return to the Ford update website where you downloaded the firmware, click “Confirm Update,” and upload this generated XML file so Ford registers your vehicle as updated in their global database.
Pro Tip: If your vehicle is regularly connected to your home Wi-Fi network, connecting to Wi-Fi will automatically report the new build back to Ford within 24 to 48 hours without needing manual file uploads.
✅ Final Checklist
- USB flash drive was cleanly formatted as exFAT (or FAT32) prior to loading files.
- The
SyncMyRidefolder andautoinstall.lstfile were placed in the root directory, not within a nested folder. - The engine remained running continuously without interruption throughout the entire installation.
- The SYNC display presented the final “Installation Complete” confirmation dialog prior to USB removal.
- The new software build is verified in the “About SYNC” menu and logged on the Ford Support website.
Important Notes:
- Safety Warning: Never run your vehicle inside a closed space or garage while running system updates; carbon monoxide poisoning can occur rapidly. Ensure the vehicle is parked outside or driven normally.
- When to Seek Professional Help: If your system freezes on a completely black screen for over 30 minutes, throws an “Installation Failed: MEM_ERR01” code repeatedly, or fails to recognize the formatted USB drive entirely, reach out to your authorized Ford dealership service department to flash the module via diagnostic tools (IDS/FDRS).
- Estimated Time and Cost: The complete procedure takes approximately 15–20 minutes to download and prepare the USB drive, plus 30–60 minutes in the vehicle for installation. The software update is 100% free when downloaded directly through official Ford portals.
How to Download and Format Ford SYNC Updates: Step-by-Step Guide
A flawless SYNC installation relies entirely on clean source files and a correctly structured USB flash drive. Follow these precise instructions to source your files directly from Ford and prepare your physical media.
Step 1: Format the USB Drive Properly
You need a high-quality USB 2.0 or 3.0 flash drive with a minimum capacity of 32GB. Avoid external hard drives or multi-partition media, as the vehicle’s USB hub cannot parse multiple logic volumes.
- Select File System: Format the drive as exFAT with default allocation sizes. While older SYNC builds occasionally accepted FAT32, current 2026 firmware packages frequently exceed FAT32’s 4GB single-file limit.
- Windows Formatting: Insert the drive, open File Explorer, right-click the drive, select Format, choose exFAT from the dropdown, uncheck Quick Format to clear bad sectors, and click Start.
- macOS Formatting: Open Disk Utility, select your physical flash drive, click Erase, select ExFAT under Format, choose Master Boot Record (MBR) under Scheme, and click Erase.
Step 2: Retrieve the Official Package via the Ford Portal
Never rely on third-party forums or file-sharing mirrors for automotive firmware. Unsigned packages can brick your APIM (Accessory Protocol Interface Module).
- Navigate directly to the official Ford Owner Support – SYNC Updates web page (
ford.com/support/sync-maps-updates). - Input your 17-digit VIN, which is stamped at the base of your driver-side windshield and printed on your vehicle registration.
- The portal cross-references your current build version against Ford’s database. If an update is available, select the Prepare USB option.
- Click the download button and save the large
.zipfile onto your computer’s local drive (e.g., your Desktop or Downloads folder)—not directly to the USB drive.
Step 3: Extract and Structure the Installation Files
Your vehicle’s internal installer script scans the root directory of the USB drive instantly upon insertion. If the folder hierarchy is incorrect, the vehicle simply reports “No Media Files Found.”
- Locate the downloaded
.zipfile on your computer. - Right-click the file and extract it locally using your system’s default extractor or an application like 7-Zip.
- Open the extracted folder. You will see a specific structure: an
autoinstall.lstfile, aDONTINDX.MSAfile, and a subfolder namedSyncMyRidecontaining several archive packages. - Copy those three items directly to the empty, freshly formatted USB drive.
Confirm that opening your USB drive displays the SyncMyRide folder, autoinstall.lst, and DONTINDX.MSA sitting squarely on the top level. Ensure they are not trapped inside a secondary container folder, as this will prevent your car’s operating system from triggering the update sequence.
How to Install the Downloaded SYNC Update via USB in Your Vehicle
Completing the USB update inside your vehicle requires continuous power and an uninterrupted data transfer. Modern Ford systems reject partial installations, so preparing your vehicle environment is essential before plugging in the drive.
Preparing the Vehicle Environment
Because the update can take between 25 and 40 minutes, vehicle battery conservation features can disrupt the installation process. Ford vehicles equipped with Automatic Engine Idle Shutdown will shut off after 15 to 30 minutes of idling, which can corrupt the APIM firmware during a flash sequence. Disable this feature through your vehicle’s instrument cluster display before beginning the installation.
Step-by-Step Vehicle USB Installation
- Start the engine in a well-ventilated outdoor area and keep the transmission safely in Park.
- Disconnect all personal devices, charging cords, and secondary media drives from every onboard USB port.
- Insert your prepared USB drive directly into the primary front media USB hub.
- Confirm that the message “Updating System Software” appears across the top banner of your touchscreen display.
- Leave the flash drive plugged in while the vehicle restarts its screen automatically during the multi-phase deployment.
- Wait until the display confirms “Installation Complete” before removing the drive from the port.
- Turn off the vehicle ignition, open the driver’s door for 60 seconds to reset the accessory power relay, and restart the car.
What If the Ford SYNC USB Update Still Doesn’t Work: Proven Fixes
If your system displays error codes such as LST_ERR05, fails to detect the storage media, or gets stuck in a boot loop, systematic hardware and software fallbacks will isolate the issue.
Advanced Troubleshooting and Recovery Procedures
- Execute a Hard Module Reset: Press and hold the Audio System Power button and the Seek Up button simultaneously for roughly eight seconds until the screen turns black and reboots.
- Correct the Directory Structure: Inspect your flash drive on a computer. The root directory must contain only the
SyncMyRidefolder, theautoinstall.lstconfiguration file, and theDONTINDX.MSAindex file. Nested folders will cause the installer to abort. - Switch File System Standards: While exFAT is standard for large files, older SYNC 3 modules frequently experience partition read errors. Reformat a clean 32GB USB 3.0 flash drive to standard FAT32 with a 32KB allocation unit size and re-extract the files.
- Inspect the Media Hub Hardware: Check the USB port for physical debris or damaged pins. If the port fails to illuminate or charge connected devices, the media hub wiring harness may require physical replacement.
- Consult an Authorized Ford Service Center: Persistent installation failures often point to failing non-volatile flash memory inside the Accessory Protocol Interface Module (APIM). Dealership technicians must reflash or replace the module using the Ford Diagnostic and Repair System (FDRS). For out-of-warranty vehicles in 2026, standard diagnostic and programming labor costs typically range between $140 and $280.
Conclusion
According to verified research and Ford technical documentation, manual USB installations remain the fastest, most reliable method to eliminate infotainment lag, resolve interface bugs, and update system maps. Preparing a clean, correctly partitioned flash drive ensures the vehicle’s computer reads every file without failure. Take your prepared USB drive to your vehicle today, maintain consistent engine power during the transfer, and experience the improved speed and stability of your modernized SYNC system.
❓ Frequently Asked Questions
How do I find my VIN to download the correct Ford SYNC update?
Your 17-digit VIN is located on your vehicle registration card, insurance documents, or the lower driver-side corner of your windshield. Entering this number on the Ford SYNC support portal ensures you receive the exact software build matched to your hardware generation.
Why is my Ford SYNC system not recognizing the USB flash drive?
This usually happens if the drive is formatted to NTFS instead of exFAT, or if the downloaded zip file was copied directly without extraction. Ensure the drive is formatted properly and that the ‘SyncMyRide’ folder and accompanying installation files sit at the root level of the drive.
How should files be arranged on the USB drive after downloading?
After unzipping the downloaded package on your computer, drag the contents directly to the root of the USB drive. You should see a folder named ‘SyncMyRide’ along with files like ‘autoinstall.lst’ and ‘DONTINDX.MSA’ sitting loose, not inside another master folder.
Can I drive my vehicle while the SYNC USB update is installing?
Yes, you can safely drive your vehicle while the USB update runs in the background. However, your infotainment screen, backup camera, and audio features may restart or remain temporarily unavailable until the process finishes.
What should I do if the SYNC download gets stuck or fails during installation?
If an error code appears or the process stalls for over an hour, turn off the engine, disconnect the USB drive, and perform a master reset via the vehicle settings menu. Re-format the USB drive, re-extract the downloaded files, and attempt the installation again.
Is a separate download required for Ford SYNC navigation map updates?
Yes, navigation map updates are managed separately from base SYNC software updates and often require purchasing an updated map license or file package. You can verify available map packages through the dedicated Ford Navigation Center website using your VIN and SYNC ESN.