2003 Toyota Tundra Hood Latch Diagram: Repair Setup (2026)

The 2003 Toyota Tundra hood latch mounts directly to the center radiator core support with three M6 bolts torqued to 9 ft-lbs (12 Nm). The release cable routes from the cabin release lever through the driver-side fender apron grommet, terminating at the primary release arm behind the front grille.
📌 Key Takeaways
- Radiator core support latch bracket mounts using three M6x1.0 bolts torqued to 9 ft-lbs (12 Nm).
- Release cable integrates a retention barrel fitting into the lower primary release lever pivot.
- Secondary safety catch spring tension must fully snap closed across the striker to ensure hood retention.
- Stretched release cables and road-debris buildup in the lower pivot structure represent the leading failures.
- Cable and latch swap is completely DIY-friendly; frame distortion requires professional body shop realignment.
The hood retention assembly on the first-generation 2003 Toyota Tundra relies on a dual-stage mechanical linkage engineered to prevent accidental hood egress while withstanding severe vehicle dynamic loads and aerodynamic uplift. Anchored directly to the stamped-steel vertical center brace of the radiator core support, the latch functions in tandem with an underside hood striker and an insulated Bowden cable routed from the vehicle cabin. Over thousands of heat cycles, heavy vibrations, and exposure to road debris and de-icing chemicals, mechanical wear, corrosion, and cable stretch can compromise operation. Understanding the layout, tolerances, and kinetic geometry of this mechanical assembly ensures reliable hood closure, prevents dangerous highway hood flutter, and allows for rapid troubleshooting when the release cable breaks or the primary locking jaw fails to seat properly.
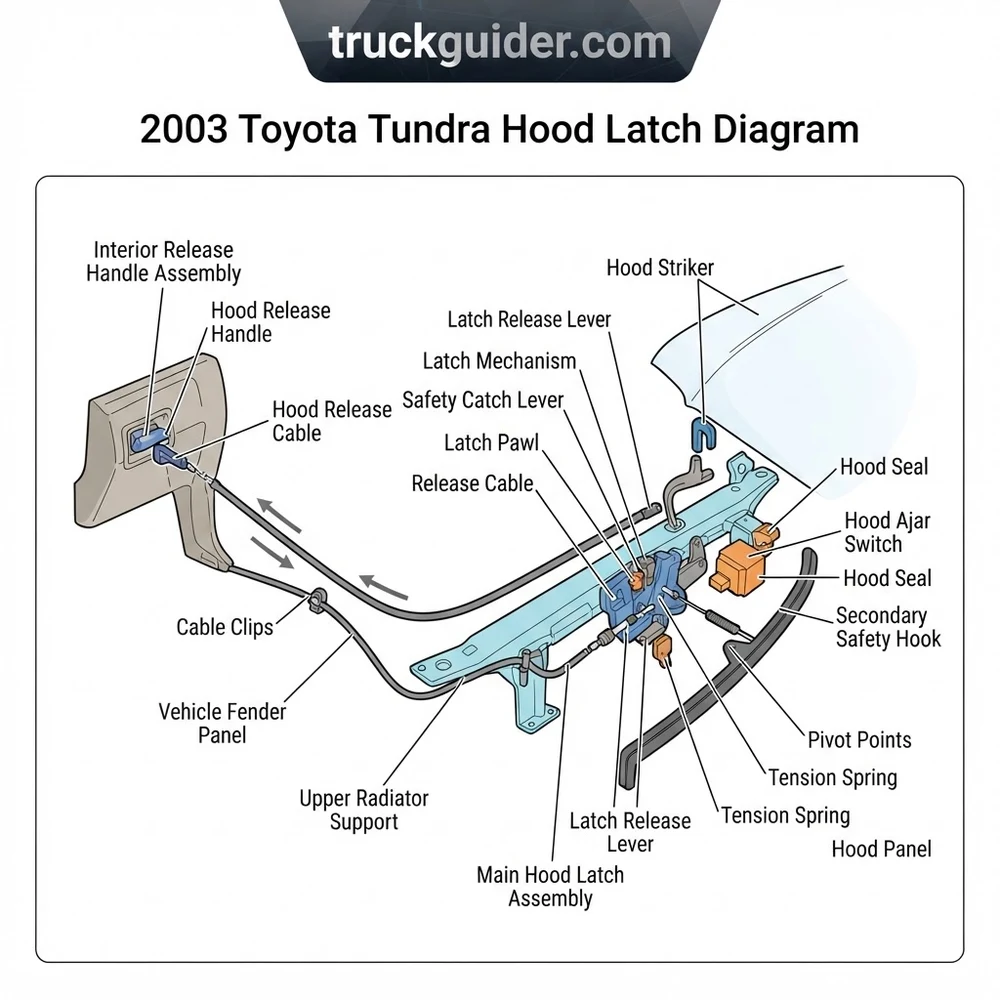
2003 Toyota Tundra Hood Latch Diagram: Component Structure and Operation

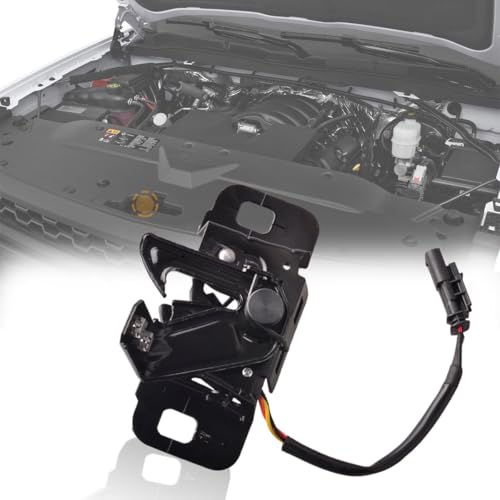

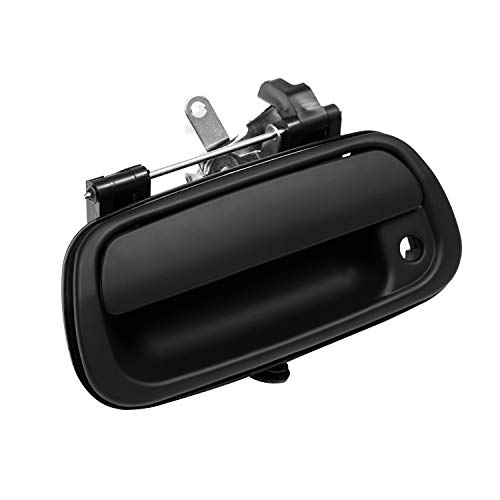

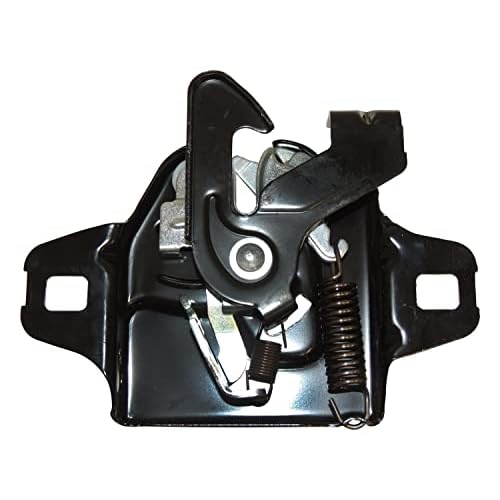
Deconstructing the 2003 Toyota Tundra hood latch diagram requires examining both the stationary mounting structure on the radiator core support and the kinetic elements operating inside the zinc-dichromate-plated steel housing. The latch mechanism uses a two-stage release configuration compliant with Federal Motor Vehicle Safety Standards (FMVSS 113). Stage one decouples the primary lock via interior cabin actuation, allowing the hood to elevate approximately one to two inches on its rubber cushion pre-load. Stage two requires manual displacement of the secondary catch through the grille aperture to free the striker completely.


| Component Name | OEM / Reference ID | Function & Kinematic Role | Mechanical Interaction |
|---|---|---|---|
| Primary Latch Mechanism | 53510-0C010 / 53510-0C020 | Captures and retains the hood striker during full closure using a spring-biased pivoting locking pawl. | Interlocks directly with the striker loop; released by the interior Bowden cable lever. |
| Secondary Safety Catch | Integrated Pawl Arm | Prevents hood fly-up if the primary mechanism releases inadvertently during transit. | Manual auxiliary arm accessible through the grille slats; spring-loaded to auto-reset. |
| Hood Striker | 53550-0C010 | Heavy-gauge U-shaped steel bar fastened to the reinforced underside of the hood skin. | Drives into the latch throat, displacing the rotating jaw until the pawl clicks into locked position. |
| Latch Return Springs | Internal Torsion/Coil | Provides angular tension to pivot pins, forcing the pawl and secondary catch into locked orientation. | Counteracts cable tension; resets the release mechanism when the cabin handle is released. |
| Cable Termination Bushing | Receiver Socket Notch | Secures the Bowden cable outer casing while allowing the inner core wire to articulate the release pawl. | Transfers linear tensile force from the cable core directly into angular displacement of the pawl. |
| Mounting Fasteners | 90119-08A29 (M8x1.25) | Secures the latch chassis to the radiator core support vertical center member. | Clamps the latch body through vertically slotted mounting holes to permit height adjustments. |
The primary latch mechanism operates around a tempered steel rotating jaw that captures the striker. When you close the hood, downward kinetic energy forces the striker loop into the latch throat. This impact drives the primary jaw past an over-center mechanical threshold. The primary locking pawl then snaps into a precision retention notch on the rotating jaw under spring force, preventing upward striker movement.
Concurrent with primary locking, the secondary safety catch—a substantial hooked steel arm—rests directly above a horizontal shoulder on the striker. If the release handle inside the passenger compartment is pulled, the Bowden cable retracts the primary locking pawl, rotating it away from the primary jaw. The jaw springs open, allowing the hood to rise under the upward force of compressed rubber bump stops. However, the upward motion halts after approximately 1.25 inches when the striker’s crossbar contacts the hook of the secondary safety catch. Final release mandates reaching through the front grille to pivot the secondary safety lever sideways, clearing the striker loop for complete hood travel.
The latch assembly relies on high-shear pivot pins pressed into the stamped bracket plates. Never use standard penetrating fluids (like basic thin solvent sprays) for long-term lubrication, as they wash away heavy factory grease and accelerate internal pin galling. Use a dedicated NLGI No. 2 lithium-complex grease or non-staining aerosol white lithium grease with PTFE to maintain spring snap and pivot fluidity.
Hood Release Cable Routing and Firewall Layout Schematic



The mechanical release system relies on an insulated, multi-strand steel Bowden cable extending from the driver-side lower instrument panel kick area to the front center of the engine bay. Precise layout and secure anchoring along the body structure are essential to minimize tensile loss and prevent binding.
At the interior cabin origin point, the release cable assembly (OEM Part #53630-0C010) locks into the plastic interior release handle baseplate anchored under the driver-side dashboard, just outboard of the emergency brake pedal assembly. The cable uses a cast lead cylindrical end-slug (barrel terminal) that slots into a notched receiving cradle in the pull handle. The outer jacket features a barbed snap-fit collar that secures into the stationary handle chassis, establishing the base tension point for cable core travel.


From the dash bracket, the cable drops downward behind the left driver-side cowl trim panel and routes upward toward the inner firewall bulkhead. It penetrates the main firewall sheet metal through a heavy-duty, dual-lipped EPDM rubber firewall grommet located slightly outboard and lower than the steering column pass-through. This grommet seals passenger cabin air and stops engine compartment fumes, water, and engine bay noise from migrating inward.
Emerging into the engine compartment, the release cable traces along the inner driver-side fender apron:
- Apron Routing: The cable fastens directly to the top edge of the driver-side inner fender skin using three snap-in nylon retention clips, running below the main engine electrical wiring harness.
- Front Core Support Transition: Upon reaching the front corner, the cable curves gently behind the driver-side headlamp bucket assembly. Maintaining this wide radius is essential; any sharp bend less than a 4-inch radius causes internal sheath friction and leads to handle binding.
- Upper Radiator Crossmember: The cable runs inward across the top rear flange of the radiator core support assembly. It is anchored to the radiator support stamping with two metal spring-steel harness clips.
- Latch Attachment: The cable snakes behind the front grille structure, turning downward into the latch mechanism. The outer casing snaps securely into an integrated open-slotted bracket on the latch housing, while the inner braided cable terminates with a barrel lug seated directly into the primary release pawl lever.
When removing or installing front-end components during a radiator support replacement guide procedure, never pinch or crimp the hood release Bowden cable casing against the steel crossmember. A dented outer steel spiral casing will cause the inner braided wire to bind permanently, locking the hood shut and requiring manual latch trips through the front grille.
How to Replace and Align the 2003 Toyota Tundra Hood Latch


Replacing and properly aligning the hood latch on a 2003 Tundra is a high-precision procedure. Incorrect positioning will cause latch failure, excessive cabin vibrations, poor fender-to-hood panel gaps, or highway panel vibration. Follow this complete step-by-step procedure to remove the old unit, mount the replacement, and set appropriate pre-load tension.
- Access and Grille Preparation: Open the hood and support it securely with the hood prop rod. Inspect the upper latch area. Accessing the mounting hardware is easier if you follow standard Tundra front grille removal instructions. Remove the upper plastic push-pins and release the lower snap retainers holding the front grille to the core support to expose the entire center vertical radiator support brace.
- Mark Baseline Latch Positioning: Take a silver or white paint marker and trace the exact perimeter outline of the old latch bracket against the radiator center support plate. Pay close attention to the position of the slotted bolt holes. This provides a baseline reference point for height and lateral positioning during reassembly.
- Disconnect Bowden Release Cable: Using needle-nose pliers, carefully pull back the rubber dust boot protecting the latch cable interface. Pivot the release arm upward manually to introduce slack into the inner wire. Rotate the inner cable wire through the receiver slot and slip the lead cylindrical barrel terminal free from the release pawl lever. Depress the retaining tabs on the outer cable jacket fitting and back it out of the mounting bracket notch.
- Unbolt the Latch Assembly: Using a 10mm or 12mm socket (depending on factory versus aftermarket bolt head specs; OEM fasteners are M8x1.25 threads with a 12mm hex head), remove the three mounting bolts securing the latch bracket to the core support. Support the latch by hand as you extract the final fastener to avoid dropping it into the lower A/C condenser tray.
- Install the Replacement Latch: Position the replacement latch (OEM Part #53510-0C010) onto the vertical radiator support. Hand-thread the three M8x1.25 bolts into their captive nuts on the support bracket. Reconnect the hood release cable: insert the outer casing collar into its retaining clip until it snaps securely, then pivot the release lever to set the lead barrel terminal into the inner pawl socket.
- Set Preliminary Alignment: Shift the latch housing until the bolt heads center closely over your previously traced paint-pen witness lines. Snug the three mounting bolts down gently, but leave them loose enough that tapping the latch bracket with a plastic mallet allows it to slide within the elongated vertical slotted bolt holes.
- Calibrate Pre-Load Tension and Striker Centering: Locate the two adjustable rubber hood bumpers / stops mounted on the left and right outer corners of the radiator core support sheet metal. Thread both bumpers clockwise until fully seated downward. Lower the hood slowly until the hood striker reaches the latch throat, watching closely from the front to verify the striker aligns perfectly with the center of the latch jaw. If the striker strikes the left or right edge of the throat, shift the latch laterally.
- Torque Hardware to Manufacturer Specifications: Once lateral alignment is verified, raise the hood and tighten the three latch mounting bolts securely to factory specification using a calibrated torque wrench.
- Fine-Tune Rubber Bumper Height: Unthread the rubber hood bumpers counter-clockwise one turn at a time. Lower the hood and drop it from a height of approximately 8 to 10 inches. The hood should latch securely without slamming. Adjust the rubber bumpers until the hood sits flush with the tops of both front fenders. The rubber bumpers must exert slight upward pre-load tension against the closed hood to stop flutter and ensure the primary jaw releases cleanly when you pull the interior handle.
Mounting Fastener Torque: 12 to 14 ft-lbs (16 to 19 Nm) for the three M8x1.25 latch mounting bolts.
Striker Center Tolerance: Must align within ±1.5 mm of the primary latch jaw centerline.
Hood Drop Height for Latch Engagement: 8 to 12 inches (200 to 300 mm) under unassisted gravitational drop.
Troubleshooting Common 2003 Toyota Tundra Hood Latch Failures




When the hood retention system fails on an older Tundra, issues typically stem from binding mechanical linkages, stretched cables, or incorrect striker engagement depths. Use these targeted diagnostics to identify and resolve common field failures:



-
Hood Release Handle Pulls with No Resistance (Hood Stays Closed):
A slack interior handle indicates the Bowden cable has snapped or the barrel end has decoupled from its bracket. Inspect the interior release lever under the dash with a flashlight. If the lead end-slug has popped out of the handle arm, re-seat it using needle-nose pliers. If the cable wire snapped inside the sheath, you must release the latch manually from outside. Fabricate a latch pick from a stiff 1/8-inch welding rod or reach upward through the front grille using a 14-inch long slotted screwdriver. Push the primary release pawl lever horizontally toward the driver-side fender to pop the first stage. Once opened, replace the release cable assembly entirely. -
Hood Fails to Pop Up When Interior Handle Is Pulled:
If you hear the primary latch click open when pulling the handle but the hood does not elevate, the mechanism lacks upward pre-load tension, or the latch return springs have weakened. This condition also occurs when the rubber hood bumpers / stops have settled, deteriorated, or were turned too far downward into the core support. Clean road grime and dried grease off the locking pawl and primary jaw using aerosol brake cleaner, apply fresh white lithium grease, and unthread both outer rubber bump stops 1.5 to 2 full turns to restore upward pre-load against the striker. -
Hood Will Not Latch or Bounces Off Latch When Dropped:
If dropping the hood results in a metallic clang without engagement, the primary locking pawl is stuck in the open position, or the latch is mounted too low on its slotted bolt holes. Inspect the latch throat: if the locking pawl does not rotate freely under spring tension, flush the housing pivot pins with penetrating lubricant and work the catch with a large screwdriver to free up internal corrosion. If the pawl operates smoothly, loosen the three mounting bolts on the core support and slide the entire latch body upward 2 to 3 millimeters within its slotted holes to accommodate striker depth. -
Secondary Safety Catch Fails to Spring Back:
Road salt and dirt thrown through the front grille often seize the secondary catch pivot pin. When this happens, the manual safety hook remains swung open, compromising safety if the primary latch fails. Soak the pivot joint with high-viscosity penetrating lubricant while cycling the catch arm back and forth manually until its dedicated torsion spring snaps it smartly back to center. If spring tension remains weak after cleaning, replace the latch assembly to prevent accidental hood fly-up. -
Hood Flutter and Vibration at Highway Speeds:
If the front leading edge of the hood shakes at speeds above 55 MPH, there is excessive vertical play between the latch jaw and striker loop. This issue is often misdiagnosed as aerodynamic hood skin delamination. Check that the rubber bumpers contact the hood firmly when closed. If the bumpers are adjusted correctly but vertical movement persists, the latch housing has shifted downward, or the striker bar has worn down at its contact point. Loosen the latch bolts, adjust the housing downward slightly to increase clamp-down pressure on the striker, and torque the bolts to 13 ft-lbs.
First-Gen Tundra Latch Specifications and Cross-Model Compatibility
When sourcing replacement components for the 2003 Toyota Tundra, verify cross-model parts interchangeability. While several Toyota trucks and SUVs from this era share common styling and mechanical platforms, hood latches vary in mounting brackets, release lever profiles, and cable hook angles.
| Vehicle Model & Platform | OEM Latch Part Number | Interchange Compatibility | Technical Variations & Differences |
|---|---|---|---|
| First-Generation Tundra (2000–2006) | 53510-0C010 / 53510-0C020 | Direct Fit (100% Interchangeable) | Identical 3-bolt radiator support pattern across all Regular, Access, and Double Cab models. |
| First-Generation Sequoia (2001–2007) | 53510-0C010 | Direct Fit (100% Interchangeable) | Shares the identical front core support structure and Bowden cable retention geometry. |
| First-Generation Tacoma (1995.5–2004) | 53510-04020 / 53510-04040 | Incompatible (Will Not Interchange) | Narrower mounting plate footprint; different vertical drop-offset and shorter secondary lever. |
| Second-Generation Tundra (2007–2013) | 53510-0C030 | Incompatible (Will Not Interchange) | Heavier frame configuration; larger latch throat depth; completely different mounting bolt pattern. |
Manufacturer specifications confirm that the 2003 Toyota Tundra hood latch is directly interchangeable across the entire first-generation production run from model years 2000 through 2006, encompassing both 3.4L 5VZ-FE V6 and 4.7L 2UZ-FE V8 configurations. Furthermore, the latch crosses directly to the 2001 through 2007 Toyota Sequoia SUV sibling platform without bracket modifications or cable travel adjustments.
Do not attempt to install a latch from a first-generation Tacoma or a second-generation Tundra. The first-generation Tacoma assembly features a narrower mounting bolt triangle that does not align with the Tundra’s center radiator upright. Meanwhile, second-generation Tundras (2007 and newer) feature a wider structural crossmember and an enlarged secondary catch handle designed for higher-profile grilles, making them physically incompatible with 2003 mounting supports.
2003 Toyota Tundra Hood Latch Diagram FAQs and Technical Inquiries
How do you manually open a 2003 Tundra hood if the release cable is broken?


If the interior cable breaks or disconnects, access the primary latch mechanism externally through the front grille. Fabricate a 12-to-15-inch rigid tool using a heavy coat hanger or 1/8-inch steel rod with a 90-degree hook bent at the tip. Insert the tool through the front grille slats directly beneath the center Toyota emblem. Locate the primary release arm where the Bowden cable end attaches on the passenger-side face of the latch assembly. Hook the arm and pull it firmly toward the driver-side battery tray. This disengages the primary locking pawl, popping the hood up onto the secondary safety catch so you can lift it manually.


What is the correct way to lubricate the 2003 Tundra hood latch mechanism?
Clean the entire latch mechanism first with a solvent-based degreaser or aerosol brake cleaner to wash away grit, dirt, and gummed lubricants. Once dry, spray the internal pivot pins, pawl contact notches, and torsion springs with high-pressure aerosol white lithium grease formulated with PTFE. Avoid using penetrating oils, silicone sprays, or engine oil; these lubricants lack the film strength needed for high-load impacts, wash off during wet driving conditions, and attract airborne dust that accelerates component wear.
Why does my 2003 Toyota Tundra hood shake and vibrate at highway speeds?
Hood flutter on the first-generation Tundra usually points to improper pre-load adjustment rather than structural hood fatigue. When the hood closes, it should press firmly against the two rubber corner hood bumpers on the core support. If these bumpers are screwed in too low, or if the rubber has rotted away, aerodynamic lift will cycle the hood up and down within the small clearance slack of the primary latch jaw. Correct this issue by turning both rubber bumpers counter-clockwise to raise them until the closed hood sits flush with the fenders and does not wiggle when pushed down by hand.
Are the hood release cables the same across all 2000-2006 Tundra cab styles?


Yes. The hood release Bowden cable assembly (OEM Part #53630-0C010) shares identical dimensions and wire travel across all Regular Cab, Access Cab, and Double Cab variants from 2000 to 2006. Because all cab configurations use the same front clip, firewall layout, and driver-side cowl dimensions, cable routing and overall sheath length do not vary by cab configuration or bed length. If your release handle is cracked or the inner core binds, consult our related hood safety release handle diagnosis walkthrough to confirm handle assembly integrity before routing a new cable through the firewall grommet.
Step-by-Step Guide to Understanding the 2003 Toyota Tundra Hood Latch Diagram
Identify – Inspect the primary latch assembly, release arm, and secondary catch on the radiator core support.
Locate – Find the three 10mm mounting bolts securing the latch bracket and inspect the cable entrance hole.
Reference – Check the diagram layout to verify cable retention barrel placement and safety spring orientation.
Connect/Route – Route the release cable through the fender clips, snapping the barrel end into the latch lever arm.
Verify – Torque the three mounting bolts to 9 ft-lbs and test the secondary safety catch spring rebound manually.
Troubleshoot – If the hood fails to latch flush, loosen the mounting bolts slightly and adjust vertical alignment.