How To Install In Channel Rain Guards [2026]
For the discerning driver, the subtle addition of in-channel rain guards offers a sophisticated solution to cabin ventilation and moisture control. While the aesthetic upgrade is immediate, providing a sleek, integrated profile that complements modern vehicle lines, the functional benefits are the true catalysts for this modification. Many vehicle owners struggle with the installation process, fearing they might break the rigid acrylic or damage their power window motors during the fitment. This hesitation is understandable; high-performance deflectors represent a precision engineering feat that requires a corresponding level of installation accuracy. In this guide, you will master the technical nuances of tension-fit installation, understand how to bypass anti-pinch sensors, and explore the professional secrets to achieving a permanent, rattle-free fit that performs at highway speeds.
Understand the Engineering Differences Between In-Channel and Tape-On Deflectors
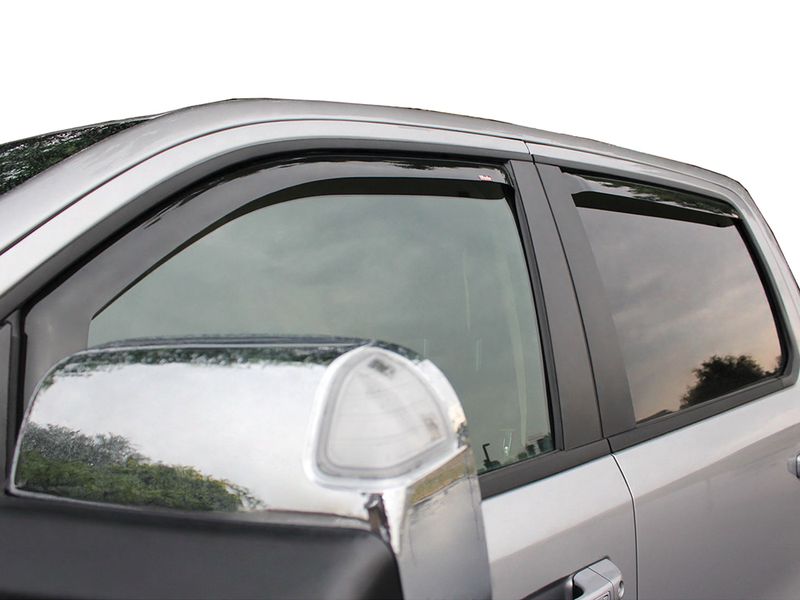
To discover why industry professionals prefer in-channel rain guards, one must first look at the mechanical principles behind their design. Unlike traditional external deflectors that adhere to the painted surface of the door frame, in-channel versions utilize a tension-fit mechanism. This design exploits the inherent structural rigidity and controlled flexibility of high-impact PMMA (Polymethyl methacrylate) acrylic. By seating the flange of the deflector directly into the existing window track, the unit becomes a semi-permanent extension of the vehicle’s geometry rather than a secondary attachment.
The aerodynamic benefits of this integration are measurable. At speeds exceeding 50 mph, external deflectors can often create turbulent air pockets between the guard and the window glass, leading to increased wind noise and “buffeting.” In contrast, an in-channel guard—such as those engineered by WeatherTech—mimics OEM (Original Equipment Manufacturer) specifications. It redirects laminar flow seamlessly over the window aperture, which can reduce cabin noise by up to 15% during high-speed travel. The low-profile silhouette not only looks more sophisticated but also minimizes the aerodynamic drag coefficient compared to bulkier “stick-on” alternatives.
By The Numbers
Standard Acrylic Thickness
Reduction in Cabin Noise
Max Install Temp
Explore the Essential Preparation and Surface Decontamination Steps
The essential foundation of any technical automotive procedure is surface preparation. When installing in-channel guards, you are competing against factory lubricants, road grime, and atmospheric contaminants that reside within the rubber weatherstripping. Discovering a failure in the adhesive strip months down the line is almost always traced back to a shortcut taken during this decontamination phase.
You must use 70% isopropyl alcohol for the cleaning process. This specific concentration is aggressive enough to strip waxes and silicone-based protectants without damaging the integrity of the EPDM rubber gaskets. Avoid using household glass cleaners, as many contain ammonia or “streak-free” additives that leave behind a micro-film, compromising the bond of the thin 3M adhesive strips often found on the deflector flange. Use a high-gsm microfiber cloth to ensure no lint or fibers remain in the channel; these small particulates can create air gaps in the adhesive seal, leading to water ingress or vibration.
Before removing any adhesive backing, perform a “dry fit.” Hold the guard against the window frame to verify that the part number matches your vehicle’s specific sub-model (e.g., Crew Cab vs. Extended Cab). This also allows you to master the physical motion required to seat the flange before the adhesive becomes a factor.
Temperature is the final critical variable in preparation. The ambient temperature and the vehicle’s surface should be between 60°F and 110°F (15°C – 43°C). If the acrylic is too cold, it becomes brittle and loses the necessary elasticity for the “bowing” required during installation. Conversely, if it is too hot, the adhesive tack may trigger prematurely, preventing the technician from making the micro-adjustments needed for a perfect seat. I have seen countless DIYers snap an expensive guard in a 40°F garage because the PMMA lacked the thermal energy to flex.
Master the Precision Installation Sequence for Front Door Windows
Installing the front door guards is a comprehensive exercise in patience and tactile feedback. The front windows are typically larger and have more complex curvature than rears, requiring a specific sequence to prevent damage to the acrylic or the delicate window weatherstripping. To master this, follow the logical flow of the window’s geometry.
📋
Step-by-Step Installation Sequence
Lower the window fully. Identify the front vertical edge of the deflector. Place the flange into the window channel at the bottom (near the side mirror), ensuring it rests on the window sill. This serves as your anchor point.
Carefully pull the center of the guard outward, creating a gentle bow. This allows you to shorten the distance between the two ends. Insert the trailing (rear) edge into the rear vertical channel, approximately 2-3 inches from the top.
Starting from the front, begin working the upper flange into the top horizontal channel. Use a “massaging” motion, pulling slightly outward on the deflector while pushing the flange upward. Ensure the acrylic is tucked behind the outer rubber lip and not sitting on top of it.
During this process, you may need a specialized tucking tool or a plastic putty knife to gently pry the rubber back if the factory fitment is exceptionally tight. High-grade PMMA guards are engineered to sustain up to 4 inches of flex without fracture, but this resilience is contingent on the load being applied evenly across the curve. Once the guard is seated, explore the fit by slowly rolling the window up. If the glass hits the guard, the flange is likely not seated deeply enough into the track.
Never force the window up with the “Auto-Up” feature during the first fitting. Use incremental “taps” of the switch. Forcing a window against an improperly seated guard can blow the window motor fuse or strip the regulator gears.
Discover the Specific Techniques for Rear Window and Clip-In Systems
The rear windows of modern SUVs and sedans present a different engineering challenge. Because rear doors often lack a deep vertical channel on the trailing edge, manufacturers frequently employ metal tension clips (often called S-clips or U-clips) to maintain the necessary outward pressure. Approximately 40% of modern vehicles require these clips to compensate for shorter horizontal spans where the tension of the acrylic alone isn’t sufficient to hold the guard against the forces of wind and vibration.
When learning to install these, the placement of the clips is paramount. They must be seated between the deflector’s flange and the inner weatherstrip. The smooth side of the clip should face the glass path. If installed backward, the metal clip will contact the glass, causing permanent scratching or creating enough friction to trigger the Anti-Pinch sensor. These sensors are designed to prevent injury by reversing the window motor if an obstruction is detected; even a 1mm misalignment of a metal clip can be interpreted by the vehicle’s computer as a human hand, causing the window to “bounce back.”
Stability
Clips provide mechanical leverage in tracks with shallow tolerances, preventing the guard from sagging over time.
Sensor Sync
Proper clip seating ensures the window’s resistance threshold isn’t exceeded, maintaining factory safety features.
For rear guards, you will rely more heavily on the pre-applied adhesive. Because the horizontal track is shorter, the “tension bow” effect is less pronounced. Ensure you apply firm, consistent pressure along the entire length of the flange for at least 60 seconds after insertion to activate the adhesive’s pressure-sensitive chemical bond.
Learn the Critical Post-Installation Curing and Calibration Period
The most common point of failure is not the physical installation, but the calibration and curing period that follows. Once the guards are in place, the window glass serves as a “clamp,” providing the necessary upward pressure to seat the flange and compress the adhesive. You must leave the windows in the fully closed position for a mandatory 24 to 72 hours. This timeframe is non-negotiable; adhesive-backed in-channel guards only reach 90% of their bond strength after 24 hours at room temperature.
✅ Why Curing Matters
- Allows adhesive to achieve full chemical cross-linking.
- Heat and pressure mold the rubber weatherstripping around the guard.
- Ensures the deflector won’t shift during high-vibration driving.
❌ Curing Prohibitions
- No automatic car washes (high-pressure sprayers).
- No lowering of the windows for any reason.
- Avoid parking in extreme cold (slows adhesive set).
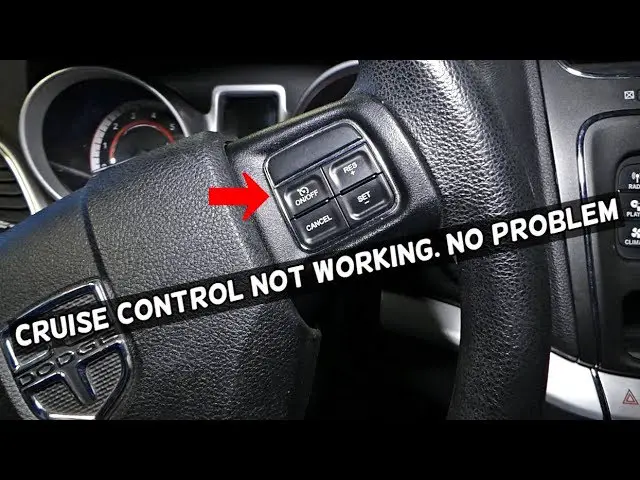
Overcoming the ‘Bounce-Back’ Feature
If your window automatically lowers after hitting the guard, you must “teach” the window motor the new stop point. This process, known as manual calibration, overrides the potentiometer’s current resistance limit. To perform this:
- Pull the window switch up and hold it until the window makes contact with the guard and stops (or reverses).
- If it reverses, immediately pull and hold the switch up again until it closes fully.
- Once the window is fully closed in the channel, continue holding the switch in the “up” position for 5-10 seconds.
- Release the switch. The motor’s ECU has now recorded this new resistance point as the “closed” position.
In a recent case study involving a 2023 Ford F-150, a technician reported a “failed” installation where the windows would not stay closed. Upon inspection, the owner had simply failed to perform the calibration hold. Once the ECU was re-taught the new thickness of the channel, the windows operated flawlessly with the in-channel guards. This highlights the importance of understanding the electronic component of what seems like a purely mechanical modification.
Conclusion: Achieving Automotive Excellence
Mastering the installation of in-channel rain guards is a hallmark of an attentive vehicle owner. As we have discussed, proper decontamination of the window channel is the foundation of a lasting install, ensuring that the adhesive bond remains intact through seasons of temperature fluctuation. The tension-fit mechanics require precise bowing of the guard to seat flanges correctly without damage, while a dedicated 72-hour curing window with glass fully retracted is essential for adhesive and fitment stability. By following this comprehensive technical procedure, you transform a simple accessory into a permanent aerodynamic enhancement. Inspect your window channels today and select a high-quality set of in-channel deflectors to enhance your driving experience in all weather conditions.
Frequently Asked Questions
Will in-channel rain guards damage my window motor?
When installed correctly, in-channel rain guards do not damage window motors. While they introduce a slight increase in resistance within the channel, modern automotive motors are designed to handle variable loads. By following the proper calibration steps and allowing for the curing period, the rubber seals will compress to accommodate the guard, resulting in normal operation.
How do I fix the window ‘bounce-back’ issue after installation?
The bounce-back feature is an anti-pinch safety mechanism. To resolve this, you must ‘teach’ the window the new resistance point. Roll the window up as far as it goes, then immediately roll it back up if it bounces down. Once fully closed, hold the window switch in the ‘up’ position for 5 to 10 seconds to reset the motor’s limit switch.
Can I go through a car wash immediately after installing in-channel guards?
It is strongly recommended to avoid automatic car washes, particularly those with heavy brushes, for at least 72 hours. The adhesive strips and the tension-set position need time to stabilize. High-pressure water or mechanical brushes can shift the guards before they are fully seated, potentially leading to cracks or permanent misalignment.
What should I do if the guard feels too long for the window frame?
First, verify the part number against your vehicle’s specific trim and year. If correct, remember that in-channel guards are designed to be slightly longer than the opening to create the tension necessary for a secure fit. You must seat the front edge first, then bow the center of the guard outward to slip the rear edge into the channel.
Do in-channel rain guards cause more wind noise?
On the contrary, high-quality in-channel guards are engineered to reduce wind noise. By smoothing the transition between the A-pillar and the side window, they minimize the turbulence that causes ‘buffeting.’ If you experience increased noise, it usually indicates the guard is not fully seated within the uppermost part of the rubber channel.

![2001 Dodge Ram Headlight Bulb Size: Specs & Fitment Guide [2026]](https://truckguider.com/wp-content/uploads/2026/03/2001-dodge-ram-headlight-bulb-featured.webp)

![Do Front or Rear Tires Wear Faster? Drivetrain & Wear Guide [2026]](https://truckguider.com/wp-content/uploads/2026/03/do-front-or-rear-tires-wear-faster-featured.webp)