6.7 Cummins Barometric Pressure Sensor Location And Maintenance Requirements
For 6.7 Cummins owners, maintaining peak torque and efficiency relies on a complex network of sensors that most drivers never see until a dashboard light appears. Locating the barometric pressure sensor on a 6.7 Cummins can be frustrating because it is often hidden or integrated into other components, leading to confusion during troubleshooting. This guide will provide the exact 6.7 Cummins barometric pressure sensor location, explain its integration with the MAF sensor, and offer professional diagnostic steps to restore your engine’s performance.
The Critical Role of the 6.7 Cummins Barometric Pressure Sensor in Engine Performance
In the world of heavy-duty diesel performance, air density is everything. The 6.7L Cummins is a marvel of engineering, but its ability to produce massive torque while meeting stringent emissions standards depends on the Engine Control Module (ECM) knowing exactly how much oxygen is available for combustion. This is where the Barometric Pressure (BARO) sensor comes into play. Unlike a boost sensor that measures pressure inside the manifold, the BARO sensor measures the ambient atmospheric pressure outside the vehicle.
The ECM uses this data to calculate air density. As you drive, the atmospheric pressure changes based on your elevation and the local weather patterns. For the 6.7L High Output engines, which utilize sophisticated variable geometry turbochargers (VGT), this data is paramount. By understanding the ambient pressure, the ECM can adjust fuel injection timing and quantity to maintain a perfect air-fuel ratio. Without this “environmental awareness,” the engine cannot compensate for the thinner air found at higher altitudes, leading to a rich condition where there is too much fuel and not enough oxygen.
Furthermore, the BARO sensor acts as a fail-safe for the turbocharger. In high-altitude conditions, the air is less dense, requiring the turbo to spin faster to achieve the same boost levels. If the BARO sensor fails to report the drop in pressure, the ECM may command the turbocharger to work beyond its mechanical limits, potentially leading to overspeeding and catastrophic failure. By integrating the BARO function with the Mass Air Flow (MAF) system, Cummins has streamlined the data processing, allowing the ECM to cross-reference multiple data points in real-time. For more technical specifics on these systems, you can consult the official guide from the manufacturer.
Imagine driving your RAM 2500 from the coastal roads of Florida to the mountain passes of Colorado. As you ascend, the BARO sensor detects the drop in pressure, and the ECM immediately de-rates the potential fuel delivery to match the decreasing oxygen. Research indicates that a malfunctioning BARO sensor can lead to a 10-15% decrease in fuel efficiency because the engine remains “stuck” in a sea-level map, wasting fuel in thin air.
Identifying the 6.7 Cummins Barometric Pressure Sensor Location and Physical Housing
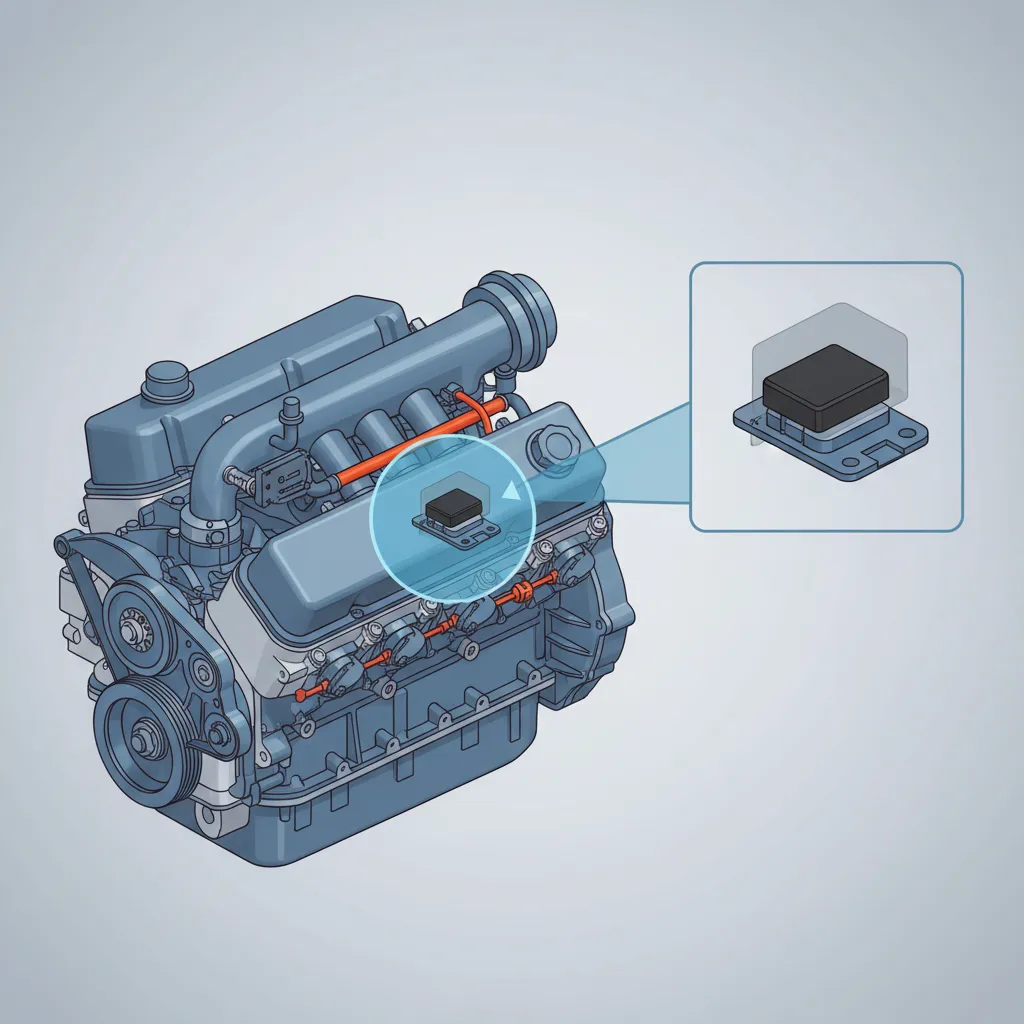
Locating the BARO sensor is the first hurdle for many DIY mechanics and even seasoned technicians. In earlier diesel platforms, the BARO sensor was often a standalone unit mounted on the firewall or near the intake manifold. However, for the 6.7L Cummins (specifically 2007.5 to the present day), engineers moved to an integrated design. In approximately 95% of these engines, the BARO sensor is physically housed inside the Mass Air Flow (MAF) sensor assembly.
To find it, pop the hood and move to the passenger side of the engine bay. Look at the large plastic ducting that carries air from the air filter housing toward the turbocharger. You will see a rectangular electronic component secured to the top or side of this duct with two small screws. This is your MAF/BARO combo unit. It is strategically placed to sample the air as it enters the system, ensuring the most accurate reading of ambient conditions before the air is compressed by the turbocharger.
📋
Locating the BARO/MAF Sensor
Locate the large black plastic tube connecting the air filter box to the turbocharger inlet on the passenger side.
Look for a 5-wire or 6-wire electrical harness plugged into a sensor mounted directly into the plastic ducting.
Most 6.7 Cummins models use T-15 or T-20 Torx screws to hold the sensor in place. Accessibility is generally excellent across all RAM configurations.
Accessibility can vary slightly by model year. On 2010-2012 models, the sensor is quite prominent near the battery. In the 2019+ redesigns, while the 6.7 Cummins barometric pressure sensor location remains in the intake stream, the surrounding engine bay covers might require removal to get a clear view of the wiring harness. This sensor is a trusted local favorite topic in enthusiast forums due to its critical nature in performance tuning.
Common Symptoms and Diagnostic Codes for BARO Sensor Failure
Knowing the location is only half the battle; identifying a failure is the other half. Because the BARO sensor is integrated with the MAF, symptoms often mimic air flow issues. Drivers frequently report sluggish acceleration, especially when merging onto highways or towing heavy loads. Another common red flag is excessive black smoke from the exhaust, indicating an over-fueling condition because the ECM thinks there is more air (higher pressure) than there actually is.
When the BARO data becomes erratic or falls outside the expected voltage range, the ECM will trigger a Diagnostic Trouble Code (DTC). For a deeper dive into these codes, check out expert tips on diagnostic platforms. The most common codes related to the BARO circuit include:
- • P0105: Barometric Pressure Circuit Malfunction
- • P0106: BARO Pressure Out of Range / Performance
- • P0107: BARO Pressure Circuit Low Input
- • P006E: Turbocharger Boost Control – BARO Correlation
By The Numbers
Frequency of BARO-related sensor failures
Max potential fuel economy loss
A sophisticated diagnostic approach involves using a scan tool to look at “Live Data.” You should compare the BARO reading (measured in inHg or kPa) to the current atmospheric pressure reported by a local weather station. If your truck is at sea level but the sensor reports 20 inHg (roughly 10,000 ft elevation), you have a definitive sensor failure. In some cases, the truck may enter “Limp Mode,” where power is severely limited to protect the engine and turbocharger components from the unknown air density conditions.
Step-by-Step Replacement and Maintenance of the Integrated MAF/BARO Unit
If your diagnosis points to a failed sensor, replacement is the most reliable course of action. However, before you buy a new part, it is worth attempting to clean the sensor. Because the BARO sensor is integrated with the MAF, it is exposed to the air stream. Over time, oil from aftermarket air filters or fine dust can coat the internal elements, leading to “lazy” readings. Professional technicians always check for debris before performing a full swap.
Never use brake cleaner, carburetor cleaner, or WD-40 on your MAF/BARO sensor. These chemicals leave residues or are too aggressive, which can destroy the delicate platinum hot wire and the BARO diaphragm. Use only specialized “MAF Sensor Cleaner” spray.
If cleaning does not resolve the DTCs or the erratic readings, follow these steps for replacement:
- 1 Power Down: Disconnect the negative battery terminals. This prevents voltage spikes and forces the ECM to reset its long-term fuel trims once the new sensor is installed.
- 2 Disconnect Harness: Gently slide the red locking tab (if present) on the electrical connector and squeeze the release to pull the harness away.
- 3 Remove Fasteners: Use your Torx driver to remove the two screws. Keep a firm grip on them; dropping a screw into the engine bay is a common pitfall.
- 4 Install New Sensor: Ensure the O-ring on the new sensor is properly seated. This creates an airtight seal. Any “unmetered air” entering through a bad seal will cause immediate performance issues.
- 5 Relearn Cycle: Reconnect the batteries and start the truck. Allow it to idle for 5 minutes, then take a short test drive at varying speeds so the ECM can calibrate to the new sensor’s voltage output.
Local Resources and Performance Upgrades for Your Cummins Community
Maintaining your truck involves more than just DIY repairs; it’s about serving the longevity of your vehicle through the support of the local diesel community. Finding nearby specialists who understand the nuances of the 6.7 Cummins barometric pressure sensor location can save you hours of diagnostic headache. These shops often have high-end diagnostic equipment that can perform “relearn” procedures more quickly than the standard drive cycle.
When it comes to parts, the “available” options at a typical auto parts store may not always be the best. For critical engine sensors, I always recommend sticking with Mopar/Cummins OEM units or high-quality brands like Bosch. While a convenient generic sensor might be cheaper, their voltage tolerances are often wider, which can lead to “ghost” codes that are difficult to track down. High-quality sensors are easily accessible through Ram specs compliant retailers.
For those in the performance community, installing a Cold Air Intake (CAI) from brands like S&B or Banks is a popular modification. It is vital to follow the manufacturer’s instructions regarding the MAF/BARO sensor relocation. Some kits move the sensor’s position relative to the air filter to optimize flow. Expert data shows that even a small change in positioning can alter the voltage output by up to 0.2V. If your aftermarket kit does not include a proper mounting bung, you risk inaccurate air density readings, which will negate any performance gains from the intake itself. Always ensure your setup remains convenient and accessible for future maintenance.
In summary, the BARO sensor is a small but mighty component of your 6.7 Cummins. It is integrated into the MAF sensor located on the air intake duct. Faulty sensors cause significant drops in fuel economy and can trigger “Limp Mode.” Proper cleaning or replacement of the MAF/BARO unit is essential for maintaining correct air-fuel ratios. If you are experiencing power loss or erratic idling, check your sensor location today or visit a nearby diesel specialist for a professional diagnostic scan.
Frequently Asked Questions
How do I know if my BARO sensor is bad?
Signs of a failing BARO sensor include a noticeable drop in fuel economy, sluggish turbo response, and inconsistent idling. You may also see a Check Engine Light with codes like P0101 or P006E. A definitive test involves using a scan tool to see if the barometric pressure reading matches the actual local atmospheric pressure when the engine is off.
What are the symptoms of a failing BARO sensor on a 6.7 Cummins?
Common symptoms include decreased engine power, particularly under load or at different altitudes, and increased exhaust smoke. Because the ECM uses BARO data to calculate air density, a failure often results in an overly rich fuel mixture, which can lead to premature DPF clogging and reduced miles-per-gallon performance by up to 15%.
Can I replace just the BARO sensor, or do I have to replace the entire MAF sensor?
On the 6.7 Cummins, the barometric pressure sensor is physically integrated into the Mass Air Flow (MAF) sensor housing. This means the components are not serviceable separately. If the BARO portion of the circuit fails, the entire MAF sensor assembly must be replaced to ensure the ECM receives accurate atmospheric and airflow data.
Where is the MAF sensor located on my 6.7 Cummins?
The MAF sensor, which contains the BARO sensor, is located on the passenger side of the engine compartment. It is mounted directly into the plastic air intake tube between the air filter box and the turbocharger inlet. It is held in place by two small Torx-head screws and features a multi-pin electrical harness.
How do I test the BARO sensor using a multimeter or scan tool?
Using a scan tool is the preferred method; compare the ‘Baro’ PID to a known local weather station reading. To test with a multimeter, check the 5-volt reference signal and ground at the connector. Then, back-probe the signal wire; the voltage should change linearly as atmospheric pressure changes, though this is difficult to simulate without a vacuum pump.

![2018 Ram 2500 6.7 Oil Capacity: Complete Specs Guide [2026]](https://truckguider.com/wp-content/uploads/2026/03/2018-ram-2500-6-7-oil-capacity-featured.webp)