2004 Toyota Tacoma Belt Diagram: 2026 Routing Guide

The 2004 Toyota Tacoma uses three individual V-ribbed belts driven by the crankshaft pulley rather than a single serpentine belt. Routing directs the inner belt to the A/C compressor idler pulley, center belt to the alternator and fan/water pump, and outer belt to the power steering pump. Tension requires manual adjustment to 1/4-inch deflection under 22 pounds.
📌 Key Takeaways
- The 3.4L 5VZ-FE requires three distinct V-ribbed drive belts: 4PK1050 (alternator), 4PK1070 (power steering), and 4PK870 (air conditioning).
- All 2004 Tacoma engines (2.4L 2RZ, 2.7L 3RZ, and 3.4L 5VZ) utilize manual mechanical adjusters rather than a spring-loaded automatic belt tensioner assembly.
- Tighten alternator bracket pivot bolts to 38 ft-lbs (51 Nm) and the A/C idler pulley center lock nut to 29 ft-lbs (39 Nm).
- Premature squealing occurs most frequently on the A/C idler pulley bearing or due to insufficient manual tension exceeding 1/4-inch deflection.
- Belt installation is a straightforward 45-minute DIY task, but seized tensioner bracket hardware or grooved pulleys require component replacement.
The 2004 Toyota Tacoma represents the final model year of the celebrated first-generation platform (N140/N150/N160/N170/N190). Maintaining proper accessory drive operation on these trucks requires navigating an engineered triple V-ribbed multi-belt layout rather than a single modern serpentine system. Whether you are servicing the bulletproof 3.4L 5VZ-FE V6 or the durable 2.7L 3RZ-FE and 2.4L 2RZ-FE inline-four engines, understanding the precise belt routing path, pulley diagram configurations, and manual tensioning specifications is critical. Incorrect belt geometry or improper torque sequencing on manual tensioner assemblies can cause premature bearing failure, persistent belt squeal, or severe charging and cooling system deficits.
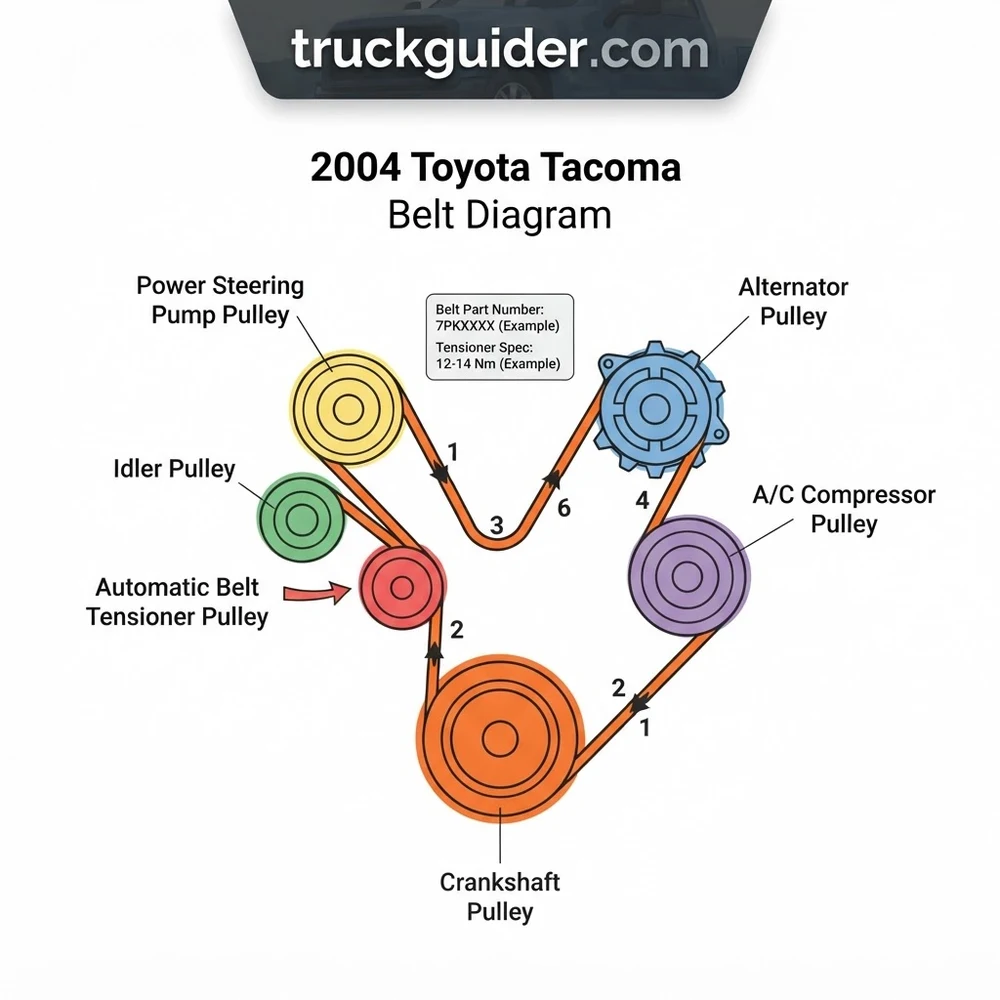
2004 Toyota Tacoma Belt Diagram and Pulley Configurations




Unlike modern vehicles equipped with automatic spring-damped belt tensioners, every 2004 Toyota Tacoma engine utilizes a triad of independent poly-V multi-ribbed drive belts. Each auxiliary system relies on manual adjustment through slotted pivot brackets or dedicated jackscrew assemblies. Correctly reading the 2004 Toyota Tacoma belt diagram requires identifying which drive pulley governs each rotational load relative to the engine centerline and harmonic balancer.



The crankshaft pulley—frequently referred to as the harmonic balancer—serves as the primary rotational drive source. It features a three-tiered outer sheave profile machined with precision micro-V micro-ribs. Each tier operates on an independent track aligned to a dedicated driven accessory pulley.
Toyota 5VZ-FE (3.4L V6) Pulley Geometry


On the 5VZ-FE V6 engine, accessory drive power distributes across three dedicated circuits:
- Circuit 1 (Inner Track / Closest to Timing Cover): Alternator and Water Pump Drive. This belt wraps around the innermost tier of the crankshaft pulley, loops under the water pump / mechanical fan clutch pulley, and engages the top-mounted alternator pulley. Tension is adjusted manually via the alternator bracket assembly.
- Circuit 2 (Middle Track): Air Conditioning Compressor Drive. The middle crank sheave routes directly downward to the lower passenger-side air conditioning compressor pulley, running upward past a dedicated ribbed idler pulley (A/C belt tensioner). A vertical manual jackscrew drives this idler pulley along an adjustment bracket to establish proper operational load.
- Circuit 3 (Outer Track / Closest to Radiator): Power Steering Pump Drive. The forwardmost crank pulley track routes directly to the driver-side power steering pump pulley. This pump features a fixed pivot bolt and an arc-slotted lock bolt, adjusted via a horizontal threaded tensioner rod underneath the fluid reservoir.
Toyota 2RZ-FE (2.4L) and 3RZ-FE (2.7L) Inline-Four Pulley Layout
The four-cylinder RZ engine family shares identical pulley architecture between the 2WD 2.4L (2RZ-FE) and 4WD/PreRunner 2.7L (3RZ-FE). While layout dimensions mirror the V6, mounting locations invert slightly:
- Alternator Circuit: Driven directly from the inner crankshaft sheave to the lower driver-side alternator pulley, wrapping around the engine water pump and fan hub.
- Air Conditioning Circuit: Routes from the center harmonic balancer sheave to the passenger-side A/C compressor, managed by a top-accessible idler pulley bracket.
- Power Steering Circuit: Occupies the outer crank track, extending across to the upper driver-side power steering pump.
Because the mechanical viscous cooling fan draws drive torque from the inner or intermediate drive loops, an incorrectly tensioned belt directly compromises engine cooling capacity and radiator airflow alongside auxiliary charging performance.
When servicing drive systems, inspect the bonded rubber ring between the inner hub and outer ring of the crankshaft pulley. Rubber degradation or outer ring slippage will alter belt alignment angles and invalidate timing mark readings during a 1995-2004 5VZ-FE timing belt and water pump overhaul.
2004 Tacoma Belt Part Numbers and OEM Belt Sizes


Selecting the correct OEM belt or aftermarket replacement depends strictly on engine displacement, air conditioning inclusion, and production month. Toyota equipped the 2004 Tacoma from the factory with Bando and Mitsuboshi manufactured V-ribbed belts. Replacement belts use the international “PK” metric sizing designation, where the first numeral designates rib count, followed by “PK”, and the remaining digits specify the effective circumferential length in millimeters.


Installing an incorrect belt size—even by 10 millimeters—frequently leads to bottoming out the adjustment track before reaching factory tension specs, or impossible installation over pulley lips without prying (which fractures structural internal aramid tensile cords).
| Engine Displacement | Accessory Circuit | Toyota OEM Part Number | Aftermarket Metric Size | Effective Length (mm / in) |
|---|---|---|---|---|
| 3.4L V6 (5VZ-FE) | Alternator & Fan / Water Pump | 90916-02385 / 99364-81070 | 4PK1050 / 4PK1055 | 1050 mm (41.3 in) |
| 3.4L V6 (5VZ-FE) | Air Conditioning Compressor | 99364-20870 / 90916-02463 | 4PK870 | 870 mm (34.3 in) |
| 3.4L V6 (5VZ-FE) | Power Steering Pump | 90080-91126 / 99364-21070 | 4PK1070 | 1070 mm (42.1 in) |
| 2.7L / 2.4L (3RZ/2RZ) | Alternator & Water Pump | 90916-02437 | 4PK865 | 865 mm (34.1 in) |
| 2.7L / 2.4L (3RZ/2RZ) | Air Conditioning Compressor | 90916-02438 | 4PK895 | 895 mm (35.2 in) |
| 2.7L / 2.4L (3RZ/2RZ) | Power Steering Pump | 90916-02439 | 4PK1060 | 1060 mm (41.7 in) |
When selecting aftermarket belts (such as Gates, Continental Elite, or Dayco), always confirm that the cross-sectional rib profile matches the Japanese Industrial Standard (JIS) pulley grooves. Standard SAE multi-rib belts can ride slightly higher in metric Toyota pulley grooves, causing accelerated wear, premature dusting, and squeal during high electrical or mechanical load transitions.
Step-by-Step Belt Routing Path for 2004 Toyota Tacoma


Because the accessory belts are nested sequentially over the crankshaft pulley, replacement of all three belts requires a strict removal order (outside to inside) and an inverted installation sequence (inside to outside). Performing this procedure on a cold engine prevents thermal expansion from distorting initial deflection adjustments.


Disconnect the negative battery terminal before placing tools near the alternator. The main B-terminal stud carries un-fused battery voltage; an accidental short from a wrench handle to the intake manifold or alternator casing can destroy fusible links or cause severe electrical arc flash.
Step 1: Outer Belt Removal (Power Steering Pump Circuit)
Locate the power steering pump on the engine. Loosen the 14mm pivot bolt located at the top rear of the pump casting through the access holes in the pulley face. Next, loosen the 12mm lock bolt on the lower adjustment bracket. Turn the 12mm adjuster jackscrew counterclockwise to relieve tension on the pump body. Pivot the pump inboard toward the engine block, disengage the 4PK1070 (or 4PK1060) belt from the power steering pump pulley and crankshaft pulley, then feed it around the fan blades to remove it.
Step 2: Middle Belt Removal (Air Conditioning Compressor Circuit)


The A/C belt operates on the intermediate track. Loosen the 14mm center lock nut securing the A/C belt idler pulley. Do not remove the nut completely; backing it off 1 to 1.5 turns relieves clamping force on the idler bracket slider. Rotate the long 12mm vertical adjustment bolt counterclockwise until the idler pulley travels downward to the bottom of its bracket travel. Disengage the belt from the compressor clutch and crankshaft pulley, and slip it over the fan assembly.
Step 3: Inner Belt Removal (Alternator and Water Pump Circuit)
Loosen the lower 14mm alternator pivot bolt. Loosen the 12mm locking bolt on the upper alternator curved adjustment ear. Turn the 12mm tensioning jackscrew counterclockwise until the alternator rotates fully inward toward the timing cover. Remove the belt from the alternator pulley, fan clutch hub, and harmonic balancer.
Step 4: Installing the New Alternator Belt
Route the new inner belt (4PK1050 on V6, 4PK865 on I4) over the fan blades first. Thread it around the inner groove of the crankshaft pulley, over the water pump / fan clutch pulley, and into the alternator pulley. Verify the four ribs align precisely in the matching grooves of all three sheaves.


Step 5: Installing the New A/C Compressor Belt
Feed the replacement A/C belt around the fan blades and seat it into the center groove of the crankshaft pulley. Route it across the air conditioning compressor pulley, running the flat backside or ribbed track (depending on route) smoothly over the idler pulley. Keep the belt centered within all pulley shoulders to prevent rib climbing during tensioning.
Step 6: Installing the New Power Steering Belt


Loop the outermost belt around the fan assembly. Seat it firmly into the forwardmost track of the harmonic balancer and wrap it over the power steering pump pulley. Ensure the belt maintains positive engagement without twisting along its run.
Manual Belt Tensioner and Idler Pulley Adjustment Notes


The most common failure encountered during belt service on the 2004 Tacoma is shearing the cast adjustment brackets or bending the long metric tensioning bolts. This failure occurs exclusively when a technician turns the 12mm adjusting bolt without first cracking loose the primary 14mm pulley center lock nut or component pivot bolt.
The adjusting bolt is designed strictly to shift the sliding block along its machined track while the lock nut is loose. The adjusting bolt cannot overcome the static clamping force of a torqued locking fastener; forcing it will strip the aluminum threads or snap the bolt head off flush with the idler body.
• A/C Idler Pulley Center Lock Nut: 39 Nm (29 ft-lb)
• Alternator Adjustment Lock Bolt: 19 Nm (14 ft-lb)
• Alternator Lower Pivot Bolt: 54 Nm (40 ft-lb)
• Power Steering Pump Lock Bolt: 39 Nm (29 ft-lb)
• Power Steering Pump Pivot Bolt: 43 Nm (32 ft-lb)
Measuring Proper Belt Deflection Tolerances
Proper tension prevents both slip under load and bearing destruction from over-tightening. Factory service manual standards prescribe deflection measurements taken midway along the longest unsupported span between pulleys, utilizing a mechanical belt tension deflection gauge with an applied force of 98 N (10 kgf / 22 lbf):
- Alternator / Water Pump Belt:
- New Belt: 5.0 to 7.0 mm (0.20 to 0.28 in)
- Used Belt (run > 5 min): 7.0 to 9.0 mm (0.28 to 0.35 in)
- Air Conditioning Compressor Belt:
- New Belt: 5.5 to 6.5 mm (0.22 to 0.26 in)
- Used Belt: 7.5 to 8.5 mm (0.30 to 0.33 in)
- Power Steering Belt:
- New Belt: 6.0 to 8.0 mm (0.24 to 0.31 in)
- Used Belt: 8.0 to 10.0 mm (0.31 to 0.39 in)
When tensioning, tighten the jackscrew until the specified deflection is achieved, torque the locking bolt or nut to factory specification, and immediately re-check belt deflection. Tightening the lock nut draws the assembly inward, which typically decreases belt deflection by 0.5 to 1.0 mm.
Solving 2004 Toyota Tacoma Belt Diagram Noise and Misalignment
Drive belt complaints on first-generation Tacomas almost always stem from two primary root causes: under-tensioning of the alternator circuit or bearing breakdown inside the A/C idler pulley assembly.
A loud, high-pitched squeal occurring for 15 to 45 seconds immediately following cold engine startup points directly to the alternator belt slipping. During cranking, the battery depletes substantial current. Upon ignition, the voltage regulator commands maximum field current, creating massive electromagnetic resistance at the alternator rotor. If the inner belt lacks proper static tension, it slips across the relatively small alternator pulley. Tighten the 4PK1050 / 4PK865 belt until deflection strictly matches factory new/used specifications.
A continuous gravel-like grinding or metallic whirring noise that varies directly with engine RPM suggests internal failure of the A/C idler pulley sealed bearing. The factory idler uses an industry-standard 6301-2RS dual-sealed radial bearing. Road debris, water ingestion, and excessive overtightening degrade the grease pack, inducing ball galling. Rather than purchasing an entire dealer bracket assembly, press out the spent 6301 bearing from the stamped pulley shell using a shop press or bench vise, then press in a high-grade replacement bearing with synthetic polyurea grease.
If belt chirping persists despite correct tension, inspect the harmonic balancer for angular runout or check for loose mounting brackets following a 1st Gen Tacoma alternator upgrade. Pulley misalignment exceeding 1/32-inch per foot of span rapidly induces cyclic rib wear and chirping.
Frequently Asked Questions: 2004 Toyota Tacoma Belt Diagrams
Can I convert my 2004 Tacoma multi-belt setup to a single serpentine belt?
No practical direct conversion kit exists for the 5VZ-FE, 3RZ-FE, or 2RZ-FE platforms. The accessory bracket offsets, crank snout design, and inverted rotation requirements of the water pump / fan clutch assembly require the three-track independent belt drive. The multi-belt design provides system redundancy: if an A/C or power steering belt snaps, your alternator, water pump, and engine cooling remain fully functional.
Why does my new belt chirp immediately after installation?
Chirping is caused either by a dirty pulley groove contaminated with rubber glazing/oil or by belt rib misalignment. Clean all pulley valleys thoroughly with a wire brush and brake cleaner prior to installation. Verify that the belt has not jumped one tooth over the outer edge of any pulley, which severely twists the belt under load.
Do I have to remove the mechanical radiator fan to replace the drive belts?


No. You do not need to unbolt the fan clutch or radiator shroud to replace external drive belts. Each belt can be carefully snaked individually over each plastic fan blade one at a time. Work systematically from blade to blade to feed the belt between the fan tips and the radiator fan shroud.
How does A/C compressor deck engagement affect belt load?
When the climate control commands air conditioning, the electromagnetic clutch energizes, pulling the outer clutch hub against the spinning pulley. This sudden shock load—termed accessory deck engagement—requires substantial instantaneous torque. If the A/C belt is set to loose tolerances, the sudden engagement will cause momentary belt slip, emitting a brief, loud squeal and rapidly glazing the belt sidewalls.
What tools are required to adjust all three belts on a 2004 Tacoma?
A comprehensive belt job on this vehicle requires standard metric hand tools: 12mm and 14mm combination box wrenches, a 3/8-inch drive ratchet with shallow and deep 12mm and 14mm sockets, an extension bar, a mechanic’s pry bar (for gentle pump leverage if pivot points bind), and a mechanical belt deflection gauge. Never use air or electric impact wrenches on the manual tensioner jackscrews.