Dodge Ram 1500 Ignition Coil Diagram: Engine Layout And Wiring Specifications
When your Dodge Ram 1500 begins to shudder under acceleration or throws a flashing check engine light, the culprit is often buried directly beneath your engine cover. Diagnosing a misfire requires more than just guesswork; it demands a precise understanding of the ignition coil layout and the complex wiring that fuels your engine’s combustion. This comprehensive guide provides an expert-level breakdown of the Dodge Ram 1500 ignition coil diagram, covering location mapping, wiring pinouts, and professional diagnostic procedures to restore your truck’s performance with reliable results.
The Architecture of the Dodge Ram 1500 Coil-on-Plug (COP) System
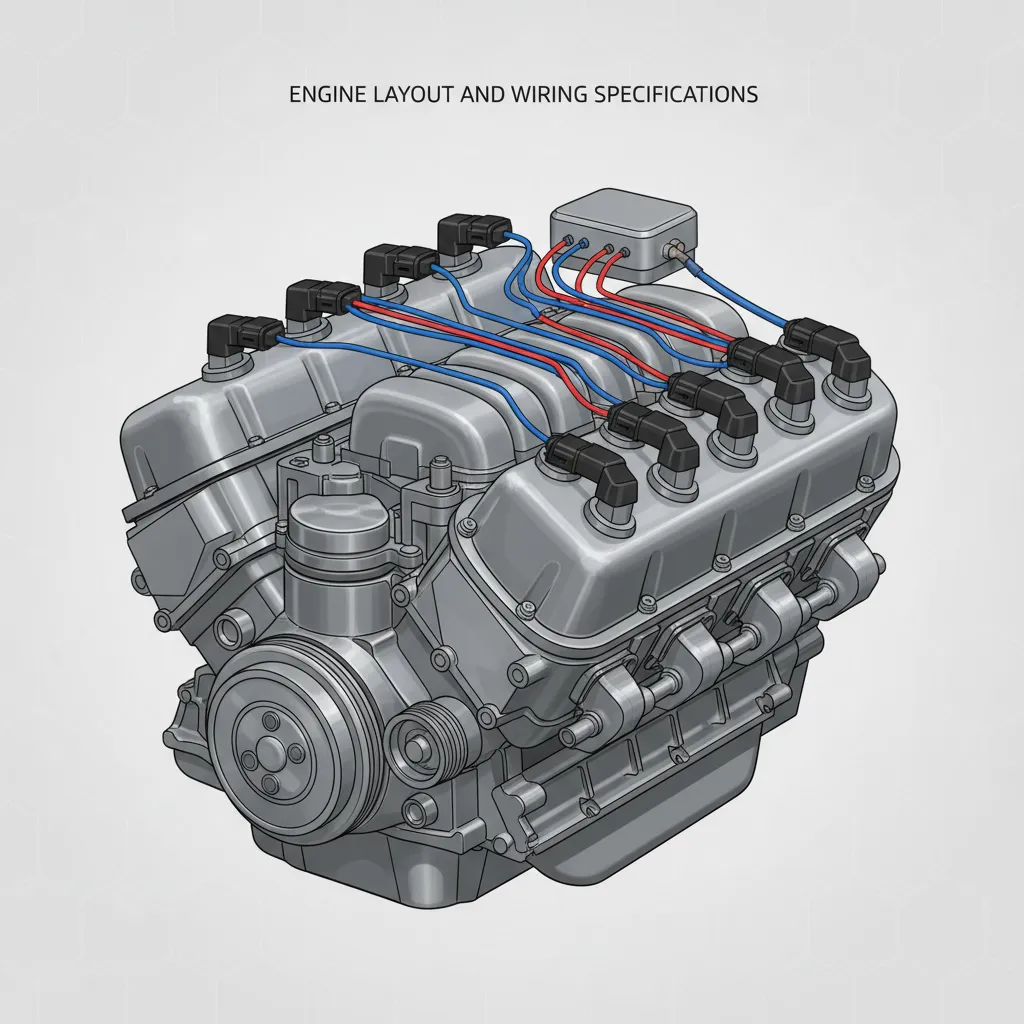
The transition from traditional distributor-based ignition to the modern Coil-on-Plug (COP) architecture represents a significant leap in automotive engineering. In a COP system, each cylinder features a dedicated transformer—the ignition coil—mounted directly above the spark plug. This layout eliminates the need for high-voltage spark plug wires, which were historically prone to degradation, resistance increase, and electromagnetic interference (EMI).
At the heart of this system is the Engine Control Unit (ECU), which acts as the master conductor. Unlike older systems that relied on mechanical timing, the ECU sends low-voltage triggers to each individual coil. This allows for hyper-precise ignition timing, adjusted in real-time based on engine load, temperature, and fuel quality. The technical breakdown of these coils reveals a sophisticated internal structure: a primary winding, a secondary winding, and a silicone-insulated boot designed to prevent voltage “flashover” to the engine block.
HEMI vs. Pentastar Configurations
While both the 3.6L Pentastar V6 and the 5.7L HEMI V8 use COP technology, their implementations differ. The 5.7L HEMI is unique because it utilizes a dual-plug setup. Each cylinder has two spark plugs, though they are fired by a single, specialized coil pack. This design enhances combustion efficiency and reduces emissions. In contrast, the V6 uses a more standard single-plug COP configuration. For those seeking exact Mopar specs, understanding these nuances is critical for proper component selection.
Replacing ignition coils in sets is a professional best practice. If one coil has reached its end-of-life at 100,000 miles, the others are likely operating on borrowed time. Replacing them together ensures consistent electrical resistance across all cylinders, which is vital for smooth idling.

Navigating the Dodge Ram 1500 Ignition Coil Diagram by Engine Type
To diagnose a misfire, you must first know which coil corresponds to the Diagnostic Trouble Code (DTC) provided by your scan tool (e.g., P0301 for Cylinder 1, P0304 for Cylinder 4). The physical layout varies significantly between the two primary engine options found in the Ram 1500.
The 5.7L HEMI V8 Layout
The 5.7L HEMI V8 utilizes eight independent coils. Looking from the front of the vehicle toward the windshield:
- Bank 1 (Driver Side): Cylinders 1, 3, 5, and 7 (Front to Back).
- Bank 2 (Passenger Side): Cylinders 2, 4, 6, and 8 (Front to Back).
- Firing Order: 1-8-4-3-6-5-7-2.
The coil harness is routed along the valve covers, often tucked under the intake manifold resonators. Access to the rear cylinders (7 and 8) can be tight, often requiring a locking extension to reach the coil retaining bolts without dropping tools into the engine bay.
The 3.6L Pentastar V6 Layout
The V6 configuration is slightly more complex for DIY enthusiasts. While the passenger side bank is easily accessible, the driver side bank is often obscured by the upper intake plenum. Identifying the correct coil requires a complete guide to the wiring harness routing, which feeds from a master connector at the rear of the engine block.

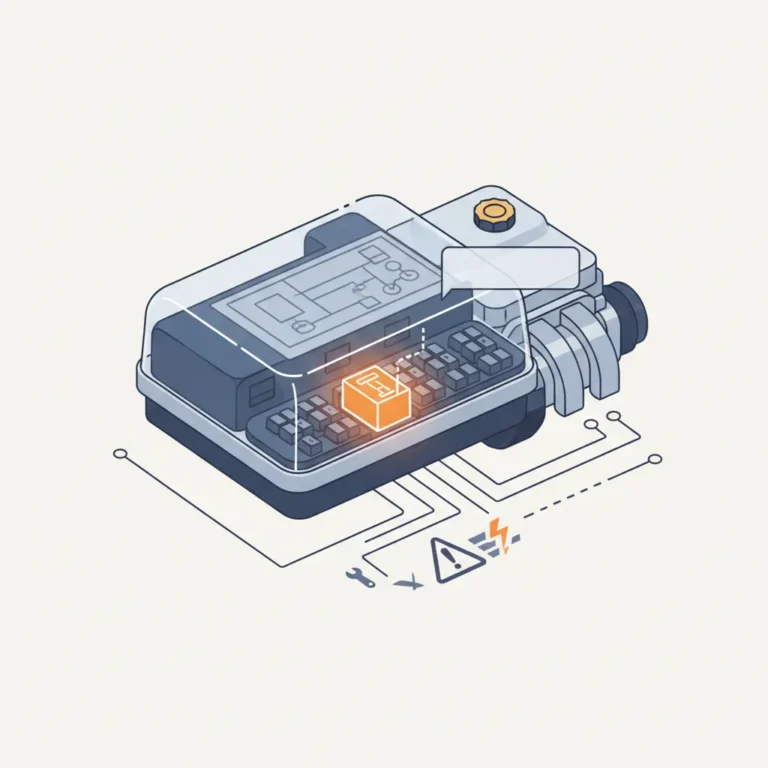
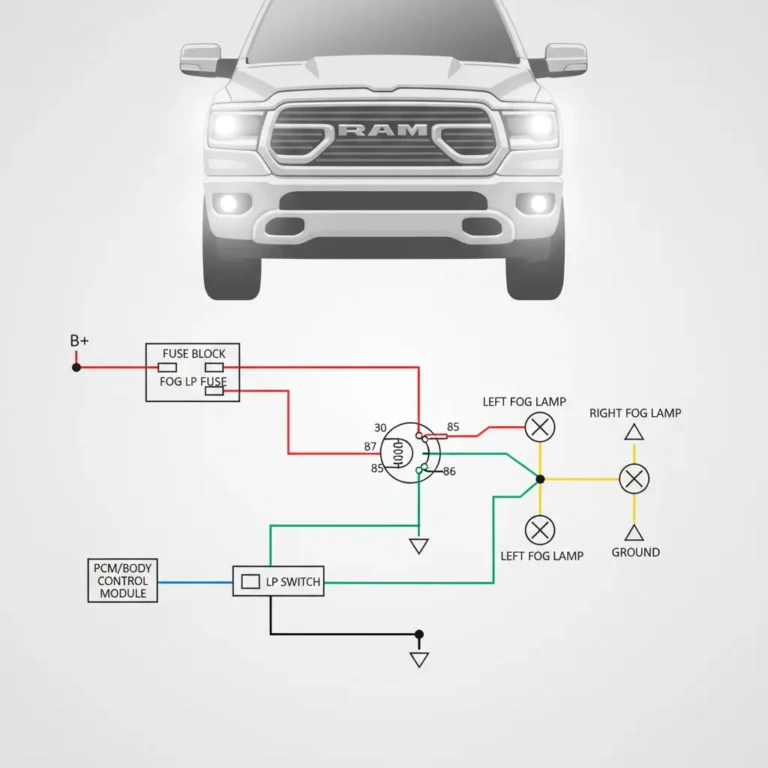
Understanding Wiring Harness Pinouts and Connector Circuits
Replacing a coil won’t fix a misfire if the issue lies within the wiring harness. Each ignition coil connector on a Ram 1500 typically features a 2-wire or 3-wire interface. This wiring is the lifeline between the battery, the ECU, and the spark plug.
The Anatomy of the Connector
A typical 3-wire Mopar coil connector includes:
- Pin 1: Constant 12V Supply – Fed via the Auto Shut Down (ASD) relay. This wire is often color-coded with a pink or brown stripe.
- Pin 2: Ground – Provides the return path for the electrical circuit.
- Pin 3: ECU Trigger Signal – This is the logic signal that tells the coil exactly when to collapse its magnetic field and fire the spark.
In high-mileage trucks, the wiring near the connector is a common failure point. Heat cycles cause the insulation to become brittle, leading to frayed wires. For example, a frayed wire at the #4 cylinder connector can cause intermittent P0304 codes that seem to disappear and reappear randomly. Professional technicians often check for discussions on Ram specs and community forums to see if specific harness batches are prone to these failures.
Never probe the harness side of an ignition coil connector with a standard test light while the engine is running. The high-frequency signals from the ECU can damage the driver circuits. Always use a high-impedance digital multimeter or an LED noid light for testing.
Interpreting Diagnostic Data and Electrical Resistance Specifications
Before you spend money on parts, you should use a trusted diagnostic approach. Research indicates that approximately 70% of misfire-related CEL (Check Engine Light) activations in Ram trucks are traced back to failing ignition coils or worn spark plugs. However, the other 30% could be fuel injectors or mechanical compression issues.
By The Numbers
Misfire CEL Causes
Average Coil Lifespan (Miles)
Primary Resistance (Ohms)
Bench Testing with a Multimeter
A quick way to verify a coil’s health is by measuring internal resistance. For most Dodge Ram 1500 coils, the primary resistance (measured across the input pins) should fall between 0.6 and 2.0 ohms. The secondary resistance (measured from the input pin to the spark plug contact inside the boot) should typically range between 6,000 and 15,000 ohms. If a coil shows “infinite” resistance (OL), the internal winding is broken, and the coil is definitively dead.
For advanced diagnostics, using an oscilloscope to view the “burn time” can identify weak coils that pass a resistance test but fail under the high-load conditions of highway towing. If you are unsure of your results, consulting expert tips can help determine if professional labor is required.
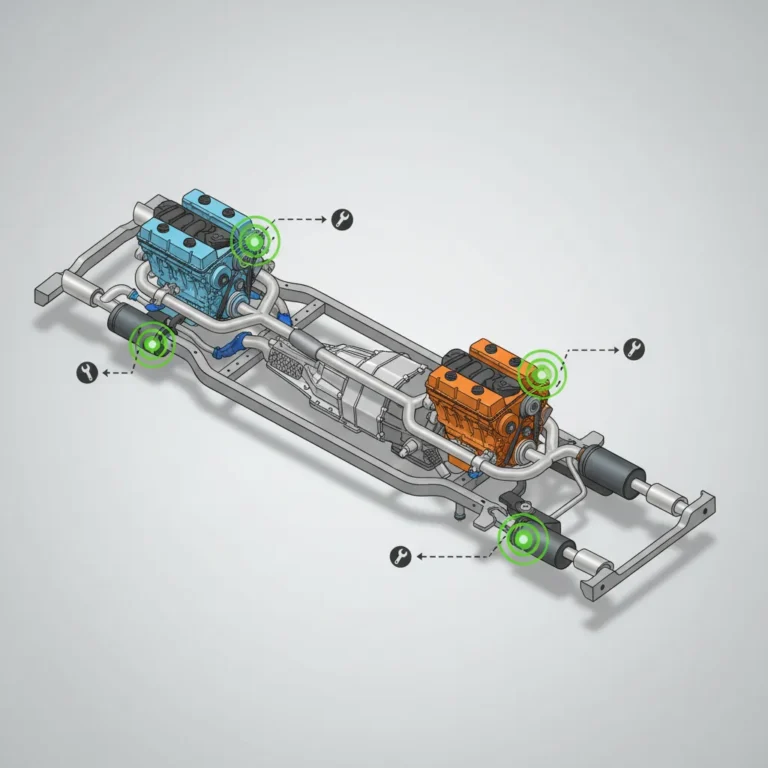
Technical Procedure for Replacing Faulty Ignition Coils
Once you have identified the faulty component using the engine diagram and electrical tests, replacement is a straightforward process. However, attention to detail is what separates a quality repair from a temporary fix.
📋
Step-by-Step Guide
Disconnect the negative battery terminal to prevent voltage spikes. Use compressed air to blow out any debris from the spark plug well before removing the old coil to prevent engine contamination.
Unbolt the 10mm retaining bolt and gently pull the coil upward. Inspect the boot for white carbon tracking or oil saturation, which could indicate a leaking valve cover gasket.
Apply a small amount of dielectric grease to the inside of the new coil boot. Seat the coil firmly onto the plug and torque the 10mm bolt to 7-9 ft-lbs. Over-tightening can strip the aluminum threads in the cylinder head.
The Role of Spark Plugs
It is a professional requirement to inspect the spark plug when a coil fails. A worn spark plug with an excessive gap requires higher voltage to jump, which puts significant thermal stress on the coil’s secondary windings. This extra “work” is what eventually burns out the coil. Always verify the gap is set to factory specifications (typically 0.044″ for the HEMI) before reinstalling.
Diagnostic Precision
Using a scan tool to pinpoint misfire counts prevents unnecessary parts swapping and saves hundreds in labor.
Optimized Longevity
Dielectric grease and proper torque specs prevent moisture intrusion and structural failure of the coil housing.
The COP system in the Dodge Ram 1500 is a high-precision component that requires accurate mapping for effective troubleshooting. By utilizing electrical diagrams to test resistance and circuit integrity, you can reliably identify failure points rather than relying on guesswork. Adhering to a maintenance schedule that monitors coil health every 80,000 to 100,000 miles is the best way to prevent costly roadside breakdowns and maintain the “Ram Tough” performance your truck was built for. If your Ram is exhibiting symptoms of a failing coil, use the diagrams and pinout specifications provided to perform a multimeter test or consult a trusted professional technician for a comprehensive diagnostic scan.
Frequently Asked Questions
Where are the ignition coils located on my Dodge Ram 1500?
The ignition coils are located directly on top of the engine’s cylinder heads, tucked underneath the plastic intake resonator or engine cover. On the 3.6L V6, they are arranged in two rows of three. On the 5.7L HEMI V8, there are eight individual coils (one per cylinder) positioned along the valve covers, each secured by a 10mm bolt and connected to the main wiring harness.
What are the common symptoms of a bad ignition coil in a Ram truck?
The most frequent signs include a noticeable engine misfire (stuttering), rough idling, a significant drop in fuel economy, and the illumination of the ‘Check Engine’ light. You may also experience ‘limp mode’ or hesitations during heavy towing. Statistically, these symptoms account for the majority of ignition-related diagnostic codes like P0300 through P0308.
How do I test a Dodge Ram ignition coil using a multimeter?
To test a coil, set your multimeter to the Ohms (Ω) setting. Measure the primary resistance by touching the probes to the outer pins of the connector; it should typically read between 0.6 and 2.0 ohms. For secondary resistance, measure from the output terminal to a ground pin. If the readings are ‘OL’ (Open Loop) or fall outside factory specs, the coil is faulty and requires replacement.
Is it necessary to replace all ignition coils at once?
While you can replace a single faulty coil to fix an immediate misfire, professional mechanics often recommend replacing the entire set if the vehicle has exceeded 100,000 miles. Because coils share the same duty cycles and environmental heat stress, the failure of one coil is usually a reliable indicator that the others are nearing the end of their functional lifespan.
Can a bad ignition coil damage my Dodge Ram 1500 engine?
Yes, prolonged driving with a faulty ignition coil can cause serious damage. Unburnt fuel from the misfiring cylinder enters the exhaust stream, where it can overheat and melt the internal honeycomb structure of your catalytic converter. Furthermore, excessive vibration from a misfire can lead to premature wear on engine mounts and internal components due to unbalanced rotational forces.

![Dodge Plastic Control Arms: Expert Review [2026]](https://truckguider.com/wp-content/uploads/2026/03/dodge-plastic-control-arms-featured.webp)
![2021 Ram 1500 Classic Warlock: Full Specs & Data [2026]](https://truckguider.com/wp-content/uploads/2026/03/2021-ram-1500-classic-warlock-featured.webp)
![2017 Ram 2500 Transmission Specifications, Maintenance, [2026]](https://truckguider.com/wp-content/uploads/2026/03/featured-9b105d51-768x768.webp)