Wiring Harness Dodge Ram 1500 Wiring Diagram Free: Diagnostic And Repair Resource
For any Dodge Ram 1500 owner, a sudden electrical failure can transform a reliable workhorse into a frustrating diagnostic puzzle. Whether it is a flickering headlight, a non-responsive fuel pump, or a mysterious “U-code” on your scanner, the root cause almost always lies within the intricate network of wires and connectors that weave through the chassis. Electrical problems account for a significant portion of vehicle repairs, and without an accurate wiring diagram, troubleshooting a complex harness can feel like an impossible task. This expert guide will provide you with the most reliable resources for finding free wiring diagrams, professional techniques for interpreting schematics, and proven diagnostic steps to restore your truck’s electrical integrity.
Understanding the Dodge Ram 1500 Electrical Architecture and Harness Integration
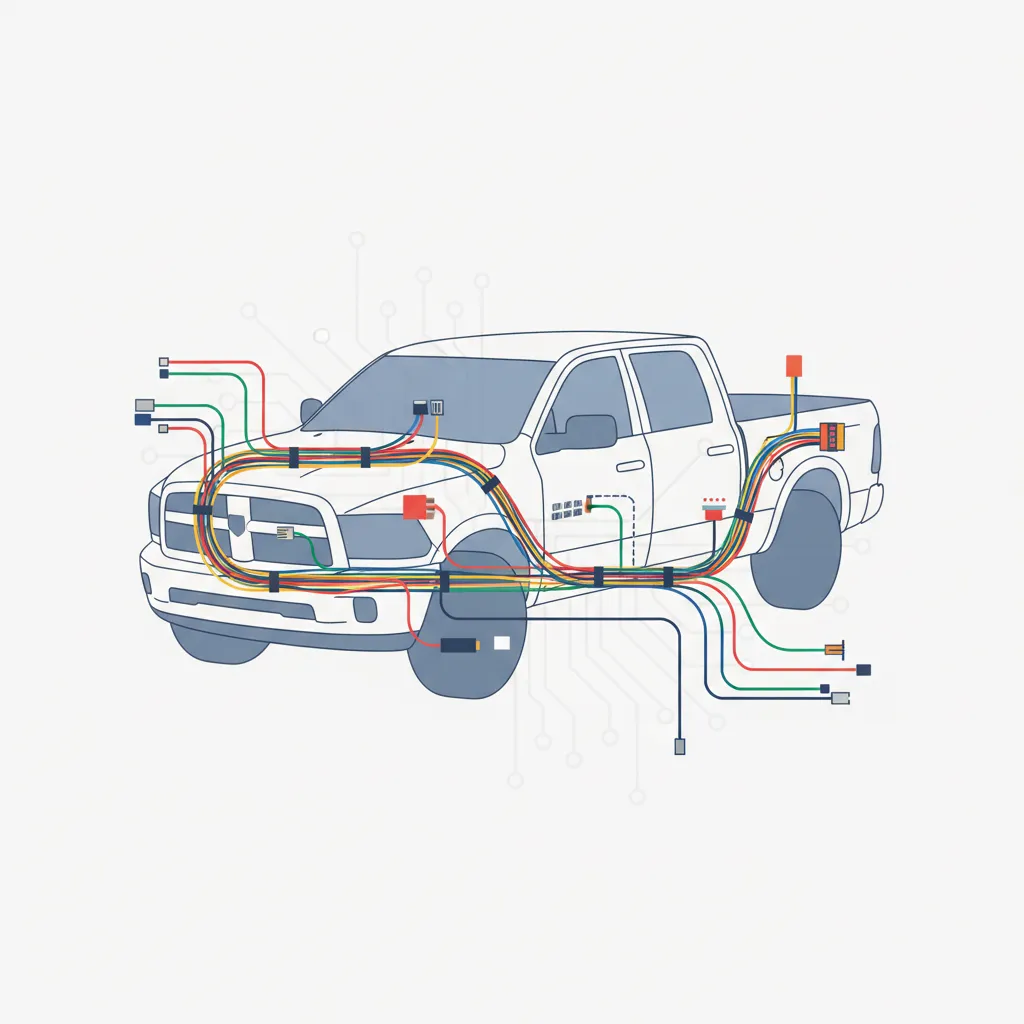
In my 15+ years of automotive diagnostics, I have seen the Ram 1500 evolve from relatively simple electrical systems into a high-tech powerhouse. The Dodge Ram 1500 utilizes a complex Controller Area Network (CAN bus) system where the wiring harness acts as the central nervous system. This network allows various modules—like the Engine Control Module (ECM) and Body Control Module (BCM)—to communicate via high-speed data packets. Research indicates that the average vehicle wiring harness contains over 1,500 individual wires and can weigh up to 100 pounds in full-size trucks.
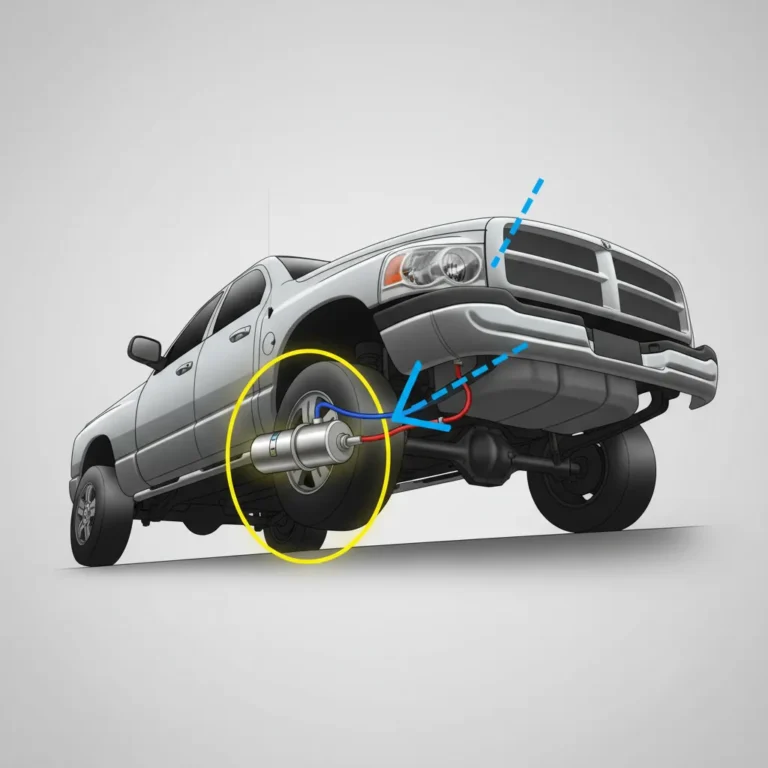
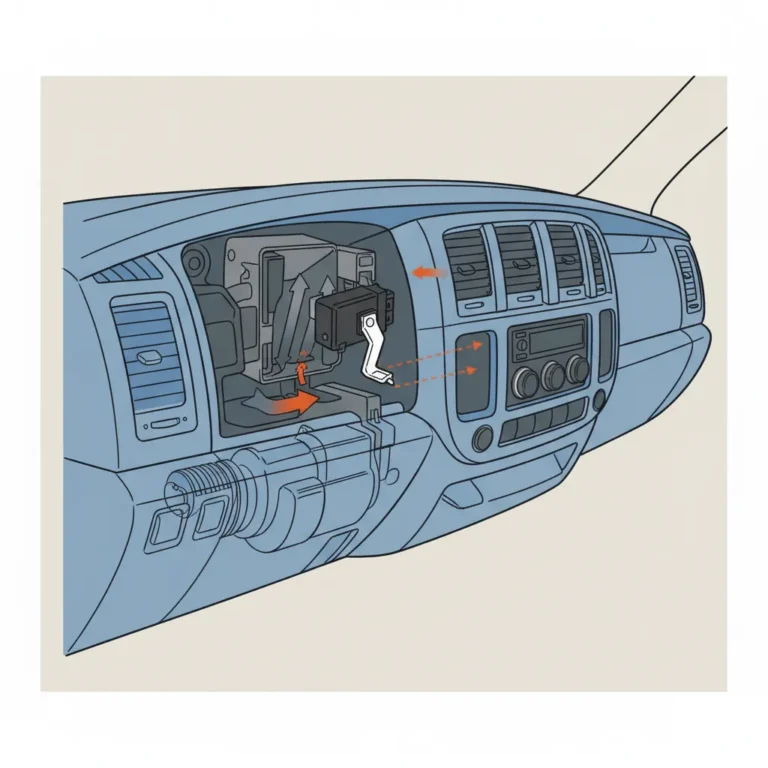
It is critical to differentiate between the primary segments of the harness. The primary engine harness handles high-heat environments and critical sensor data, while the body harness manages cabin electronics and lighting. Specialized sub-harnesses are often used for towing packages and off-road lighting. A major shift occurred between the DS (Classic) and DT (New Body Style) generations. For instance, a 2014 Ram 1500 relies heavily on a Totally Integrated Power Module (TIPM), which acts as both a fuse box and a computer. Conversely, a 2020 Ram 1500 uses a more distributed BCM-controlled architecture, requiring a different diagnostic mindset and more precise schematics.
Expert knowledge is required to navigate the high density of circuits in modern Mopar systems. Environmental factors such as extreme heat cycles under the hood and road debris under the chassis contribute to the degradation of professional-grade wire insulation over time. This degradation often leads to “ghost” symptoms that only appear under specific load conditions or temperatures. Without a comprehensive guide, identifying which of the hundreds of wires is compromised is nearly impossible.
By The Numbers
Repairs due to electrical issues
Avg lifespan (Years) of a harness
Individual wires in modern trucks

Accessing Reliable Dodge Ram 1500 Wiring Diagram Free Resources
Finding a high-quality “wiring harness Dodge Ram 1500 wiring diagram free” can be a challenge, as many online sources offer low-resolution or generic drawings. One of the best professional-level hacks is to leverage public library databases. Many local libraries offer free access to Chilton Library or AutoRepairSource, which provide manufacturer-level diagrams that are searchable by VIN. This is crucial because mismatched wiring diagrams lead to an estimated 15% of DIY electrical repair failures due to incorrect pinout identification.
Navigating dedicated enthusiast forums is another excellent strategy. Sites like RamForum.com are goldmines where trusted members often share PDF schematics for specific model years. However, you must be cautious; a diagram for a 2012 Ram 1500 with a Hemi engine will have vastly different pinouts than a Pentastar V6 variant. Always verify that the diagram matches your specific engine and trim level to avoid “bricking” a control module.
When free options are insufficient or too generic, I recommend using the official official guide resources or the Mopar TechAuthority portal. While TechAuthority is a paid service, they offer short-term, low-cost access that provides the most reliable and up-to-date professional diagrams available. This ensures you are looking at the exact revision of the harness that was installed on your truck’s production date.

Decoding Mopar Wire Color Codes and Schematic Symbols
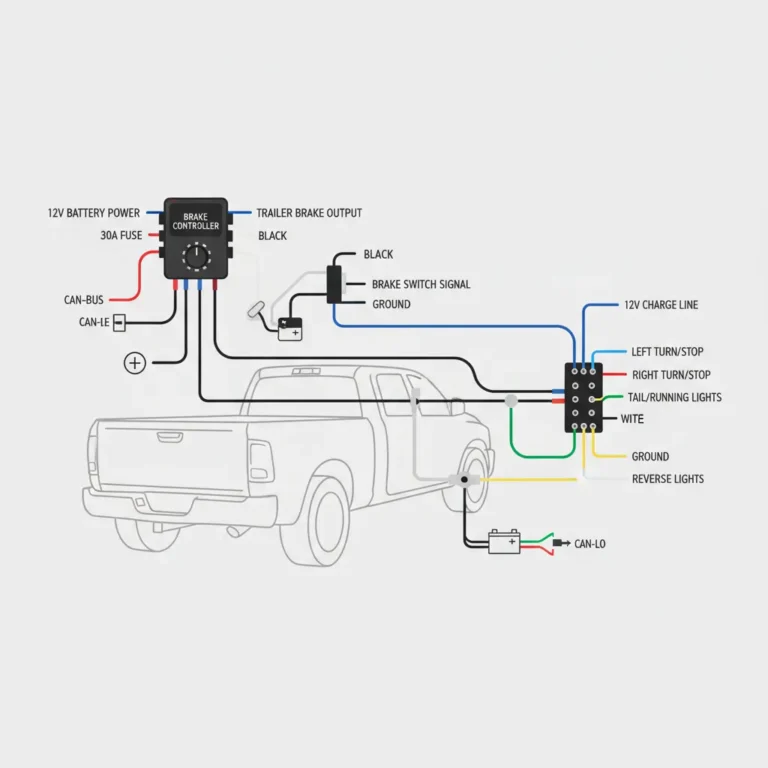
Reading a Mopar schematic is like learning a second language. Dodge uses a very specific base color and tracer color system. For example, if you see a label like TN/YL, this indicates a Tan wire with a Yellow tracer stripe. Mastering this identification is the first step in successful circuit tracing. You must also identify standard symbols for ground points (labeled as G101, G102), splices (S201), and multi-pin connectors (C1, C2). Ground integrity is a frequent failure point in Ram trucks, often causing flickering lights or strange sensor errors.
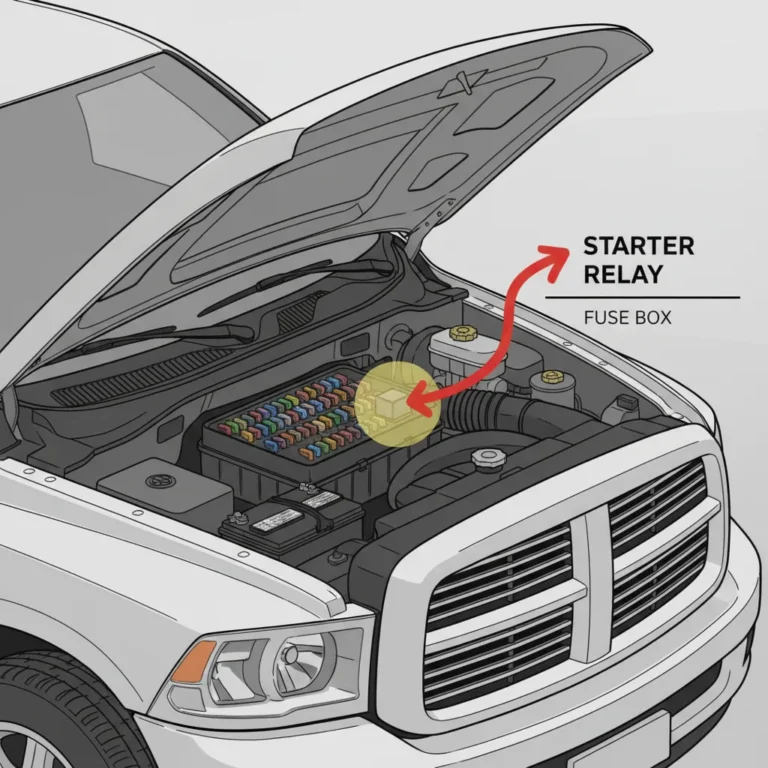
Understanding the flow through the Power Distribution Center (PDC) and TIPM is essential. In a typical fuel pump circuit, you would trace the power from the battery to a fuse in the PDC, then through a relay, and finally down the harness to the fuel pump motor connector. Along the way, you’ll notice circuit numbers and gauge sizes. Dodge typically uses 18 to 22 gauge wire for signal circuits, while high-current power feeds, such as those for the starter or alternator, may exceed 10 gauge. Using the wrong gauge for a repair can lead to overheating and potential fire hazards.
Always document any modifications or repairs made to the wiring harness for future reference. Use a permanent marker to label the specific circuit number on the harness tape or wire loom if you make a splice.
Step-by-Step Diagnostic Procedures for Common Ram 1500 Electrical Issues
When faced with an electrical malfunction, professional technicians follow a systematic approach. The first tool in your arsenal should be a Digital Multimeter (DMM). One of the most effective tests is the voltage drop test. This allows you to check for high resistance in a circuit while it is under load—a problem that a simple continuity test might miss. For comprehensive troubleshooting data, consult the expert tips found on RepairPal or similar diagnostic databases.
I often use the “divide and conquer” method to isolate a short or open circuit. By finding a connector halfway through the circuit, you can determine if the problem is between the fuse box and the connector, or the connector and the load. Intermittent communication codes (U-codes) are often caused by harness chaffing near the wheel wells or where the harness passes through the firewall. If your Ram has flickering gauges or random “no-start” conditions, inspect these high-vibration areas first.
📋
Troubleshooting a ‘No Start’ Condition
Ensure the battery has at least 12.6V and that the terminals are free of corrosion and tight.
Use your wiring diagram to locate the starter relay signal wire. Check for 12V when the key is turned to ‘Start’.
Trace the circuit through the transmission range sensor to ensure the BCM is receiving the ‘Park/Neutral’ signal.
Safety Standards and Professional Tools for Harness Repair
Safety is paramount when working with a vehicle’s electrical system. Before you begin probing any circuits, especially those on the CAN bus, you must disconnect the negative battery terminal. This prevents accidental short circuits that could blow expensive fuses or destroy sensitive electronic modules. Modern trucks are essentially computers on wheels; a single stray spark can result in thousands of dollars in damages.
For repairs, skip the cheap electrical tape and “vampire” wire taps. These compromise the harness’s weather sealing and lead to long-term corrosion. Professional technicians use marine-grade heat-shrink tubing and high-quality crimp connectors or solder for permanent repairs. Specific tools you should have include precision wire strippers, a logic probe for checking signal pulses, and depinning tools for Deutsch or Molex connectors. If you discover internal harness melting or widespread terminal damage, it may be time to consider a full harness replacement rather than an individual wire repair.
Never use a test light on modern digital circuits. The internal resistance of a standard test light can draw too much current and fry delicate BCM or ECM outputs. Always use a high-impedance Digital Multimeter (DMM).
✅ Pros of DIY Repair
- Significant cost savings on labor
- Gain deep knowledge of your truck
- Immediate fix for trail breakdowns
- Customize wiring for accessories
❌ Cons of DIY Repair
- Risk of damaging expensive modules
- Requires specialized, costly tools
- Time-consuming diagnostics
- Potential for future corrosion if not sealed
Accurate wiring diagrams are the essential foundation for any successful Ram 1500 electrical repair. Utilizing trusted sources like library databases or manufacturer portals, and understanding the specific Mopar color codes, can prevent costly diagnostic errors. By following professional safety standards and using the right tools, such as heat-shrink tubing and high-impedance multimeters, you ensure a reliable, long-lasting fix for your truck. Before you begin cutting or probing, download your specific model-year diagram and perform a systematic visual inspection of your wiring harness.
Frequently Asked Questions
Where can I find a free wiring diagram for my specific year and model of Dodge Ram 1500?
The most reliable way to find a free diagram is through your local public library’s online portal, which often provides access to Chilton or EBSCO Host automotive databases. Alternatively, joining enthusiast forums like RamForum allows you to access community-curated technical libraries where members share PDF versions of factory service manuals and specific wiring schematics for various model years.
What do the different wire colors in the Dodge Ram wiring harness represent?
Dodge uses a standardized color-coding system where the first abbreviation represents the base color and the second represents the ‘tracer’ or stripe color. For example, a ‘WT/OR’ wire is White with an Orange stripe. These colors correspond directly to the wiring diagram, allowing you to trace a specific circuit’s path from the power source to the component and ground.
How do I use a wiring diagram to diagnose a dead circuit in my truck?
Start by identifying the fuse and relay associated with the circuit on the diagram. Use a multimeter to check for power at the fuse, then at the output pin of the relay. By following the line on the diagram to the next connector (e.g., C202), you can ‘back-probe’ the wire to see where the voltage is lost, effectively isolating the break in the harness.
What tools are essential for working on a Ram 1500 wiring harness?
A professional-grade digital multimeter (DMM) is the most critical tool for measuring voltage, resistance, and continuity. Additionally, you should have a set of terminal depinning tools to remove wires from connectors without damage, high-quality wire strippers, a butane torch for heat-shrink tubing, and a circuit tester or logic probe to safely check for signal pulses in computer-controlled circuits.
Is it safe to repair a damaged wiring harness myself?
Yes, provided you follow professional safety protocols. Always disconnect the battery to prevent short circuits or accidental airbag deployment. Repairs should involve soldering or high-quality crimping with adhesive-lined heat shrink to prevent corrosion. However, if you discover widespread melting or damage to the main engine harness, consulting a professional mechanic or replacing the entire harness section is recommended for safety.

![2018 Ram 2500 6.7 Oil Capacity: Complete Specs Guide [2026]](https://truckguider.com/wp-content/uploads/2026/03/2018-ram-2500-6-7-oil-capacity-featured.webp)