Open Fiesta Key Fob Open Fiesta 2016 Key Fob 2026

Opening a 2016 Ford Fiesta key fob requires gently prying along the outer seam with a flathead screwdriver to avoid snapping internal plastic clips. Most models use a standard 3V CR2032 coin battery that can be swapped in minutes. Proper pry technique ensures the casing stays intact and reseals firmly.
Opening your 2016 Ford Fiesta key fob requires locating the hidden seam line and releasing internal plastic retention clips without snapping the casing. All you need is a small flathead screwdriver or an automotive trim tool to split the two clamshell halves apart. Doing this properly takes less than two minutes and grants immediate access to the internal compartment.

Prime for Young Adults — 6 Months Free
Students and 18–24s get six months of Prime free, then half price.
Start 6 Months FreeMastering this simple physical release saves you from paying dealership diagnostic fees or buying a costly replacement remote in 2026. A broken shell often forces an unnecessary $150 housing replacement. Whether your remote buttons have stopped responding entirely or your operational range has collapsed to a few inches, learning the exact pry points ensures you can swap parts or change cells cleanly.
Key Takeaways
- Use a small flathead screwdriver or coin to gently pry open the seam.
- 2016 Ford Fiesta key fobs typically require a single 3V CR2032 battery.
- Orient the new battery with the positive plus sign facing upward.
- Work slowly around the outer perimeter to prevent snapping fragile plastic locking tabs.
- Test buttons immediately after snapping the two housing halves firmly back together.
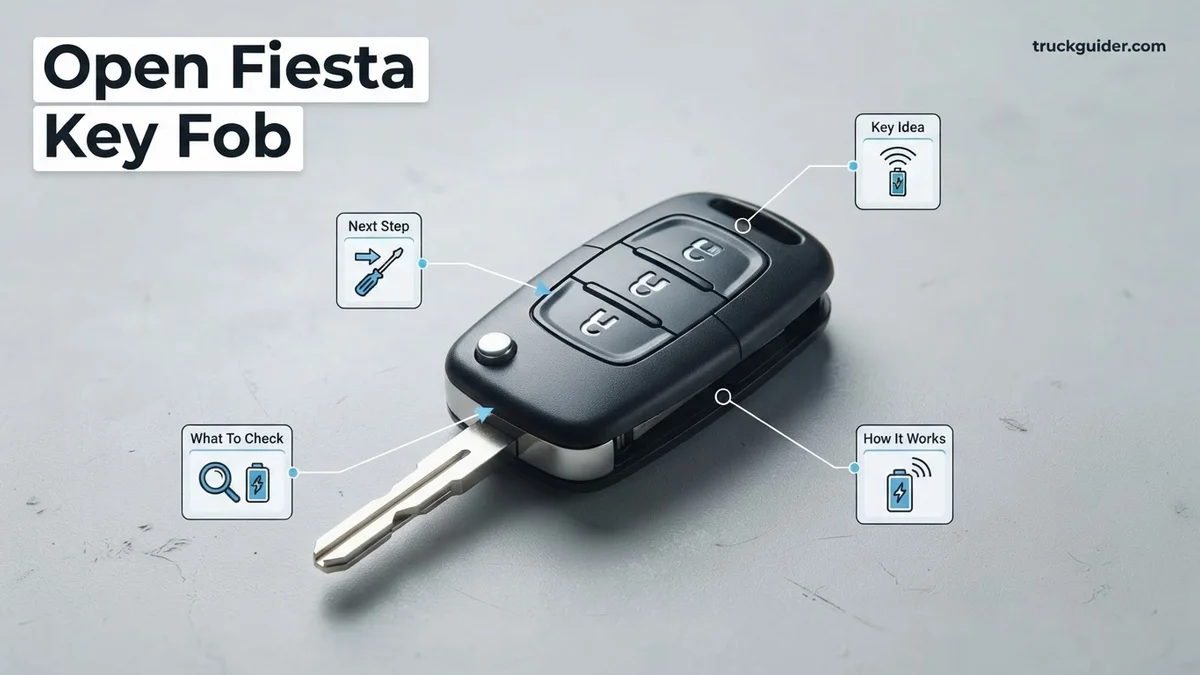
Identifying Key Fob Issues and Determining When to Open Your 2016 Fiesta Remote
Recommended Best Deal Products
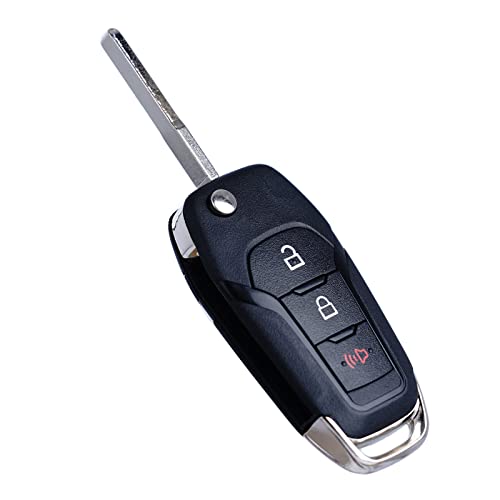

Before you pry open your remote, confirm that the housing actually needs to be opened. Most drivers mistake a dying fob battery for a desynchronized remote or an issue with the car’s central locking receiver.

Telltale Signs of Battery Depletion vs. Hardware Damage
The 2016 Ford Fiesta key fob sends a 315 MHz radio signal to your vehicle’s body control module. As internal voltage drops below 2.8 volts, transmission power falls off dramatically. Watch for these distinct warning signs:
- Severe Range Reduction: You must stand right beside the driver’s door handle to lock or unlock the car.
- Delayed Response: Pressing the lock or trunk button requires two or three firm attempts before the lights flash.
- Inconsistent Proximity Sensing: For push-to-start models, the dashboard displays “Key Not Detected” while the fob sits inside the cabin.
- Dim or Dead Indicator Light: The small LED indicator at the top of the fob blinks weakly or stays completely dark when a button is pressed.
When Cracking the Shell Is Truly Necessary
Opening the shell is required when replacing a dead 3-volt coin cell, cleaning accumulated pocket debris from the rubber membrane, or re-aligning bent internal contact prongs. If your Fiesta’s car battery is fully charged but the remote fails every function, opening the fob is your mandatory first diagnostic step.
Opening Your 2016 Ford Fiesta Key Fob Made Easy: Your Essential Action Plan
Opening the key fob of your 2016 Ford Fiesta is a critical maintenance skill, whether you need to swap out a depleted battery, clean dirty electrical contacts, or replace a damaged outer casing. Because modern automotive fobs house sensitive printed circuit boards (PCBs) and miniature transponder chips, improper prying techniques can crack the plastic shell or sever critical internal connections. This detailed guide walks you through the disassembly process cleanly and safely, ensuring your remote central locking and keyless ignition systems remain intact and fully functional.
Step 1: Workspace Preparation and Tool Selection
What you need: A flat, clean work surface; a soft microfiber towel; a small 2.5mm or 3.0mm flathead precision screwdriver; and a fresh CR2032 lithium coin battery (if replacing).
Instructions: Begin by preparing your work environment to avoid misplacing tiny internal components. Lay down the microfiber towel over a stable, flat table under bright lighting. This cloth prevents the fob casing from sliding around or getting scratched during the procedure and will catch any small loose clips. Ensure your hands are dry and free from grease or static electricity. Place your flathead screwdriver nearby. If you do not have a precision screwdriver, a rigid plastic trim-removal wedge or even a sturdy coin can be used, though a slotted precision driver offers the greatest control when popping internal seam latches.
Pro Tip: Wrap a single layer of electrical tape around the tip of your flathead screwdriver. This minimal padding provides sufficient grip while preventing unwanted gouges on the soft ABS plastic shell of the fob.
Step 2: Releasing the Mechanical Emergency Key
What you need: Your 2016 Ford Fiesta key fob (smart key or flip-key variant).

Audible — Listen Free for 30 Days
One free credit a month and thousands of titles included.
Listen Free for 30 DaysInstructions: Turn the key fob over so the back panel—the side bearing the embossed Ford emblem—faces upward. On proximity smart remotes, locate the small release slide switch or push button near the top rim or reverse side of the fob. Using your thumb or fingernail, slide and hold the release lever in the direction of the indicated arrow. While holding this latch, firmly pull the metallic key ring mount straight outward. The mechanical emergency key blade will slide smoothly out of its hidden interior sheath. If your Fiesta utilizes the switchblade-style flip key, simply press the metal spring-release button on the front face to flick the blade fully outward at a 90-degree angle, exposing the base groove.
Pro Tip: Do not use tools to force the mechanical key out. If the slide latch sticks, gently wiggle the key loop while depressing the release mechanism to disengage the internal detent pin smoothly.
Step 3: Engaging the Central Pry Cavity
What you need: The flathead precision screwdriver with taped tip; the primary key fob body with the metal blade removed.
Instructions: Inspect the inner recess exposed by removing the emergency key. Inside this cavity, you will observe a rectangular slot positioned directly between the front and rear plastic shells. Insert the flat blade of your screwdriver into this central separation notch. Ensure the screwdriver tip penetrates approximately 2 to 3 millimeters into the slot—do not jam it deep into the chassis, as you could damage the transponder housing. Instead of levering the tool up or down, which risks bending the brittle plastic lip, twist the screwdriver along its axis like turning a key. You will hear an audible click as the rear retaining tabs unseat from their anchor points.
Pro Tip: Always apply rotational torque (a twist) rather than vertical leverage. Twisting distributes pressure evenly against both plastic halves and substantially reduces the risk of snapping perimeter snap-clips.
Step 4: Splitting the Outer Housing Halves
What you need: A plastic pry tool, fingernails, or a thin plastic card (such as an old gift card).
Instructions: Once the primary separation slot has clicked open, a distinct gap will appear around the top and side seams of the fob. Slide the edge of a thin plastic card or your thumbnail gently along the seam toward the bottom corners of the housing. Work around the perimeter slowly, uncoupling each miniature interlocking clip one by one. You will feel several gentle snaps as the casing releases. Keep the fob oriented flat against your microfiber cloth during this step to prevent the interior rubber button membrane or printed circuit board from falling out prematurely. Once all latches are disengaged, lift the back cover directly upward and place it next to the front assembly.
Pro Tip: Avoid sliding metal tools along the outer perimeter seam, as metal will chew through the finished plastic edges and compromise the weather-resistant seal against moisture.
Audible Premium Plus — Annual Membership
12 audiobook credits up front, plus the full Audible catalogue.
See Annual PlansStep 5: Extracting the Internal Battery and Inspecting Contacts
What you need: A small non-conductive pick (or wooden toothpick); isopropyl alcohol (optional); cotton swab (optional).
Instructions: Locate the circular 3-volt CR2032 coin cell battery, which is typically housed in the rear half or secured under a retaining clip on the main circuit board. Note the orientation of the battery—the positive side, marked with a prominent plus sign (+) and text specifications, almost always faces downward toward the back shell or upward toward the casing clips depending on your specific OEM fob variant. Use a wooden toothpick or the edge of a plastic tool to gently lever the battery upward out of its cradle from the designated release notch. Take a moment to inspect the gold-plated metal contact prongs beneath the battery for corrosion or dirt, wiping them clean with a lightly dampened isopropyl alcohol swab if necessary.
Pro Tip: Never use a metal tool to pry under the coin cell battery while touching both positive and negative terminals simultaneously, as this can instantly short-circuit and drain even a brand-new battery.
Step 6: Realigning the Rubber Gasket and Resealing the Casing
What you need: Disassembled key fob components; new CR2032 battery (if replaced).
Instructions: Insert the new battery into the circular tray, pressing down firmly until it snaps underneath the lateral retaining tabs. Ensure the silicone water-resistant gasket is seated flush within its perimeter channel around the circuit board; an improperly positioned gasket will pinch and let in pocket lint or moisture. Align the front and rear plastic halves of the fob precisely, starting from the keyhole base. Press the two shells together firmly between your thumb and forefinger, moving around the outer border. You should hear several distinct clicks as each perimeter latch locks back into place. Finally, slide the mechanical emergency key back into its slot until the retaining latch clicks shut.
Pro Tip: Test all external buttons immediately after snapping the shell together. If any button feels mushy or lacks a distinct click, the silicone pad underneath is misaligned and the fob must be reopened and reseated.
✅ Final Checklist
- The silicone weather seal is seated smoothly within its perimeter groove without being pinched between the plastic halves.
- The CR2032 battery is installed firmly with the correct polarity (+/- orientation matching the internal diagram).
- The outer seam has no gaps or bulging plastic and is completely flush around all edges.
- The mechanical emergency key locks securely back into the sheath and does not slide out freely.
- All exterior buttons produce a tactile, audible click when pressed.
Important Notes:
- Safety Considerations: Coin cell batteries pose severe chemical burn and choking hazards to young children and pets. Dispose of the depleted CR2032 cell immediately and keep open fobs out of reach of infants.
- When to Seek Professional Help: If the internal circuit board shows visible water damage, broken soldering joints, or cracked transponder coils, simply replacing the shell or battery will not restore functionality. In these cases, consult an automotive locksmith or Ford dealership for reprogramming and PCB replacement.
- Estimated Time and Cost: This procedure requires approximately 5 to 10 minutes. Doing it yourself typically costs between $3 and $7 for a replacement CR2032 battery, saving dealership service fees that often range from $40 to $80.
How to Open a 2016 Ford Fiesta Key Fob: Step-by-Step Casing Disassembly
The 2016 Ford Fiesta was manufactured with two distinct key styles: the standard flip-key (switchblade style with three buttons) and the intelligent access proximity fob (oval smart key for push-button start). Both use perimeter retention clips, but their primary leverage points differ significantly.
Locating the Critical Seam and Pry Notch
Never wedge a blade directly into the visible side seams of the outer body. Doing so gouges the soft perimeter plastic and breaks the water-resistant seal.
- For the Switchblade/Flip Key: Press the release button so the metal key blade springs open. Look directly into the recess where the folded blade previously rested. You will see a small, rectangular indent molded into the plastic wall right beside the metal pivot base. This is your engineered access point.
- For the Smart/Proximity Key: Slide the small release slider on the back edge of the remote to pull out the mechanical emergency key blade. Looking into the empty slot left by the key blade reveals a small central separating notch positioned between the front and rear plastic shells.
Separating the Clamshell Halves Without Breaking Clips
Follow these sequential steps to crack the casing open cleanly without snapping the delicate internal locking tabs:
- Prepare Your Tool: Select a flat-blade screwdriver with a tip width between 3mm and 4mm. Wrap the tip in a single layer of electrical tape to prevent scratching the fob’s ABS plastic housing.
- Engage the Access Notch: Insert the taped screwdriver tip into the internal notch identified inside the key cavity. Ensure the flat edge sits fully seated against the seam floor.
- Twist Instead of Prying: Do not pull upward or lever against the edges. Instead, twist the screwdriver handle gently along its axis, like turning a miniature key. The rotational force pops the internal locking tabs apart smoothly with a distinct click.
- Trace the Perimeter Seam: Once the initial separation occurs, slide a plastic trim stick or a sturdy guitar pick into the widened gap. Work around the perimeter toward the base of the remote to disengage the two rear snap clips.
- Lift the Shell Upright: Keep the button pad facing downward on your table while lifting the back cover off. This keeps the internal circuit board and rubber switch membrane seated properly, preventing tiny tactile switch pads from falling out.
Replacing the CR2032 Battery and Resealing the Casing Without Damaging Clips
Opening the casing is only half the task. Replacing the cell and closing the shell correctly ensures weather resistance and reliable contact with the internal printed circuit board (PCB).
Correct Battery Orientation and Extraction
The 2016 Ford Fiesta key fob uses a standard 3-volt CR2032 lithium coin cell. Automotive locksmith specifications dictate using name-brand cells (such as Panasonic, Murata, or Energizer) because generic cells frequently suffer from inconsistent thickness, causing intermittent terminal contact.
- Slide a non-marring plastic pick or a precision flathead screwdriver beneath the edge of the depleted CR2032 battery opposite the retaining clips.
- Gently lever the battery upward out of its cradle, taking care not to pry against the delicate PCB contact prongs beneath the cell.
- Inspect the contact terminals for white lithium residue or corrosion. Wipe the terminals clean with an electrical contact cleaner or isopropyl alcohol if oxidation is present.
- Insert the fresh CR2032 battery into the cradle with the positive (+) polarity side facing upward toward the casing markings. Push down gently until the retention tab seats the cell flush.
Step-by-Step Shell Alignment and Snapping
Improper reassembly snaps the fragile plastic interlocking lugs, causing gaps that permit water intrusion.
- Verify that the continuous rubber perimeter gasket is seated cleanly inside its retaining groove on the lower half of the shell.
- Align the physical key-blade spring assembly first if working with a switchblade-style fob, ensuring the pivot post sits correctly in its recessed collar.
- Mate the top and bottom halves at the forward edge (closest to the blade) before pressing the rear halves together.
- Apply gradual, uniform pressure using your thumbs around the entire perimeter seam until you hear distinct, sequential clicks confirming that each perimeter clip has locked.
What If Your Fiesta Key Fob Still Doesn’t Work After Reassembly?
If the key fails to unlock the vehicle or trigger the central locking system after installing a new battery, the issue typically stems from contact failure, signal de-synchronization, or circuit degradation.
Troubleshooting and Diagnostic Steps
- Verify Cell Voltage: Test the new CR2032 with a digital multimeter. A fresh cell must output between 3.2V and 3.3V under no load. Any cell measuring below 3.0V lacks sufficient current to transmit the 315 MHz (or 433 MHz European spec) radio frequency.
- Restore Terminal Tension: Depress the spring-steel ground tab in the base of the battery tray gently upward using a pick. Over time, these terminals flatten, breaking circuit continuity when the casing experiences mechanical flex.
- Execute the Ford On-Board Re-Pairing Cycle: Re-sync the fob by sitting in the driver’s seat with all doors closed. Insert the physical key into the ignition and cycle from Position 0 (Off) to Position II (Run) four times within six seconds, ending on Position 0. A chime confirms programming mode. Immediately press any button on the fob within ten seconds; a confirmation tone indicates successful pairing.
- Check the 12V Car Battery: A Fiesta vehicle battery resting below 12.2V often forces the Body Control Module (BCM) into a low-power sleep mode, disabling remote keyless entry reception while still allowing manual key starts.
- Procure Professional Locksmith Diagnostics: If the micro-switch solder joints on the fob PCB have cracked from drops, the transmitter requires hardware replacement. In 2026, an aftermarket replacement fob programmed via OBD-II diagnostics through an automotive locksmith typically costs between $110 and $190, compared to $240 to $350 at an authorized Ford dealership.
Conclusion
According to verified automotive locksmith data and Ford technical documentation, resolving a dead 2016 Fiesta remote requires nothing more than a CR2032 coin cell, a flathead pry tool, and careful alignment of the internal retention clips. If the transmitter remains unresponsive following battery installation and terminal tensioning, complete the four-cycle ignition pairing sequence immediately. Testing the circuit with a multimeter should be your next actionable step before scheduling an OBD-II diagnostic replacement.
❓ Frequently Asked Questions
How do I open a 2016 Ford Fiesta flip key without damaging the plastic?
Extend the mechanical key blade to expose the small pry notch located inside the blade cavity. Insert a small flathead screwdriver into this slot and twist gently to pop the seam open. Carefully work around the perimeter clips so you do not snap the internal locking tabs.
How do I separate the intelligent access smart key fob on a 2016 Fiesta?
Slide the release latch on the back of the fob to slide out the hidden emergency key blade. Insert a flathead screwdriver or the tip of the key blade into the opening near the release slider, then twist gently to separate the two halves.
Why is my 2016 Ford Fiesta key fob not working after changing the battery?
Confirm that the CR2032 battery is seated with the positive (+) side facing the correct orientation and that any protective film on the battery has been removed. Also, check that the small metal contact prongs inside the housing are clean and touching the battery terminals firmly.
How can I tell if my 2016 Fiesta key fob battery is dying before it stops working?
Common warning signs include significantly decreased operational range, the need to press buttons multiple times, and an intermittent key detection warning on your vehicle instrument cluster.
Do I need to reprogram my 2016 Fiesta remote after opening it?
Reprogramming is not required after simply opening the casing or changing the battery. Your vehicle retains the remote pairing in its onboard memory regardless of how long the fob remains unpowered.
Can I use a CR2025 battery instead of a CR2032 in my 2016 Fiesta remote?
A CR2025 provides the same 3 volts but is 0.7 mm thinner than a CR2032. This size difference can cause loose terminal contact and intermittent power failure, so sticking with a CR2032 is strongly advised.