Dodge Ram Power Window Not Working? (5 Step Diagnostic Guide 2026)
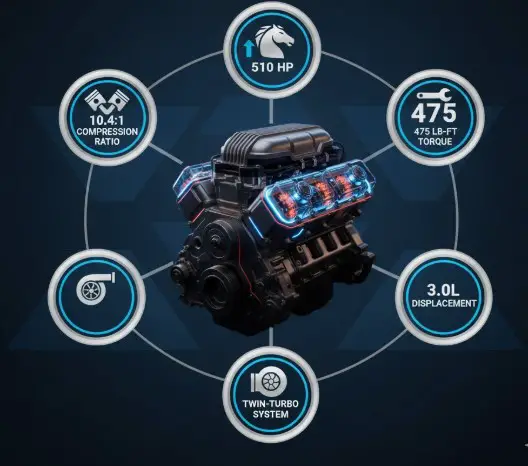
The power window system in a Dodge Ram 1500, 2500, or 3500 is a complex integration of mechanical hardware and advanced network electronics.
When a Dodge Ram power window stops working, the root cause can span from a simple blown fuse to a catastrophic failure of the Totally Integrated Power Module (TIPM).
This report synthesizes extensive diagnostic data to provide an authoritative guide on isolating, testing, and repairing Dodge Ram power window failures.
By understanding the underlying mechanisms and electrical pathways, technicians and owners can avoid unnecessary parts replacement.
Proper diagnosis prevents the replacement of functional motors when the true fault lies within a fractured wiring harness or a network communication error.
Why Your Ram Window Won’t Budge
The Dodge Ram power window system is a sophisticated mix of mechanical strength and network logic. Understanding where the failure occurs is the difference between a $10 wire repair and a $1,000 TIPM replacement.
Failure Probability Analysis
Not all window failures are equal. Industry data reveals that the vast majority of Dodge Ram window issues originate in the electrical pathways rather than the physical motor itself. Before buying a new motor, verify the wiring and fuses first.
Distribution of confirmed repair causes for Dodge Ram platforms (1500-3500).
36% Electrical Failures
This includes blown fuses, damaged door boot harnesses, and relay malfunctions.
24% Window Regulators
Physical failure of the cable or pulley system, often accompanied by grinding noises.
20% Motor Burnout
Loss of carbon brush contact or internal thermal overload triggering shutdown.
Electrical Diagnostics & TIPM
Modern Ram trucks utilize the Totally Integrated Power Module (TIPM). If multiple windows are dead, the issue is likely a fuse or the TIPM itself. Always test the easiest components first before assuming a module failure.
| Symptom | Probable Cause | Test Method |
|---|---|---|
| All windows inoperative | Blown Fuse F20 / CB1 | Continuity check with Multimeter |
| Intermittent window failure | Door Boot Wiring / Thermal Breaker | Flex boot while toggling switch |
| Grinding or crunching sound | Snapped Regulator Cable | Visual inspection of door internals |
| Window works from driver only | Faulty Passenger Switch | Bypass test at switch connector |
Repair & Replacement Cost Analysis
Professional repair costs vary significantly between standard heavy-duty Rams and the Ram 1500 series. Regulator assemblies are typically more expensive than standalone motors because they include the physical tracks.
National Average
$476.50
Total average for a professional window motor replacement.
DIY Potential
$85.00
Average cost of a high-quality aftermarket part only.
Calibration Reset Procedure
If you’ve replaced the motor or disconnected the battery, you must re-initialize the auto-up feature. Follow this sequence to teach the control module the glass limits.
01
Hold DOWN button until glass is fully retracted.
02
Continue holding DOWN for 5 seconds after it stops.
03
Pull UP and hold for 5 seconds after glass seals.
Statistical Breakdown of Ram Window Failures
Understanding the statistical likelihood of specific failures streamlines the diagnostic process for any automotive technician.
Industry repair data provides a clear hierarchy of common culprits when a Ram truck window will not go up or down.
Electrical system failures, including fuses, relays, and damaged harnesses, account for approximately 36% of all window malfunctions.
Window regulators, which handle the physical tracking and lifting of the heavy door glass, are responsible for 24% of failures.
Window motors, which convert electrical energy into mechanical force, account for 20% of the documented malfunctions.
The remaining percentage encompasses master switch failures, central module communication errors, and mechanical binding within the door channels.
| Primary Symptom | Probable Cause | Diagnostic Testing Method |
| No sound, multiple windows dead | Blown Fuse / TIPM Failure | Test fuses F20, F24, CB1; Check for BCM codes. |
| Clicking sound, window stuck | Stripped Motor Gear / Regulator | Remove panel, inspect regulator cables and motor gear. |
| Grinding noise, glass drops | Broken Window Regulator | Visual inspection of door internals for snapped cables. |
| Works intermittently with door open | Broken Door Boot Wiring | Flex rubber door boot while pressing the switch. |
| One window dead, no sound | Faulty Switch or Dead Motor | Multimeter continuity test on switch; direct 12V to motor. |
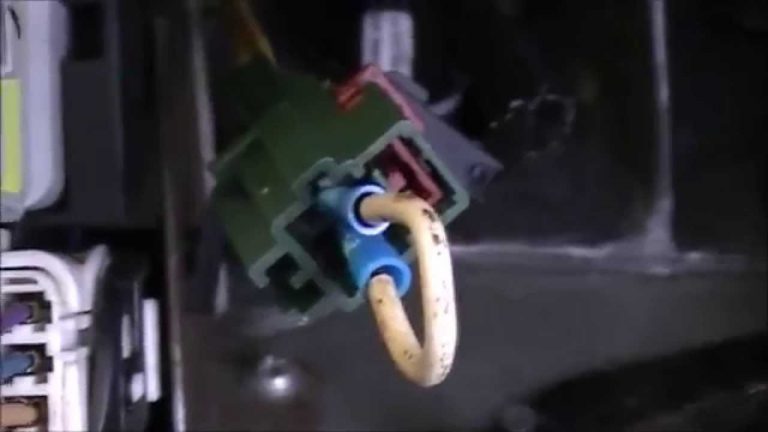
The Most Prevalent Issue: Door Boot Wiring Harness Failure

For many generations of the Dodge Ram, particularly the third generation (2002–2008), the most frequent cause of window failure is not the motor or the switch.
The primary culprit is the wiring harness located inside the rubber accordion boot between the vehicle's body and the front or rear doors.
Every time the vehicle door is opened and closed, the copper wires inside this protective boot are subjected to severe bending and mechanical stress.
The factory wiring utilizes copper strands with a relatively low strand count, resulting in thicker, less flexible individual wires.
Over thousands of door cycles, this physical flexing causes metal fatigue, leading the copper strands to harden, become brittle, and eventually snap.
Symptoms of Wire Fatigue in the Door Jamb
When these wires break, the electrical circuit is entirely severed, immediately disabling the power windows, door locks, or audio speakers.
Often, the protective polymer wire insulation remains completely intact while the copper core inside is broken.
This hidden damage makes visual identification extremely difficult without physically tugging on the wires to feel for internal separation.
If a window operates intermittently depending on whether the door is open or closed, a fractured wire in the jamb is definitively the cause.
This issue is so prevalent that technicians routinely check the door boot before ever removing an interior door panel for motor diagnostics.
Advanced Wiring Repair Techniques
When repairing a fractured door harness, standard rigid crimp-style butt connectors should generally be avoided.
A rigid butt connector creates a hard point in a high-flex area, transferring the bending stress to the adjacent wire and causing a rapid secondary failure.
Similarly, soldering the wires back together creates a brittle, heat-affected joint that cannot withstand the constant flexing of the door hinge area.
The most resilient repair method involves splicing in a completely new four-to-six-inch section of highly flexible, high-strand-count silicone wire.
This new section acts as a flexible bridge, using an overlapping linesman splice secured with marine-grade, adhesive-lined heat shrink tubing to seal out moisture.
If the damage is extensive, complete replacement door wiring harnesses are available in the aftermarket, providing a permanent factory-level fix.
Electrical Diagnostics: Fuses and Circuit Breakers
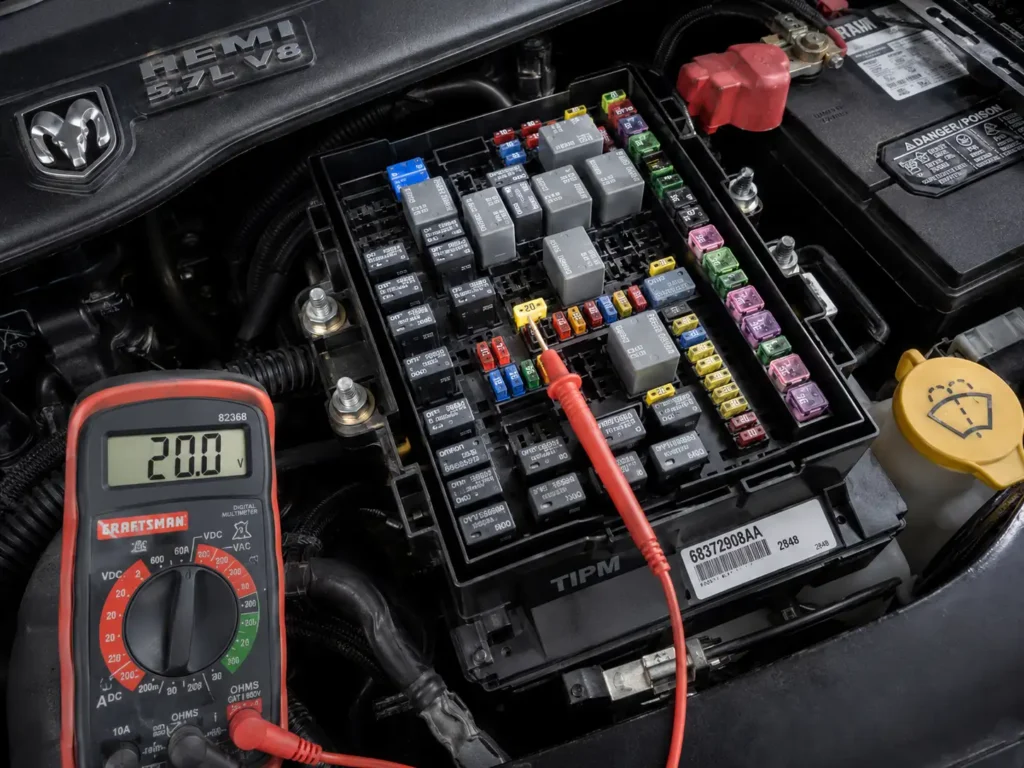
Before dismantling door panels or splicing wires, standard diagnostic protocols dictate checking the vehicle's central fuse box.
This fuse box is commonly known as the Totally Integrated Power Module (TIPM) or the Power Distribution Center, depending on the model year.
A blown fuse is a designed failure point, intended to protect the more sensitive, expensive components from catastrophic electrical overloads.
For Dodge Ram power windows, several key fuses and circuit breakers must be visually and electrically inspected using a digital multimeter.
Critical Power Window Fuse Locations
Depending on the exact model year and generation, technicians must verify the integrity of specific, high-amperage fuse locations.
Fuse number 20 and fuse number 24 are primary power feeds for the power window system in many Ram configurations.
Additionally, fuse number 66 and a specialized metallic circuit breaker designated as CB1 control the extreme amperage demands of the window motors.
A visual inspection is not always sufficient; a multimeter set to continuity mode must be used to ensure the internal S-shaped metal filament is truly unbroken.
If a fuse is repeatedly blowing immediately upon replacement, a dead short to ground exists within the circuit.
This short is likely due to exposed wiring grounding out against the metal door frame inside the boot.
Evaluating the TIPM (Totally Integrated Power Module)
In Dodge Ram trucks produced between 2006 and 2012, electrical routing shifted away from basic analog relays to the Totally Integrated Power Module (TIPM).
The TIPM is an advanced computer module that acts as the central power distribution center for the entire vehicle.
When a TIPM begins to fail, it causes highly erratic electrical anomalies, such as windows rolling down unprompted or fuel pumps running continuously.
A faulty TIPM can cause intermittent power delivery to the window motor circuit, generating network codes like B2112.
Sometimes, TIPM issues are software-related rather than hardware malfunctions, and a hard reset can resolve the anomaly.
A hard reset involves disconnecting the battery, removing the TIPM, and leaving it disconnected for at least three hours to drain internal capacitors.
Diagnosing the Master and Passenger Window Switches
The master power window switch on the driver's side armrest acts as the central command hub for the entire vehicle's window system.
It routes primary power and ground not only to the driver's window but also dictates the functionality of all individual passenger switch assemblies.
If the master control switch suffers an internal electrical failure, it can paralyze every window in the vehicle simultaneously.
When a passenger window switch does not work, but the driver’s master switch operates that same window perfectly, it indicates an isolated passenger switch failure.
Internal Switch Wear and Environmental Corrosion
Inside the plastic switch housing, small copper rocker contacts pivot to direct electrical flow to the appropriate motor circuits.
Repeated use causes micro-electrical arcing, which slowly burns and pits the copper contacts over years of operation.
This arcing creates high-resistance carbon buildup, eventually preventing the switch from transmitting the 12-volt signal required by the motor.
Because the master switches are located horizontally on the door armrest, they are highly susceptible to rain ingress and spilled beverages.
Water saturation leads to rapid internal corrosion, displaying as chalky white or green deposits on the switch wire terminals.
Multimeter Switch Diagnostics and Bypass Testing
Testing a suspected faulty switch requires a digital multimeter set to the continuity or ohms setting.
The technician probes the main power input pin and the corresponding motor output pin while manually toggling the switch mechanism.
A healthy switch will seamlessly complete the circuit, registering near-zero electrical resistance and triggering the multimeter's audible beep.
If no continuity is detected when the button is depressed, the internal contacts are obliterated, and the switch module must be replaced.
Before condemning a master switch, technicians should always check the physical child-lock override button, as accidental engagement is a common source of perceived failure.
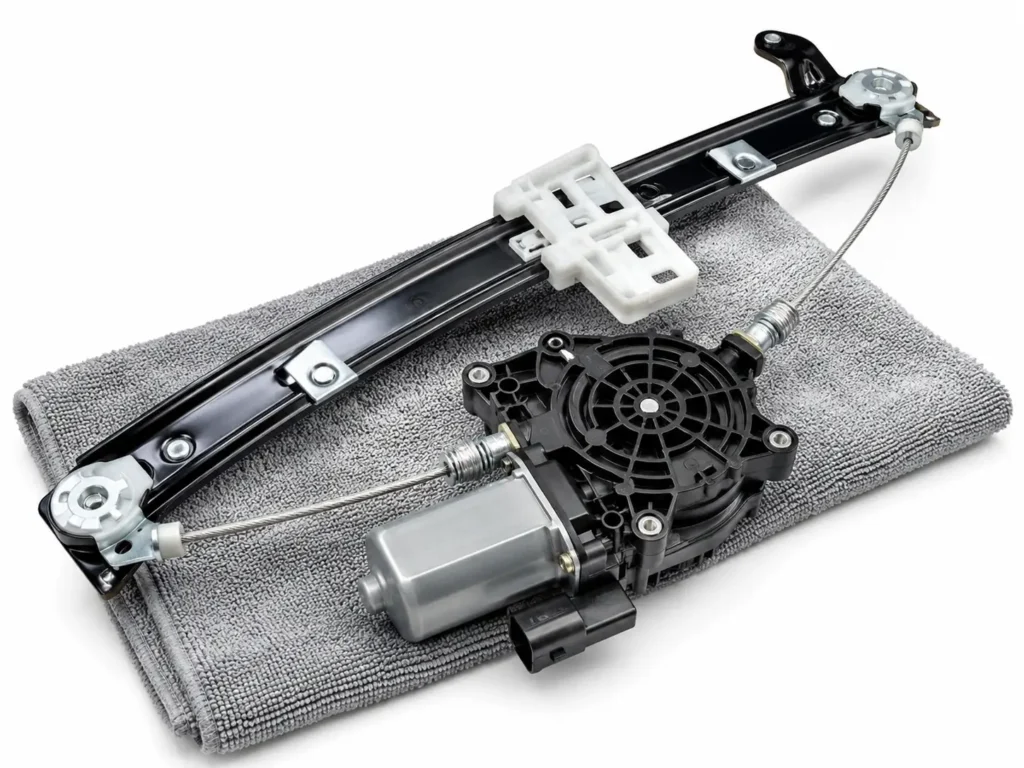
Window Regulator Mechanics and Mechanical Failures
The window regulator is the skeletal metal mechanism inside the door frame that physically supports, lifts, and lowers the glass panel.
Modern Dodge Ram trucks typically utilize a highly tensioned cable-and-pulley style regulator, which operates similarly to bicycle brake cables.
As the attached electric motor spins, it winds and unwinds braided steel cables around a central plastic spool.
This action drags a plastic carriage—which is firmly bolted to the glass—up and down the vertically aligned metal tracks.
Identifying Symptoms of a Failing Regulator
When a window regulator fails, the symptoms are usually mechanical, tactile, and highly audible to the vehicle occupants.
A grinding, clicking, or loud crunching noise emanating from behind the door panel strongly indicates that the braided steel cable has frayed.
These frayed metal strands snag inside the cable's protective sheath, creating immense resistance and causing the motor to strain audibly.
If the window glass suddenly drops inside the door and cannot be pulled up, the plastic clips holding the glass or the main support cable have completely snapped.
In cold weather climates, regulators often fail when drivers attempt to roll down a window that is frozen shut, placing immense strain on the brittle plastic brackets.
Because regulator cables and plastic guide pulleys cannot be serviced individually, the entire metal assembly must be replaced as a single unit.
| Component Replaced | Labor Cost Estimate | Parts Cost Estimate | Total Average Range |
| Window Regulator (Assembly) | $140 - $206 | $259 - $348 | $399 - $554 |
| Regulator Motor (Only) | $130 - $191 | $240 - $311 | $370 - $501 |
| Ram 1500 Regulator Assembly | $128 - $187 | $151 - $404 | $278 - $591 |
| Ram 1500 Motor (Only) | $110 - $161 | $125 - $315 | $234 - $476 |
Window Motor Failures and Thermal Overload Dynamics
The power window motor is a compact, high-torque 12-volt direct current (DC) motor integrated directly into the window regulator assembly.
These heavy-duty motors utilize internal carbon brushes that maintain constant electrical contact with the rapidly spinning copper armature.
After thousands of operational cycles, these carbon brushes physically wear down to nothing, losing electrical contact entirely.
This brush wear causes the motor to operate sluggishly, stall halfway up the track, or fail completely without warning.
Thermal Protection Breakers and Intermittent Stalling
Power window motors are equipped with internal thermal circuit breakers designed to prevent electrical fires in the event of a jam.
If a motor is severely strained—such as fighting against dry window channels or a misaligned glass panel—it will draw excessive amperage.
This high amperage causes the internal windings to heat up rapidly, which subsequently trips the integrated thermal breaker.
The thermal breaker will shut the motor down entirely until it cools, which manifests as an intermittent failure where the window magically works again after ten minutes.
Frequent thermal tripping is a strong indicator that the metal window channels require lubrication with white lithium grease to reduce friction.
Direct Voltage Testing of the Window Motor
To definitively prove an electric motor has failed, technicians bypass the vehicle's complex switches and wiring entirely.
By removing the interior door panel, a direct 12-volt power source and a solid chassis ground are applied directly to the two pins on the motor connector.
If the motor drives the window up smoothly and with appropriate speed under direct power, the motor is functional.
This result proves that the fault lies further upstream in the vehicle's electrical system, either in the switch, the door boot wiring, or the TIPM.
If reversing the polarity of the test probes fails to move the window in the opposite direction, or if the motor simply clicks, the internal gears or brushes are destroyed.
Advanced Diagnostics: Network Communication and OBD Codes
In modern Ram trucks, particularly the 4th and 5th generations, the window systems are no longer controlled by simple analog power switches.
Instead, they utilize sophisticated internal communication networks like the Controller Area Network (CAN) bus and the Local Interconnect Network (LIN) bus.
When a driver presses a window switch, the switch does not send raw voltage to the motor; it sends a digital data packet to the Driver Door Module (DDM).
The DDM then processes this request and communicates with the Body Control Module (BCM) to authorize the power window motor activation.
If this delicate digital network is interrupted by a severed wire, a corroded connector, or a module logic failure, specific OBD-II network codes are generated.
Deciphering U-Series Network Trouble Codes
Diagnostic scanners capable of reading body control codes are essential for troubleshooting modern Dodge Ram window failures.
Code U1532 indicates a localized issue with door module communication, often triggered by a broken LIN bus wire in the door jamb.
Code U0199 signifies a complete loss of communication with Door Control Module A, which is the primary Driver Door Module (DDM).
If code U0073 (Control Module Communication Bus "A" Off) is present, the entire high-speed CAN bus has crashed, which will disable multiple systems beyond just the windows.
A weak vehicle battery can provide inconsistent voltage during startup, causing these sensitive modules to fail to initialize correctly and drop off the network.
Technical Service Bulletins (TSBs) and Software Flashes
Automotive manufacturers continually monitor warranty repair data, occasionally releasing software updates to address inherent logic errors in vehicle control modules.
For certain Ram truck configurations, Technical Service Bulletins have been issued specifically regarding inoperative power windows.
These bulletins frequently prescribe reprogramming or "flashing" the DDM and Passenger Door Module (PDM) with updated software to restore functionality.
Replacing physical hardware, like motors or switches, without checking for necessary software calibration updates will result in persistent, unresolved failures.
Specific TSB Examples for Ram Window Systems
In older models, TSB 18-029-05 directed technicians to load test all powers and grounds to the cluster and BCM before condemning the window system.
More recently, Rapid Service Update (RSU) 23-276 was issued for newer platforms regarding window motors making a distinct grinding noise.
This specific bulletin requires technicians to operate the window ten times and listen for noise, ultimately replacing the driver side window motor/carrier assembly if it grinds.
Additionally, safety recalls involving vehicle electrical systems can sometimes overlap with door functions.
How to Reset and Calibrate Ram Power Windows
When a Dodge Ram window motor is replaced, or when the vehicle's battery is disconnected for maintenance, the door control modules may lose their positional memory.
This digital memory loss disables the luxury "Auto-Up" and "Auto-Down" features associated with the master switch.
Furthermore, an uncalibrated window can cause the glass to bounce back down automatically, as the anti-pinch safety system falsely detects an obstacle.
A manual calibration reset procedure must be performed to teach the door module the exact upper and lower physical limits of the window glass.
The Step-by-Step Window Calibration Procedure
To begin the reset, the vehicle ignition must be in the "Run" position, though the engine does not necessarily need to be running.
First, push the corresponding window switch down firmly to lower the glass completely.
Continue holding the button down for an additional two to five seconds after the window bottoms out inside the door.
Next, pull the window switch up to close the window completely, ensuring it seats tightly into the upper weather stripping.
Continue holding the switch in the upward position for an additional two to five seconds after the glass seals into the upper frame.
This straightforward procedure establishes the electrical stall current thresholds, fully restoring the factory anti-pinch and automatic roll-up functionalities.
If the procedure fails initially, unplugging the motor harness while the window is in upward motion will force a hard unlearn, allowing a fresh calibration attempt.
Step-by-Step Window Regulator and Motor Replacement Guide
Replacing a failed window regulator or motor assembly requires patience, basic hand tools, and a systematic approach to interior door panel removal.
Rushing this process often results in broken plastic interior trim clips or damage to the delicate internal vapor barrier.
Removing the Ram Interior Door Panel
First, disconnect the negative battery terminal to prevent accidental window actuation or unintended airbag deployment, if side airbags are present within the door.
Carefully pry off the cosmetic upper sail panel covering the mirror mounting hardware.
Use a non-marring plastic trim tool to gently pry out the master switch control panel, disconnecting its wiring harness to free it from the door.
Locate and remove all retaining fasteners; modern Rams utilize a combination of T20 Torx bolts around the perimeter and hidden Phillips screws behind the door handle.
Carefully pull the door panel upward to release it from the window ledge, and detach the inner door latch cable mechanism.
Finally, peel away the sticky plastic water deflector (vapor barrier) to expose the inner metal door cavity and the regulator tracks.
Extracting the Old Regulator Assembly
If the regulator has failed but the window can still be moved vertically by hand, slide the heavy glass up to the closed position.
Secure the glass aggressively with high-strength fabric tape looped over the top of the door frame to prevent it from crashing down during removal.
Unbolt the clamps or clips holding the bottom of the window glass to the regulator carriage mechanism.
Disconnect the electrical harness from the motor, then remove the primary mounting bolts securing the regulator assembly to the inner door skin.
On some specific Dodge Ram models, the window regulator and motor are held in place by industrial rivets rather than bolts.
If rivets are present, the technician must use a power drill to carefully drill out the rivets before the assembly can be removed.
Maneuver the collapsed metal regulator assembly out through the large lower access hole in the door shell.
Installing the New Regulator and Motor
Insert the new regulator assembly through the door opening, aligning the mounting studs with the holes in the door skin.
Torque the regulator-to-door mounting bolts to the manufacturer's exact specifications to prevent loosening from future vibration.
If the original assembly used rivets, the technician can secure the new assembly with fresh rivets or substitute them with heavy-duty nuts and bolts.
Carefully remove the tape holding the glass, lower the window onto the new regulator carriage, and tighten the mounting clamps securely.
Reconnect the power window motor's electrical connector, temporarily reinstall the switch, and operate the window to verify smooth functionality before replacing the door panel.
Wire Color Code Reference for Advanced Diagnostics
When repairing severed harnesses in the door boot or diagnosing switch outputs, identifying the exact wire color is absolutely paramount.
While wire colors vary wildly by specific generation and trim level, established patterns exist for the Dodge Ram power lock and window circuits.
Connecting the wrong wires during a door boot repair can instantly short out the Body Control Module or the Driver Door Module.
| Vehicle Generation | System Function | Typical Wire Color Code |
| Ram 1500 (2002-2008) | Driver Lock / Unlock | Lt. Green / Dark Blue |
| Ram 1500 (2002-2008) | Passenger Lock / Unlock | Tan / Lt. Green or Violet |
| Ram 1500 (2009-2012) | Main Door Controls | Tan / White, Tan / Dk. Blue |
| Ram 1500 (2013-2016) | Door Circuitry | Lt. Green / Dk. Blue |
Part Compatibility: The "Classic" vs. "New Body" Dilemma
When purchasing replacement window motors or regulators for late-model Dodge Rams, strict attention must be paid to the body style.
In 2019, Ram began simultaneously selling two completely different versions of the 1500 pickup truck.
The "Ram 1500 Classic" utilizes the older DS body style, which is a direct continuation of the 2009-2018 generation truck.
The "All-New Ram 1500" utilizes the completely redesigned 5th generation DT body style.
A window motor or regulator designed for the 2019-2024 Classic (DS) model will physically not fit inside the door of the DT body style.
Technicians must verify the truck's cab configuration, lug nut count, and exact body code before ordering major internal door components.
People Also Ask: Critical Ram Window Inquiries
Why does my window work intermittently?
Intermittent functionality is the hallmark sign of either a failing thermal breaker inside the window motor or a partially fractured wire inside the door boot.
If the window works perfectly when the door is swung wide open but fails when closed, the wiring harness is definitively broken and making temporary contact.
Can I manually pull up a stuck power window?
If the window motor has failed but the regulator mechanism is fully intact, the internal gearing will mechanically lock the window in place, preventing manual movement.
However, if the braided regulator cable has snapped, the glass will be completely loose and can easily be pulled up by hand.
It must then be aggressively secured with wedges or heavy tape to prevent it from dropping into the door while driving.
Will a bad battery cause the power windows to stop working?
Yes, modern automotive networks are highly sensitive to even minor voltage drops.
A weak battery can cause the Body Control Module to drop offline, generating U0073 or U1532 OBD-II communication codes.
When the network crashes due to low voltage, the vehicle completely disables luxury features like power windows to save critical energy for engine management.
What is a window motor initialization?
Initialization is a calibration process required after replacing a motor so the control module can relearn the top and bottom positions of the glass.
Without this initialization, the safety anti-pinch system will not function correctly, and the automatic roll-up feature will be disabled.
How do I bypass a failing TIPM?
A failing Totally Integrated Power Module (TIPM) can cause erratic power delivery to the windows and fuel pump.
While some owners attempt to splice external relays into the system to bypass the internal TIPM faults, this is generally unadvisable for window circuits.
The safest protocol is to perform a hard reset by disconnecting the battery overnight; if symptoms persist, the TIPM board must be professionally remanufactured.

![Reprogram Dodge Key Fob Push Start [2026]](https://truckguider.com/wp-content/uploads/2026/03/featured-bb1a0e6c-768x432.webp)